How to photograph the total solar eclipse
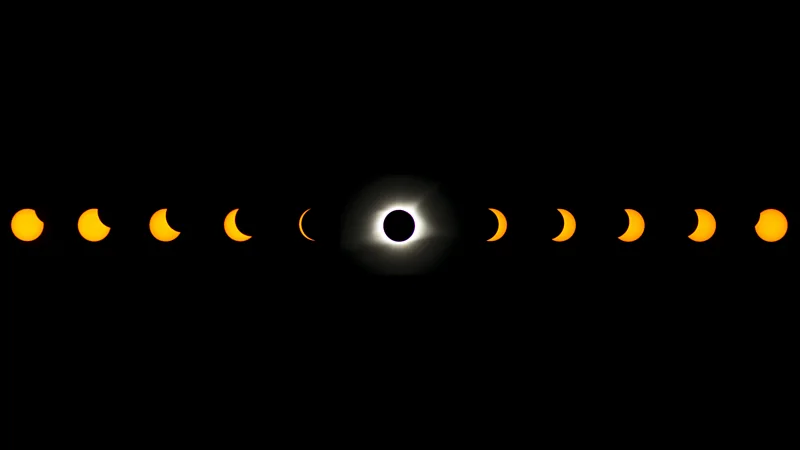 An astrophysicist and photographer offers valuable insights into capturing the highly anticipated total solar eclipse. This event, where the Moon entirely covers the Sun, plunging the sky into sudden darkness, is a surreal experience that many never encounter.
Eclipses reflect our journey through space; as Earth hurtles through space at approximately 107,000 km/h (67,000 mph), and the Moon follows its own orbit, occasionally aligning to create these remarkable phenomena.
Photographing a solar eclipse may appear challenging due to the inherent danger of looking directly at the Sun without proper eye protection. However, whether equipped with a high-powered lens or a smartphone, both amateur and seasoned photographers can capture stunning images of this rare event. Here are some expert tips to ensure you capture unforgettable memories of this celestial spectacle.
Shooting the eclipse with a smartphone
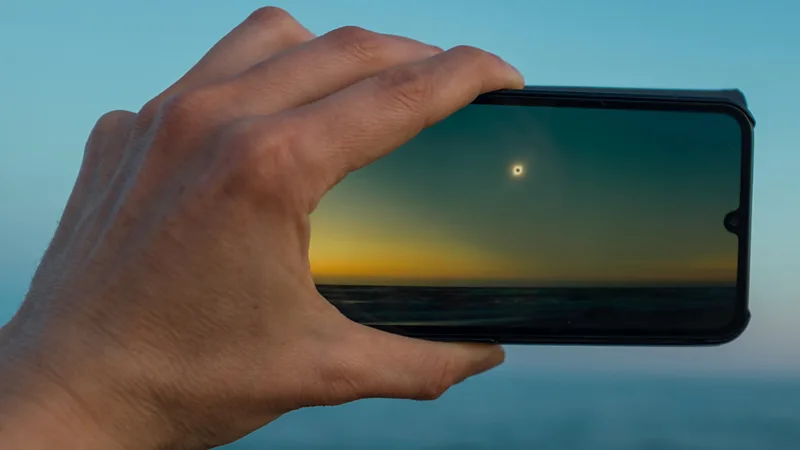 Even with just a smartphone, capturing photos of the eclipse is entirely feasible. However, the most remarkable shots are obtained within the path of totality, where the full eclipse is visible. During these brief moments of darkness, it's advisable not to use a filter on your phone's camera. Instead, opt for manual settings to ensure the photo accurately reflects the darkness of the scene.
Given the low light conditions, your smartphone camera will naturally adjust to a longer exposure, necessitating stability to avoid blurriness. If a tripod isn't available, improvising by placing the phone on a stable surface like a fence or against a wall can suffice.
Additionally, incorporating the surrounding landscape or people in your photos adds depth and context to the images, enhancing the overall composition.
Photographing the partial phase of the eclipse with a DSLR
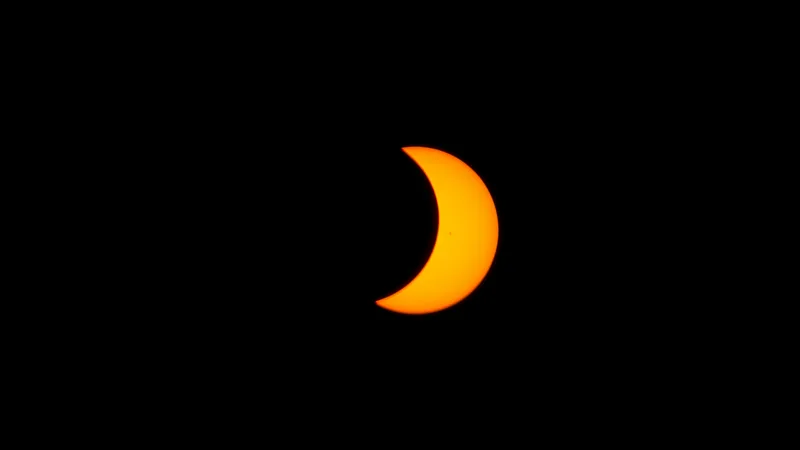 During the onset of a total eclipse, the Moon gradually obscures the Sun, causing it to take on a crescent shape. Photographing this partial eclipse phase is relatively straightforward as it extends over an hour or more.
To capture the partial eclipse, it's essential to use a filter for your camera lens to mitigate the still intense sunlight. One cost-effective option is aluminised mylar, specifically designed for solar observation. This material can be cut to size with scissors and affixed to the lens with a homemade cardboard frame secured with tape to prevent accidental dislodging.
Manual focus is typically required as autofocus may struggle with the filtered scene. Similarly, exposure settings may need adjustment. It's advisable to experiment with settings prior to the eclipse, using regular, unobscured sunlight as a reference. Starting with values around 1/250s at f/8 and ISO 100 is recommended.
Using a telephoto lens with the longest focal length available is ideal. A 200mm lens can yield satisfactory results, but a 500mm lens allows for capturing finer details such as sunspots—darker regions on the Sun's surface indicating cooler temperatures. These details add depth and interest to your eclipse photographs.
Photographing the moment of totality
 During the moment of totality, it's crucial to photograph without any filter, as using one would result in a dark image. Interestingly, this is the only time when observing the Sun without eye protection is safe. However, since totality lasts just a few minutes, there's no opportunity to test shots or settings.
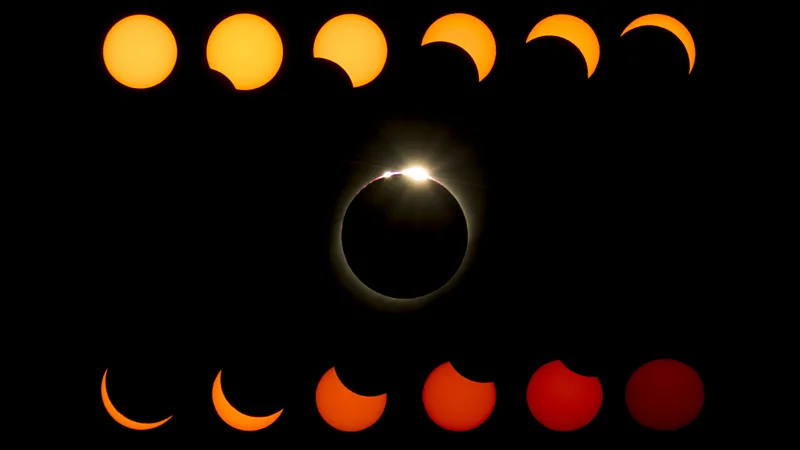
For beginners, it's advisable to stick to one lens and viewpoint. An engaging approach is continuously photographing the Sun with a telephoto lens, creating a series of shots to compose into a single image. In the provided picture, you can observe the gradual dimming of the Sun during totality, as captured during a total solar eclipse in Chile in 2019, coinciding with sunset.
Shooting Baily's beads
 Just before and after totality, capturing the Baily's beads or diamond-ring effect is possible. These beads are the last rays of sunlight passing through the rugged edges of the Moon, creating small bursts of light, as seen in the upper portion of the Sun's disc in the provided image.
To photograph this phenomenon, set up your camera on a tripod well before the eclipse begins and use a remote shutter release cable to prevent any camera shake when taking the shot. A relatively fast shutter speed, such as around 1/500s at f/8 and ISO 100, or even faster, is recommended. Given that the beads appear and vanish within a fraction of a second, it's essential to shoot rapidly as totality begins and ends.
A different view of the eclipse
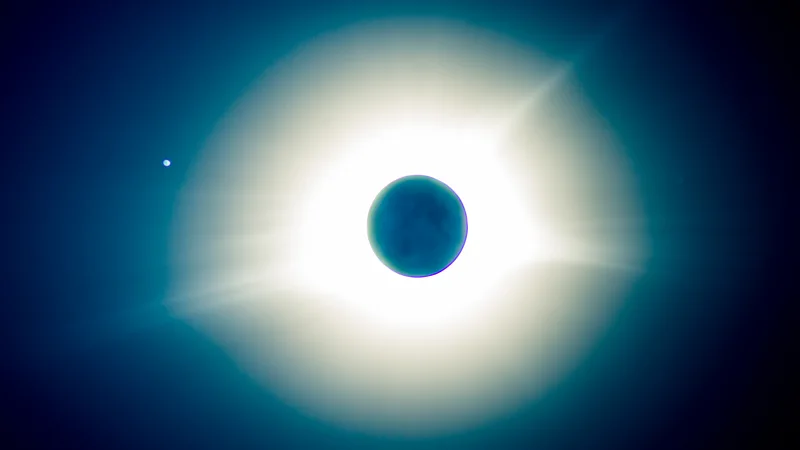 Another approach to capturing the totality is to use a slow shutter speed instead of a fast one. This technique enables you to capture the corona, the Sun's outermost atmosphere, providing a different perspective of the eclipse.
In the provided image taken in Chile in 2019, the photographer utilized a slow shutter speed of two full seconds at f/8 and ISO 100. However, it's noteworthy that the bright dot to the left of the image, representing the star Regulus (the brightest in the Leo constellation), appears blurry, likely due to camera shake during the shutter's opening.
For photographers using high-end reflex cameras, employing the mirror-up function can help reduce camera shake. This function lifts the mirror before the exposure, minimizing vibrations caused by mirror movement.
The value of a wide-angle lens
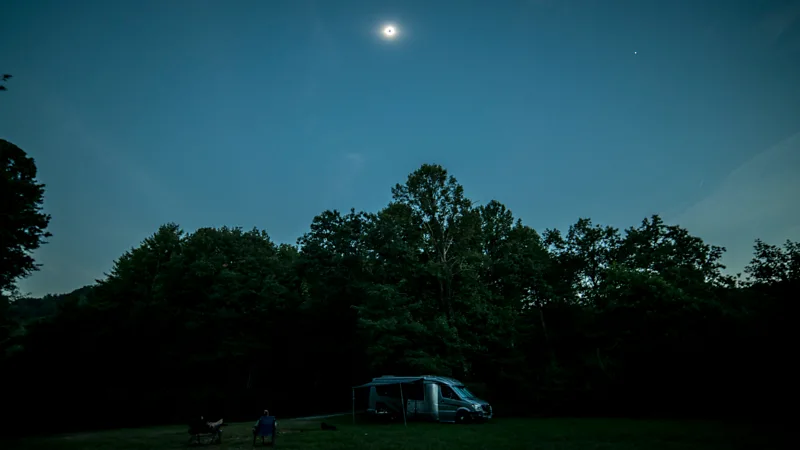 Using a wide-angle lens offers the advantage of incorporating the surrounding landscape or people into your totality shots. While the Sun may appear relatively small in the frame, the resulting image can be exceptionally memorable due to the inclusion of the broader context, unlike with telephoto lenses.
The provided photograph, taken during the 2017 eclipse in North America, utilized settings of 1/8s, f/2.8, and ISO 800 with a 14mm lens to capture both the ground and the Sun simultaneously. As the upcoming April eclipse will position the Sun similarly high in the sky in the southern US, shooting with an extreme wide angle may be necessary to encompass both the eclipse and the ground.
However, in the northern US and Canada, where the eclipse occurs later in the day, allowing the Sun to be lower in the sky, shooting horizontally with a standard wide-angle lens may suffice.
The Devil's Comet
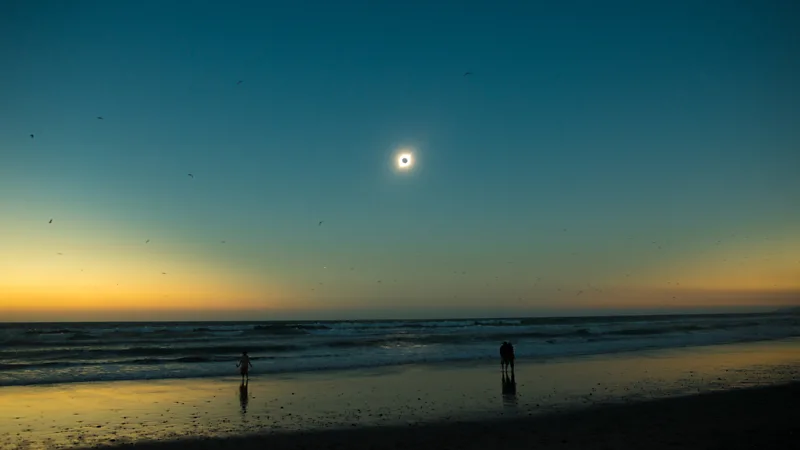 During totality, observers will have the unique opportunity to spot Jupiter to the left of the Sun and Venus to the right, with the possibility of the comet 12P/Pons-Brooks, also known as the Devil's Comet, appearing between Jupiter and the Sun. While these celestial objects may be challenging to see with the naked eye, they are likely to be captured in photographs. Thus, when composing your landscape shots, keep these celestial positions in mind and review your images later to spot these phenomena.
It's beneficial to know the exact duration of totality in your location in advance. Choosing a location as close to the center of the path of totality as possible is advisable. For example, while San Antonio, Texas, is located on the edge of the path and experiences only a few seconds of totality in certain parts of the city, a location like Kerrville, Texas, just 66 miles away, enjoys over four minutes of totality. Detailed maps are available to determine the duration of totality in your area. Additionally, checking weather forecasts and climate patterns for different locations helps maximize the chances of encountering clear skies during the eclipse.
An eclipse's evolution
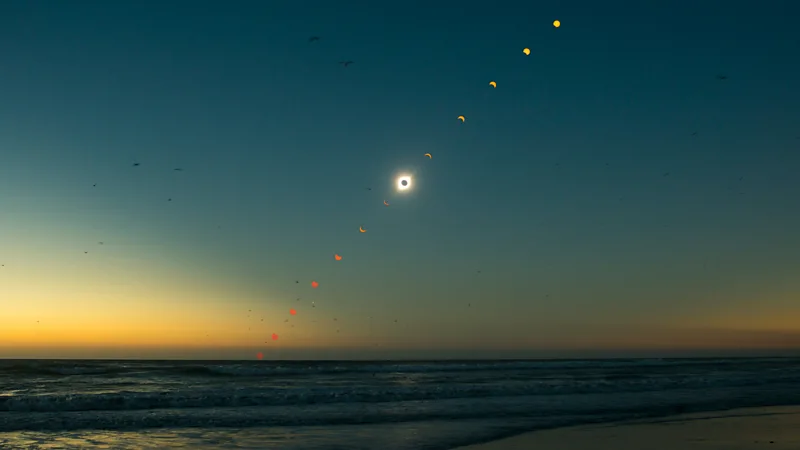 Using a wide-angle lens allows you to document the entire eclipse process unfolding across the landscape by combining multiple images. To achieve this, set up your camera on a tripod and keep it stationary throughout the eclipse. Continuously capture the scene at regular intervals, ensuring the Sun moves across the sky by its diameter every two minutes or so. To prevent image overlap, leave more than two minutes between shots.
If you opt to take photos every 10 minutes, ensure the first photograph is taken in a way that totality will occur at a multiple of 10 minutes later. This strategy ensures evenly spaced images. Upon returning home, utilize photo editing software to merge the photographs together seamlessly.


