A Step-by-Step Guide: Adding a Network via Chainlist on Metamask
 In the ever-expanding realm of cryptocurrency projects spanning diverse networks, the intricacies associated with utilizing these networks demand meticulous attention while conducting transactions. This precaution is essential to prevent scenarios wherein tokens intended for one specific chain inadvertently get sent across an entirely different network. This underscores the paramount importance of familiarizing oneself with the process of adding a network through Chainlist on the Metamask platform.
Among the multitude of blockchain networks, Ethereum stands out as the most frequently employed platform for creating tokens spanning a wide array of chains, each tailored for various use cases.
To navigate the challenges posed by integrating these diverse networks into wallets capable of accommodating multiple chains — such as Metamask — Chainlist has pioneered a solution. Their innovative platform empowers users with the seamless capability to effortlessly incorporate additional networks into the Metamask interface.
Your Go-To Source for the Latest News and Tools in the Blockchain Sector — Coinnav.io
What is Chainlist ?
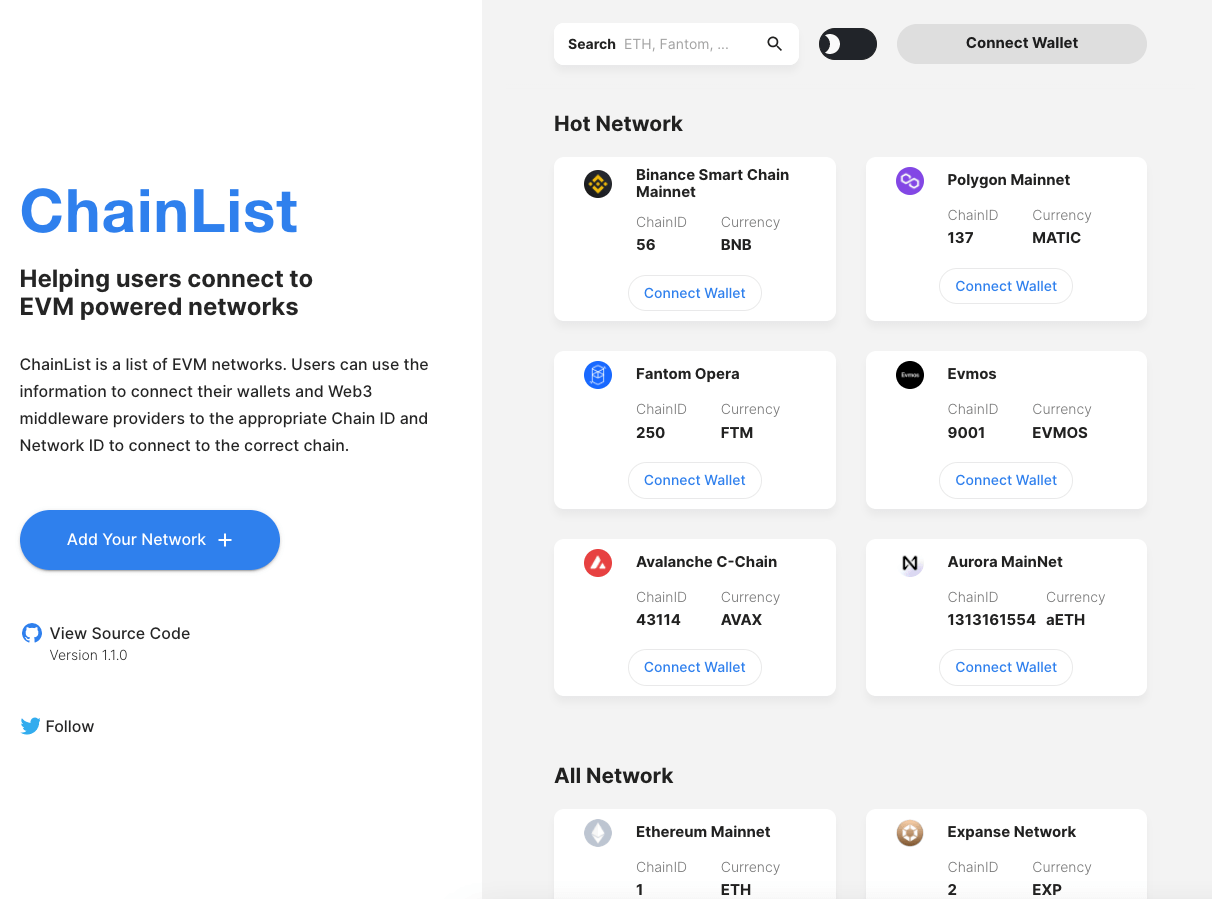
Chainlist stands as a convenient utility, facilitating users in establishing connections with Ethereum Virtual Machine (EVM) based network listings. Through Chainlist, users gain the ability to seamlessly link their wallets to the designated chain network, streamlining the process of network configuration.
Presenting a comprehensive tutorial for utilizing Chainlist:
- To commence, it’s essential to integrate the MetaMask wallet plugin into your browser. The plugin can be downloaded and installed directly from the official MetaMask website (https://metamask.io/).
- If access to Google Chrome is unavailable, opting for the Edge browser packaged with Windows 10 is recommended to ensure a seamless installation and configuration process.
- For precise instructions on the correct utilization of the MetaMask wallet plugin, kindly consult the usage guide available at (https://qitmeer.io/#/library/article/82).
Through the combined employment of Chainlist and the MetaMask wallet plugin, users gain enhanced ease in establishing connections with Ethereum Virtual Machine-driven network linked lists and configuring the corresponding networks.
Initiate the tutorial for navigating the usage of Chainlist:
Step 1: To embark on your journey, open your preferred web browser and enter the following URL in the address bar: https://chainlist.org/
Step 2: Once the page loads, direct your attention to the upper right corner and locate the “Connect Wallet” option. Give it a click to establish a seamless connection with your MetaMask Wallet.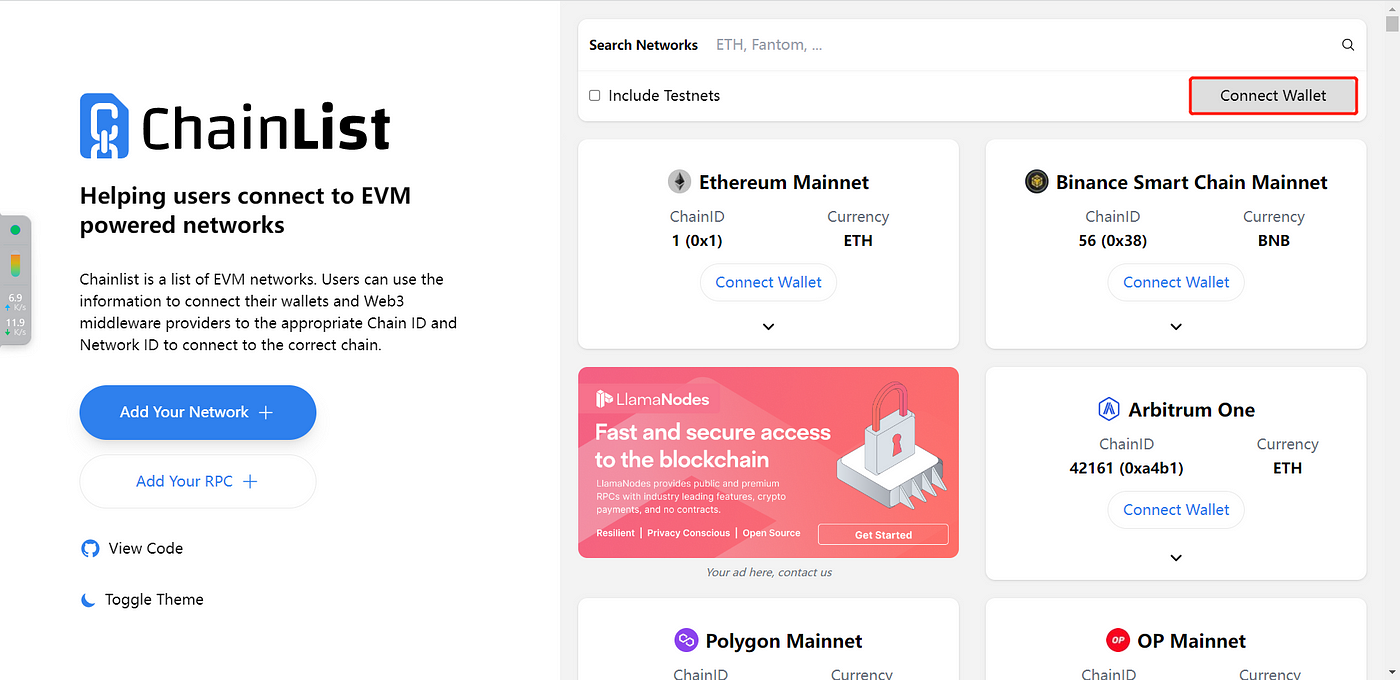 Step 3: Now, let’s proceed to enhance your network experience. Within the confines of the webpage, identify the search box. This is where you’ll input the name of the mainnet network you’re eager to integrate. Let’s use the example of “Qitmeer” to guide us through.
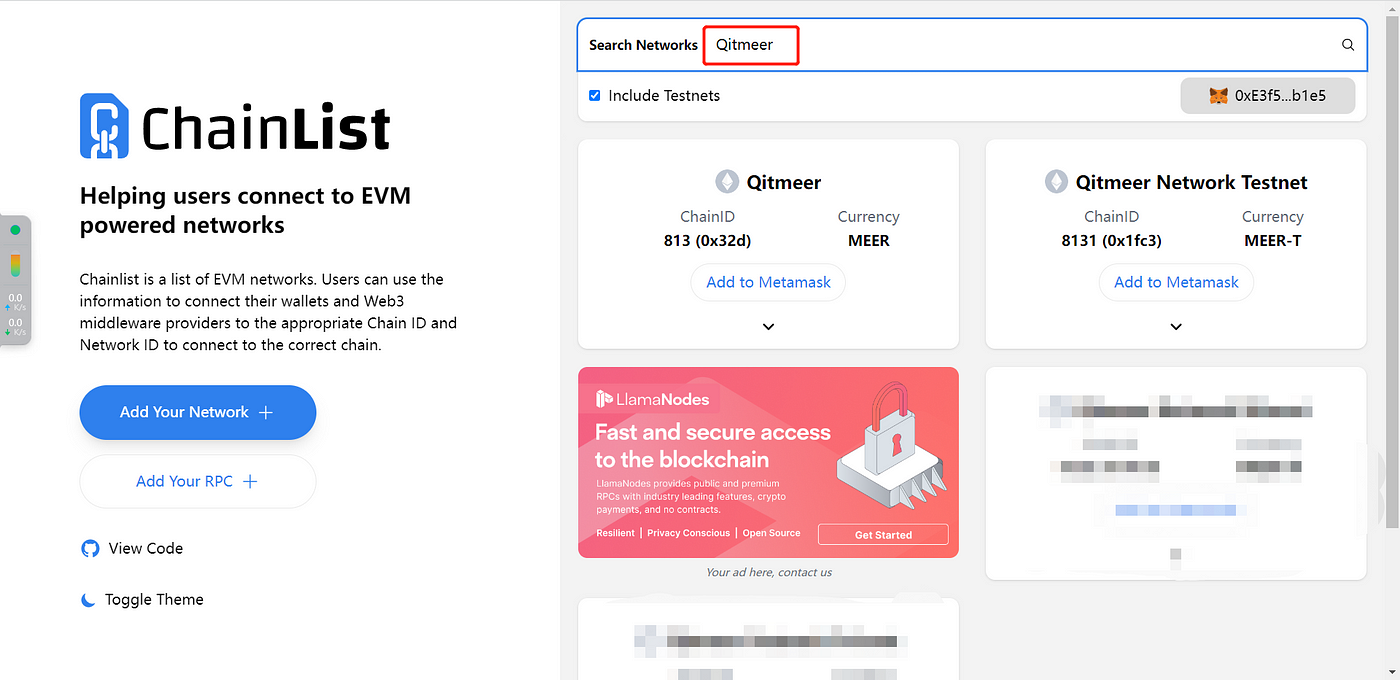 Step 4: Your exploration of the page will reveal two distinct Qitmeer Networks: 813, which denotes the QNG Network, and 8131, designated for the Testnet test network. Enhance your journey by clicking the “Add MetaMask” option displayed below, leading you to network configuration.
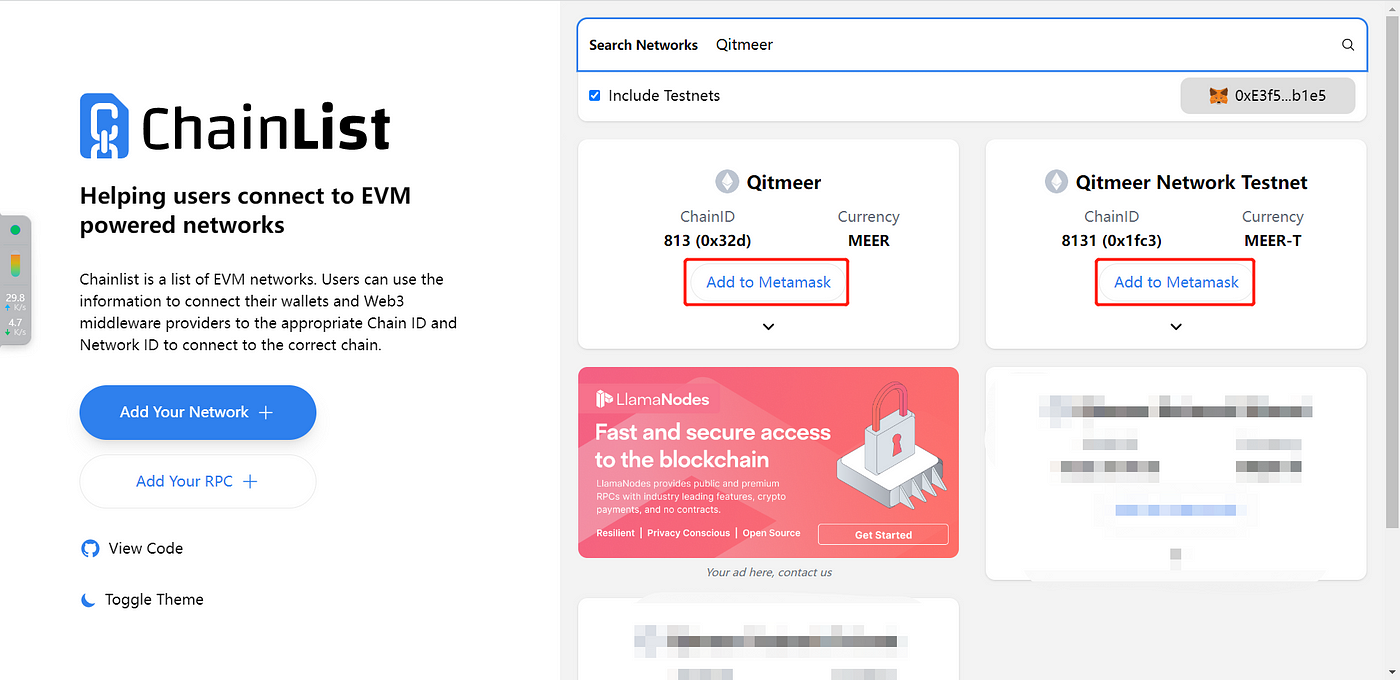 Step 5: As you embark on this network configuration endeavor, your trusty MetaMask Wallet will prompt you with a query: “Allow this network to Add a Network?” Respond to this call by clicking the reassuring “Approve” button nestled within the inviting blue box below the query.
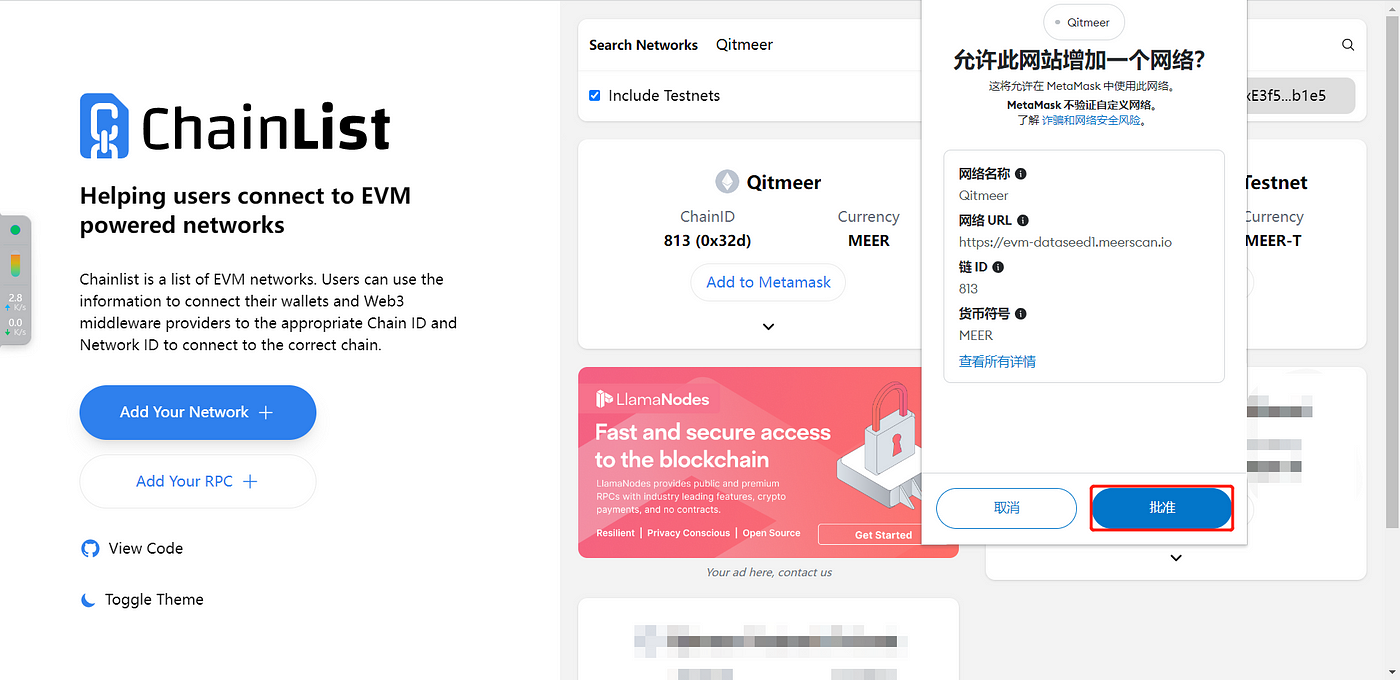 Step 6: With your approval registered, take a moment to verify the successful integration of the new network. Assurance is key, after all.
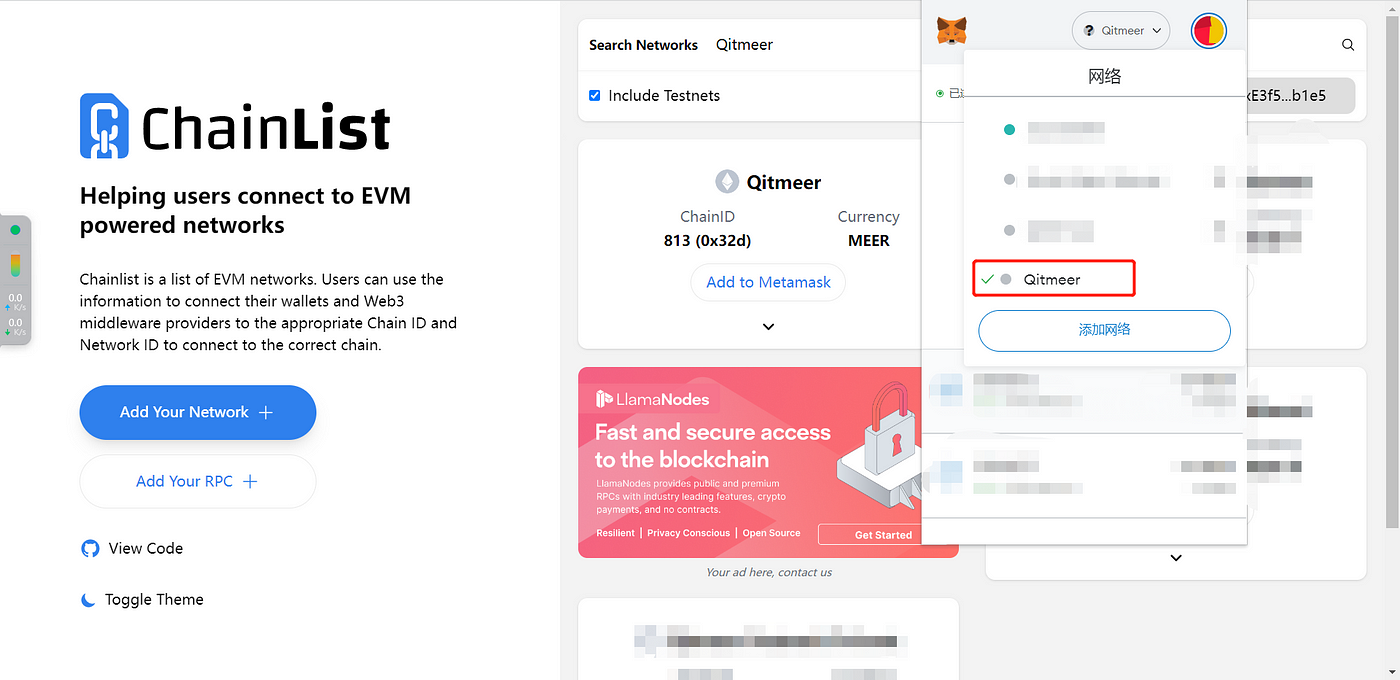 As you wrap up this voyage, take pride in your achievement. With Chainlist as your guiding star, you’ve seamlessly woven your MetaMask wallet into the fabric of the QNG Network, cementing a connection that promises new possibilities and opportunities.


