Radio Hackers: The Satnogs Project (Pt 2)

Taking our ground station from cold and dark to a functional telemetry station.
We strive to provide informative articles, however, users need to ensure their research is both ethical and responsible. Additionally, it is your responsibility to ensure you’re compliant with all applicable laws and regulations for your region. The information provided in this article is intended for educational purposes only.
In this previous article, we started looking at the Satnogs project. This project is an open-source, satellite ground station that collects data from in-orbit satellites. This data is then fed to the central Satnogs website where you’ll be able to contribute your data right alongside the data of others. Overall, projects such as this aim to improve the efficiency of space-based assets by providing live, real-time data that can help monitor the health of spacecraft as they pass overhead.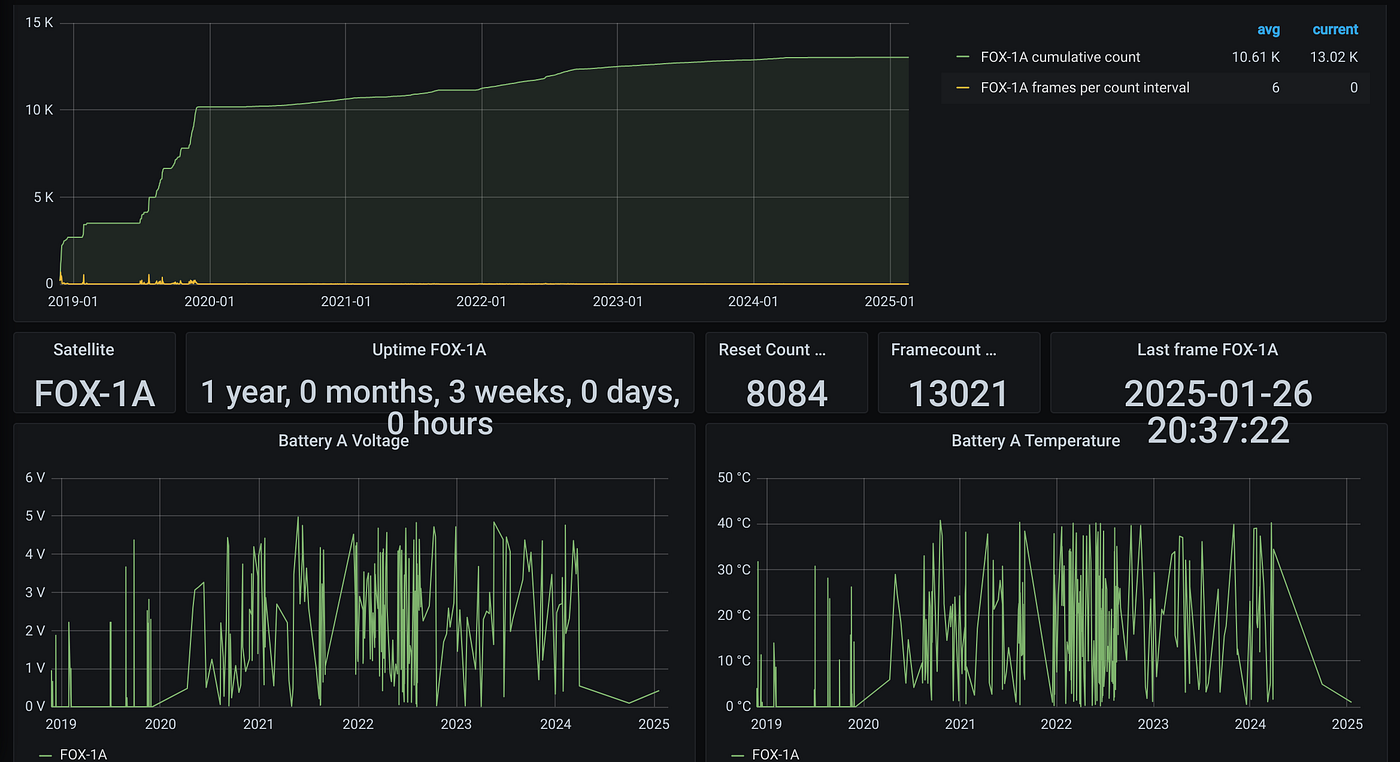 Satnogs aims to provide a live, real-time dashboard that helps monitor satellite health in real-time. Source: Satnogs.org
Let’s Build
If you followed along for part one, you’re probably already aware of the fact that to get things up and running there’s a minimum equipment list. In case you missed it though, here’s what we’ll need to get started.
1x Raspberry Pi + Accessories
1x SDR Unit (HackRF, BladeRF, SDRPlay RTL-SDR etc)
1x. Antenna with Feedline.
You should also have an SD card that is preloaded with the Satnogs disk image. If you haven’t organised that yet, you can find it here
To ensure that we can still feed data correctly, we’ll also need to sign up for a Satnogs Account. This means we can configure and change our settings as needed, as well as set up the location of a new ground station feeder.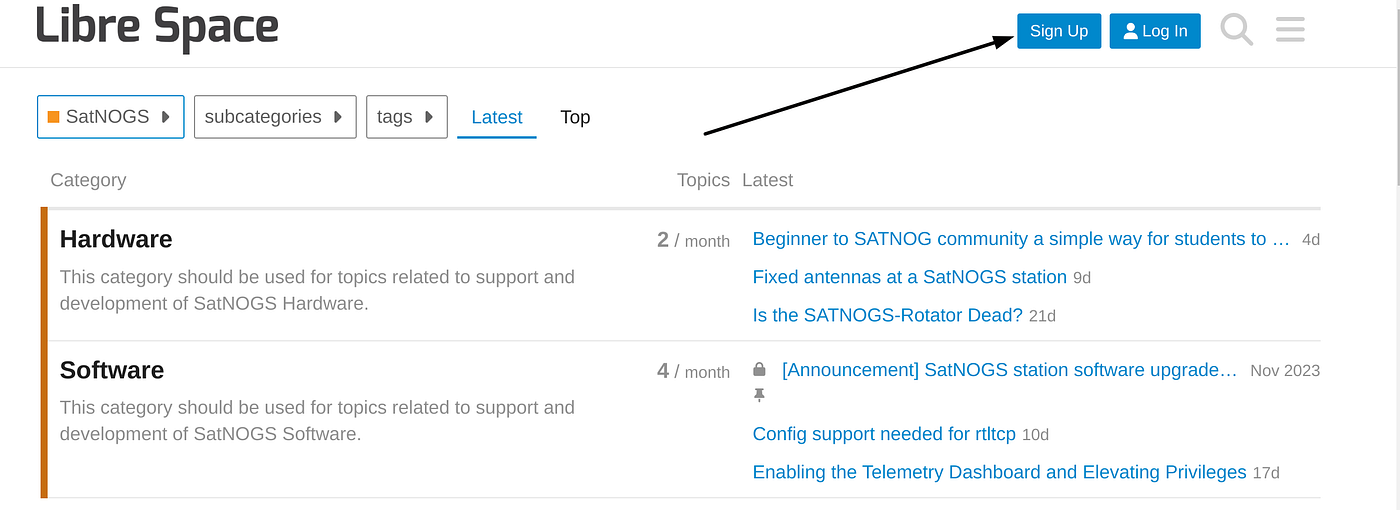
To do this, we’ll simply visit the Libre Space community and register a new account as per the image above. From here, we can start to make changes to our station and apply the final configurations.
The Ground Station
Once we’re into our account and the email has been verified we can move to the next step, which is adding our ground station. There are a few ways that you can look at doing this and the block diagram below gives a great breakdown of how this might work and what we’ll need.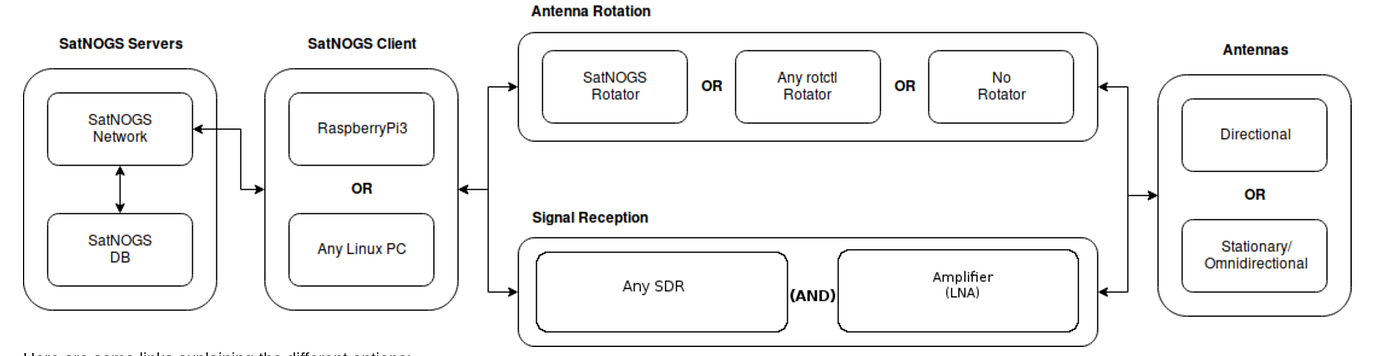
If you aren’t using ground-based preamplifiers or antenna rotators then your own block diagram will look a little different to this. Remember though, you won’t need to have everything. While an omnidirectional antenna without a rotator has a distinct disadvantage in comparison to a tracked Yagi, you can still get started with something simple and carry out upgrades later on. Just remember that each time you add a change, update your details in the Satnogs portal so they remain current.
Let’s visit the portalnow and add our new ground station. Then, we can get the configuration sorted and start sending data to the community.
When we’re in the portal, we’ll want to select the Add Ground Station tab as seen in the image below.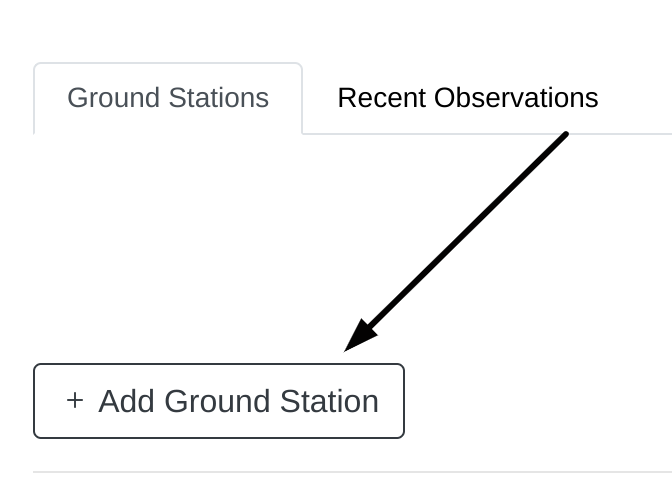
Once we’ve done that step, you’ll be taken to a fresh page where you’ll put in the technical information regarding how your station runs. Here, we’ll need to add info about our overall configuration that’s in use, a description of any antennas we might be running as well as any other relevant information.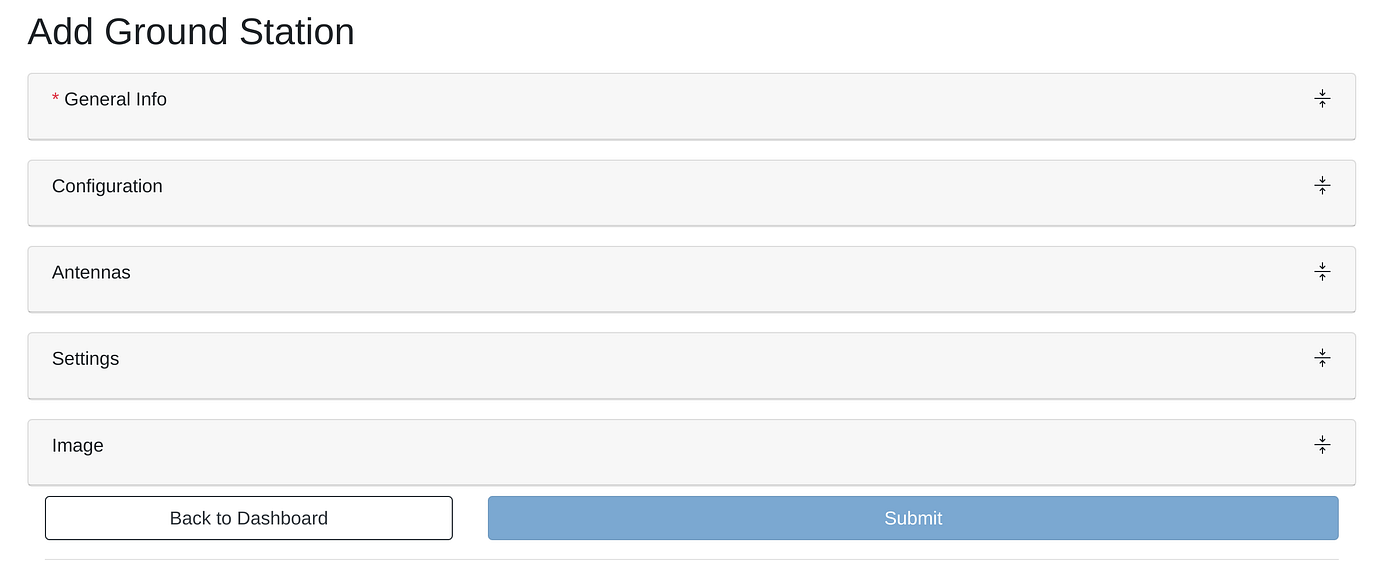
Most of this is pretty simple stuff, but there are a few things to be aware of. Firstly, an accurate location is required to ensure that your station is correctly integrated into the network. You’ll need to set the location in the “Advanced Edit” in the format of Lat/Long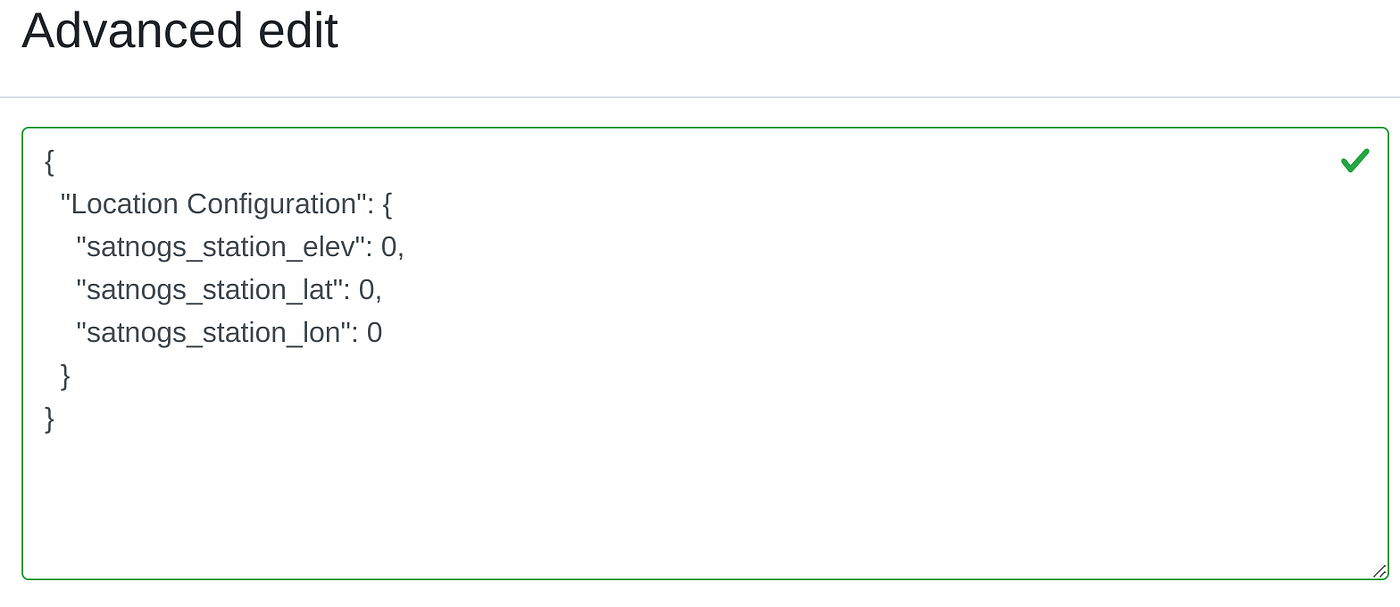
Once you’ve completed this step, the next is to add and configure an antenna. This is an important step, regardless of what type of antenna you might be using.
If you’re using separate antennas for each band, that isn’t a problem either. You will, however, have to add each antenna as well as the frequency range it covers. Check out the image below if you’re looking for some more insight on this.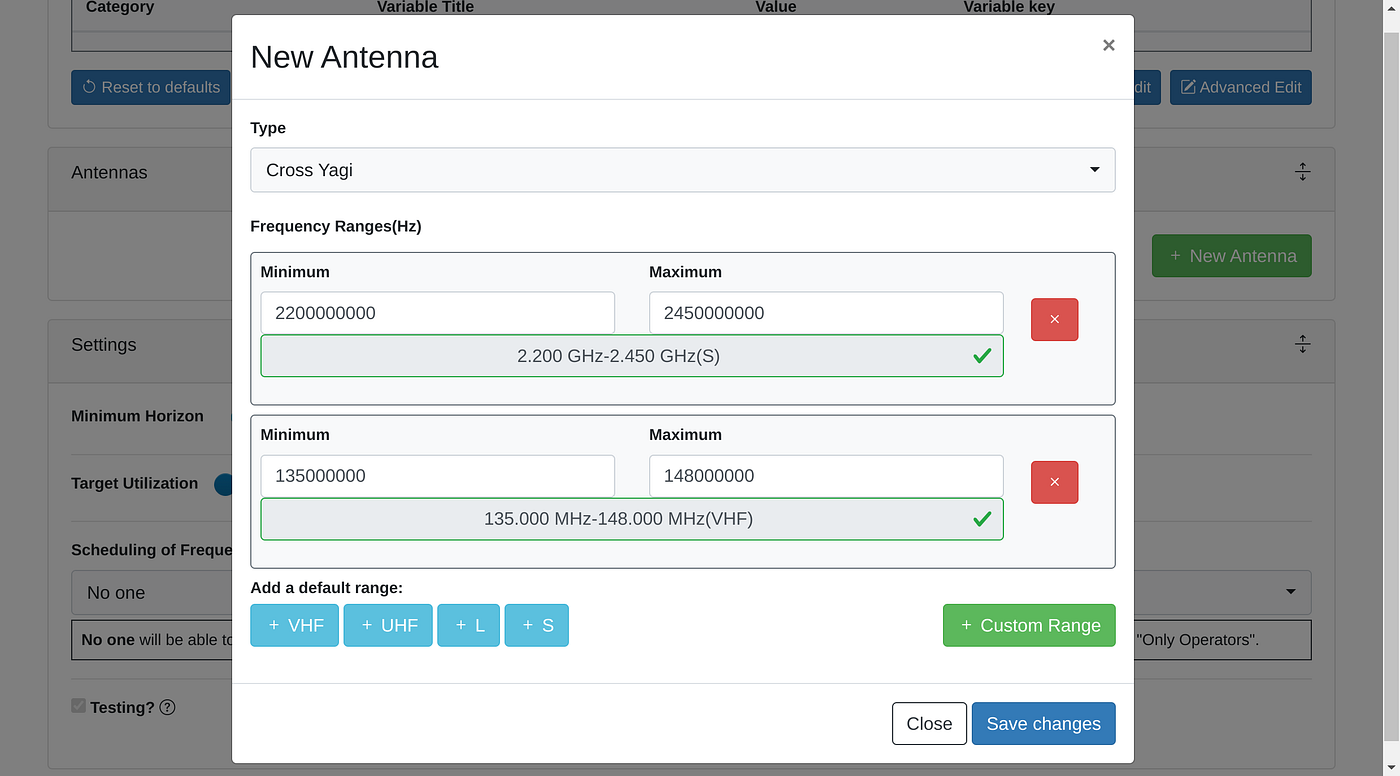
Web Portal Setup
The next step is ensuring that we’re able to feed data properly from our SDR unit into the Satnogs web portal. To do this, simply open your terminal and hit it with the following command
sudo satnogs-setup
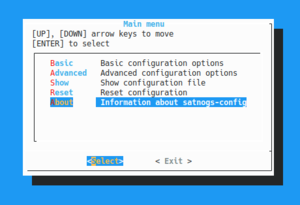 The Satnogs setup menu. Source: Wikipedia.com
If we’re using Raspbian to configure a system, typically we will need to run the usual update & upgrade commands. In this instance though, the Satnogs software is pretty efficient. By running the setup command, we’ve also instructed the system to fetch all relevant updates as needed.
Most of this configuration will happen automatically with little input needed from your good selves. However, there are a few things we’ll need to double-check before we put things online.
Don’t Forget This!
Satnogs works as a global feeder so to ensure it doesn’t go hungry, we’ll need to keep it fed with plenty of data. To do this, we’ll need an API key so that we can feed it data via the backend.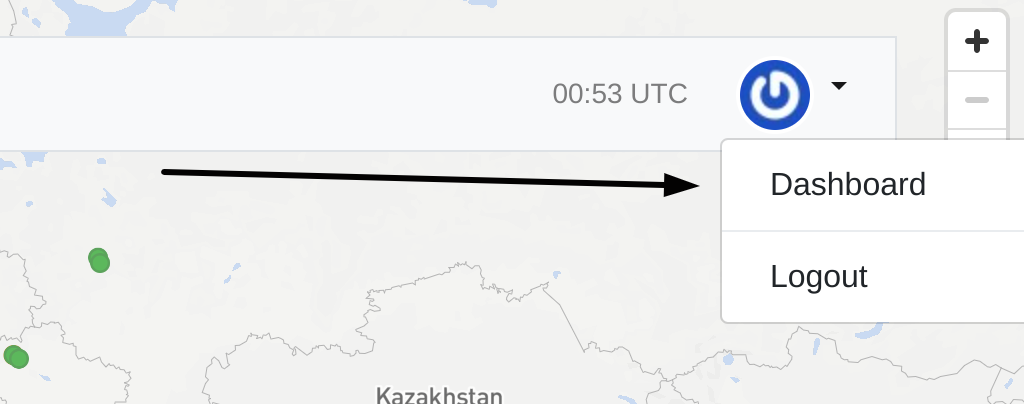
To set this up correctly, we’ll need to visit the portal again and then acquire our key. First, we’ll visit the dashboard, then hit the tab that says API Key.
This will generate an API code that you can use to access and feed data to the web portal. Once you’ve completed this, work your way through the last of the setup steps. You can choose between basic and advanced configurations but if you’re using a simple system with no antenna, it’s probably better to stick with basic for now.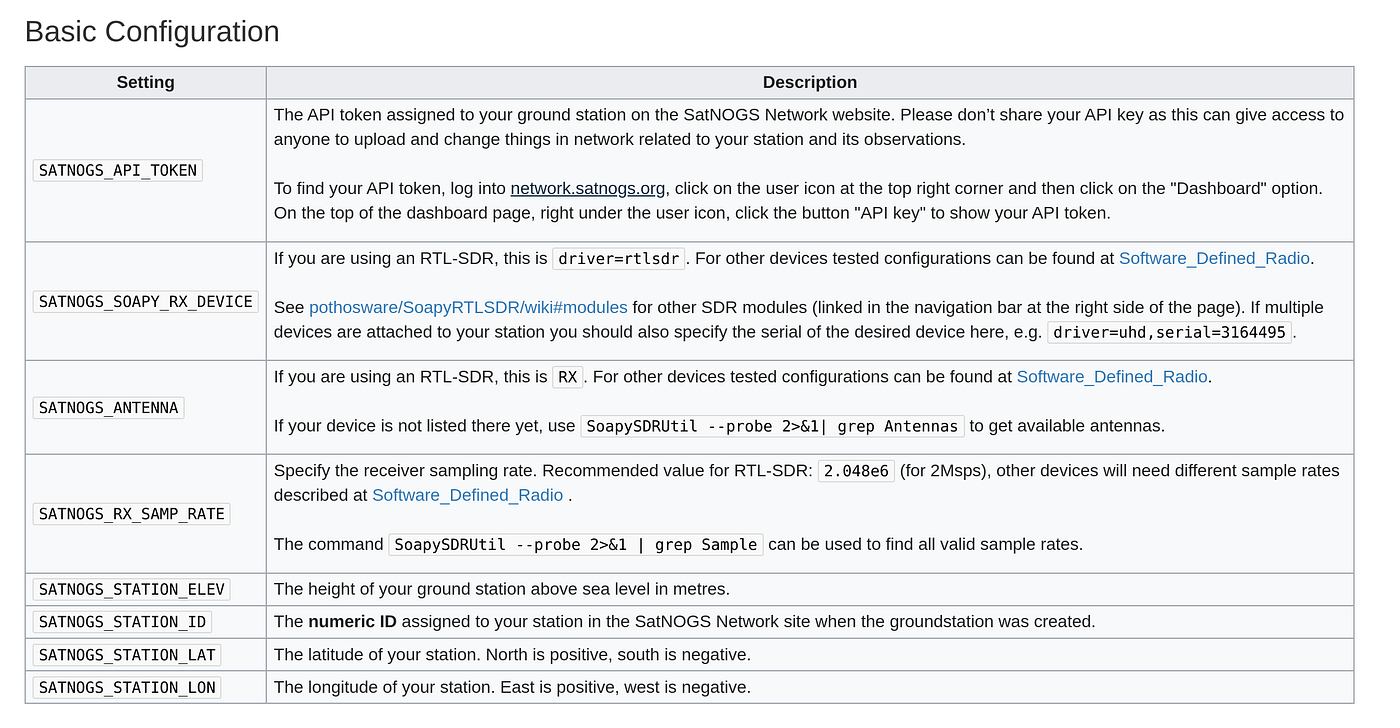 Sticking with the basic configuration is the way to go for most users. Source: satnogs.org
The Test Run
When setup is complete and you’ve got your ground station up and running, you’ll need to check to ensure that it shows up as online.
Once that’s done, really there is only one thing left to do and that’s to start testing by capturing packets!
It’s a good idea to SSH into your Pi for this part as you’ll be able to use the terminal to show what is happening and identify any other problems or issues. We’ve covered this before in earlier articles, so you should be good to gain access.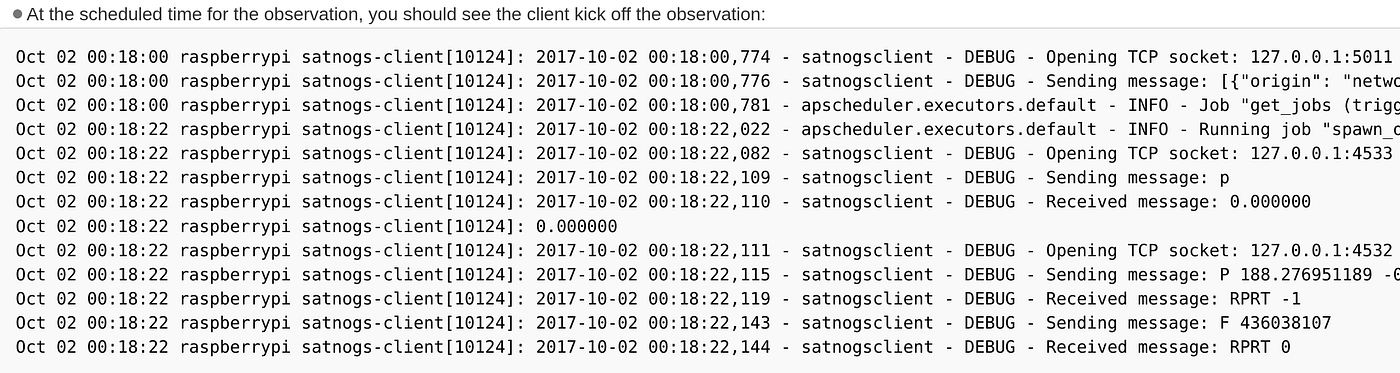
When you have a satellite scheduled to arrive overhead, you should see your station going through the following motions as per the image above. If you’re able to see this in your own terminal, then you can rest assured that everything is working as it should on your end as well.
Reminder: The best way to log in via SSH is by using a key instead of a password. If you must use a password though, ensure it is strong and unique.
The Backup
Pi’s are great for low-cost devices to run receive stations, weather stations or what ever else you might like to build. However, they do come with one small flaw. In the interest of keeping costs low, the Pi relies on an SD card-based flash memory to run the operating system.
Unfortunately, these aren’t optimised particularly well for long-term use and as such, it’s not uncommon for the SD card to stop writing, at which point the device typically stops working.
Because of this, it’s worth grabbing a backup of the image on the SD card so that the current card can be flashed should circumstances require it. You can do this by doing a straight duplication, however it’s also wise to copy your configuration file.
Did You Build?
Once your station is assembled and tested, it should run fairly reliably. To optimise it though, you can look at changing antennas, adding a rotator for tracking or even using preamplifiers to help increase your signal strength.
You’ll find some great resources in the Satnogs wiki that discusses these upgrades and these are particularly helpful in understanding exactly what kind of improvements each change will make.
Space communication can often be the pinnacle of weak signal work. Small transmitters, with small antennas in small satellites thousands of km away, mean that when you’re stuck with omnidirectional antennas, the challenge is on.
You’d be surprised at the difference some small, well-thought-out changes can make to your received signal strength levels. Also, if you’re building your own Satnogs ground station, don’t forget to post in on socials with a tag to show off your build.
Stay tuned for part 3, where we look at some easy-to-construct antenna options to finalise your station.
If you found this article insightful, informative, or entertaining, we kindly encourage you to show your support. Clapping for this article not only lets the author know that their work is appreciated but also helps boost its visibility to others who might benefit from it.
🌟 Enjoyed this article? Join the community! 🌟
📢 Join our OSINT Telegram channel for exclusive updates or
📢 Follow our crypto Telegram for the latest giveaways
🐦 Follow us on Twitterand
🟦 We’re now on Bluesky!
🔗 Articles we think you’ll like:
- What The Tech?! Space Shuttles
- Shodan: A Map of the Internet
✉️ Want more content like this? Sign up for email updates