How to onboard new AD tenant under EA enrollment?
When setting up a new AD tenant for their business, the majority of our customers frequently seek some direction. I’ll go over the specific processes for onboarding a new AD tenant under EA Enrollment in today’s blog post.
Here are four steps to get you started. Let’s dig into it.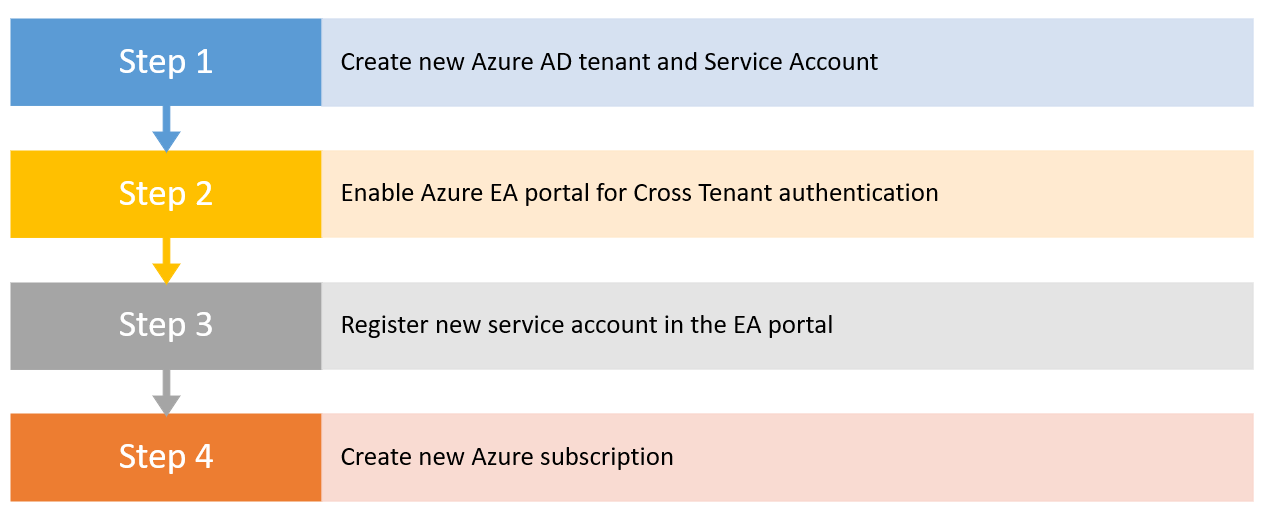 Photo by Author ©
Step 1: Create New AD Tenant and Service Account
You must be the owner of the Azure subscription in order to connect to your current Production Azure AD Tenant and Subscription.
By going to portal.azure.com, you can access the portal and search the market for Azure Active Directory. Photo by Author ©
Provide Domain and Organization Name for new AD tenant and click on create. Photo by Author ©
When it is successful, it will ask you to join in to the new AD, and you’ll see that I already have global admin privileges over the new tenan by default.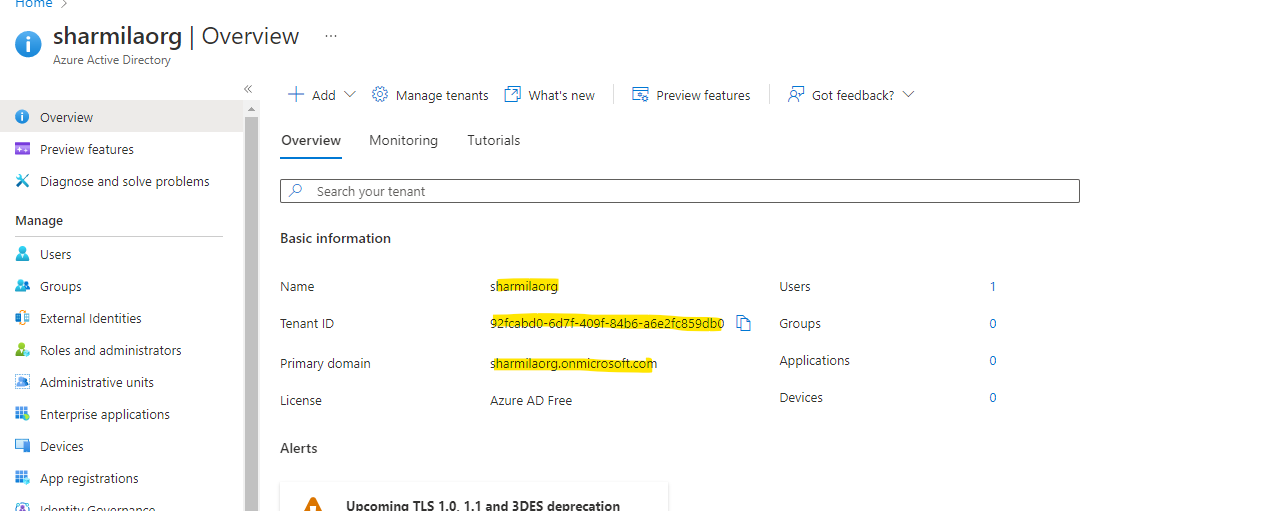 Photo by Author ©
Now create a new user that will be your service account. Now edit the profile to add an email address that can receive notifications (can be a DL) Photo by Author ©
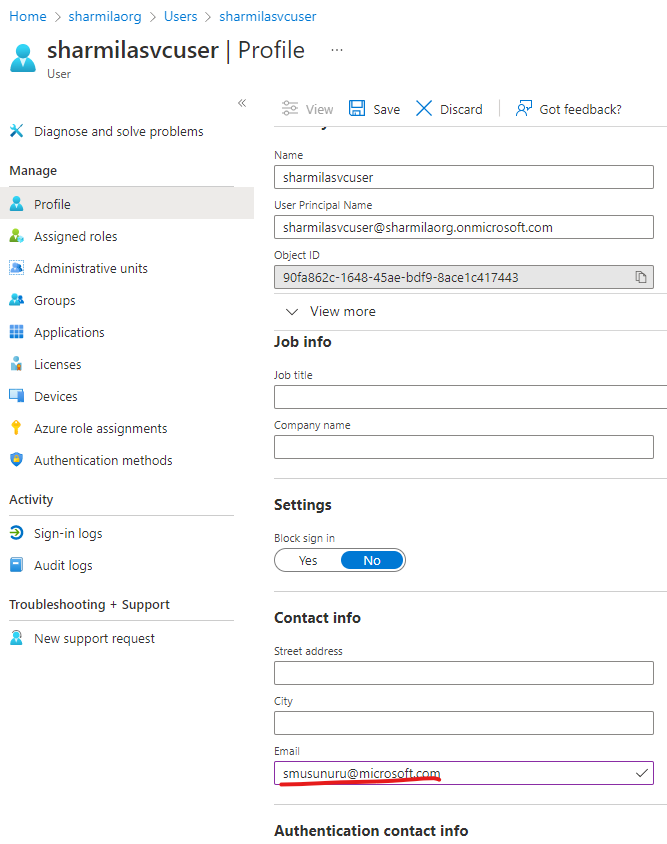 Photo by Author ©
This account will now be the owner of a new Azure subscription EA.
The creation of a tenant and service account concludes step 1 at this point.
If you’re interested, you can take a couple more further steps.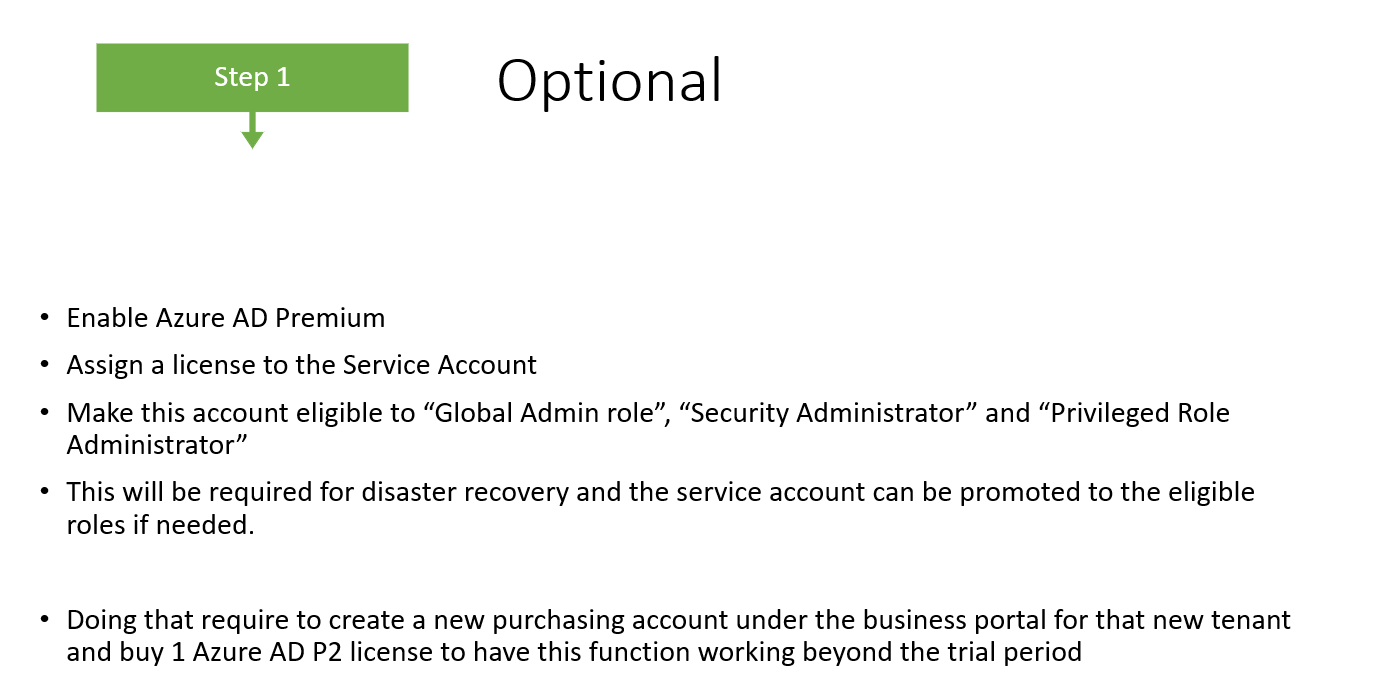 Photo by Author ©
Step2: Enable Azure EA Portal for Cross Tenant Authentication.
To perform this step, you must be Azure EA Portal EA Admin.
Login to EA portal https://ea.azure.com and go to your respective enrollment and change the authentication level to Work or School Cross Tenant.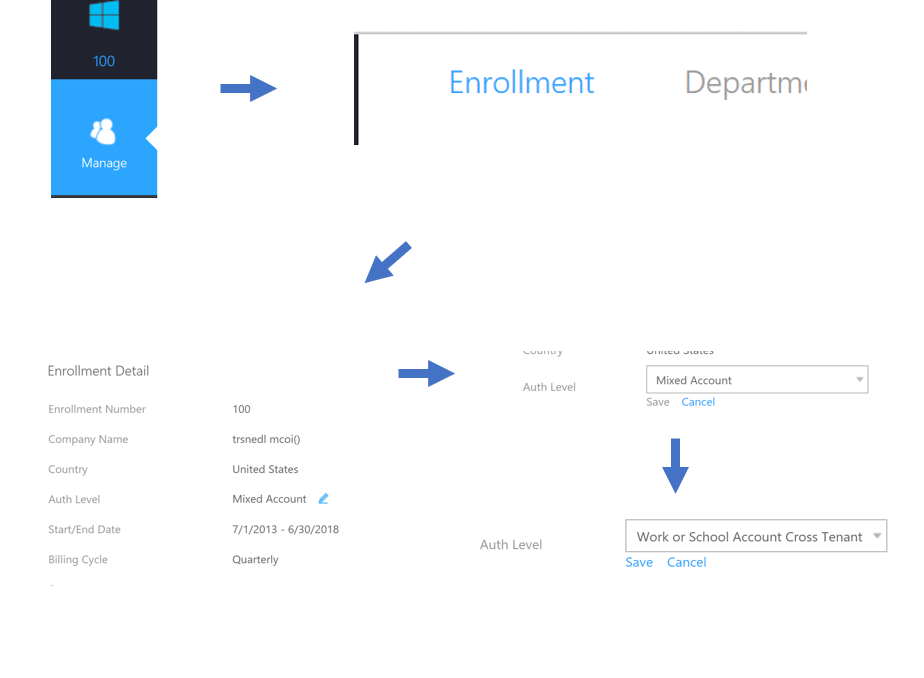 Photo by Author ©
Step 3: Register new Service Account in EA Portal
Now, you need to register new service account in EA portal by following below steps.
Select Account
•Click +Add Account
•Add the service account
•You should receive and email (as set in the Azure AD profile)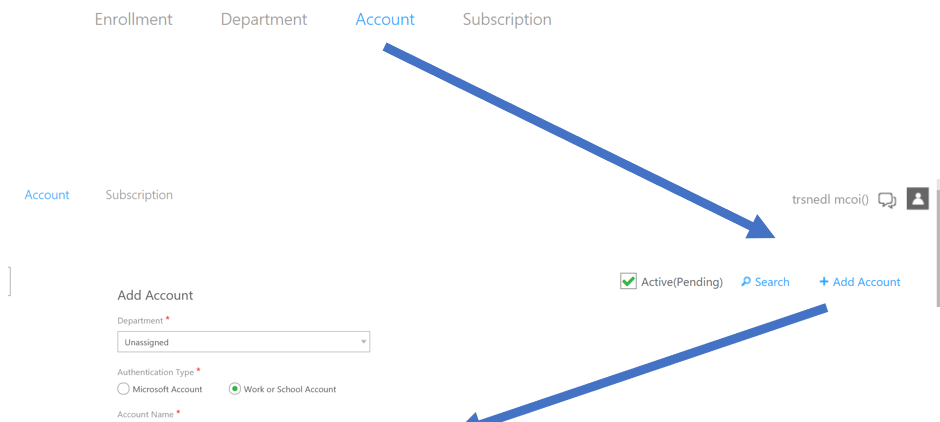 Photo by Author ©
From the email, click on the invitation emails and login the EA portal with the service account login. You will see the following warning. Click on Continue to validate the creation of the account.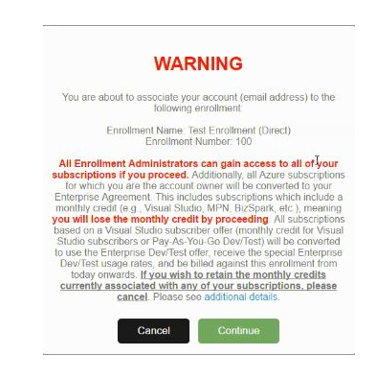 Photo by Author ©
Step 4: Create New Subscription
Only the service account user who’s account owner can be able to create subscription in the EA Portal.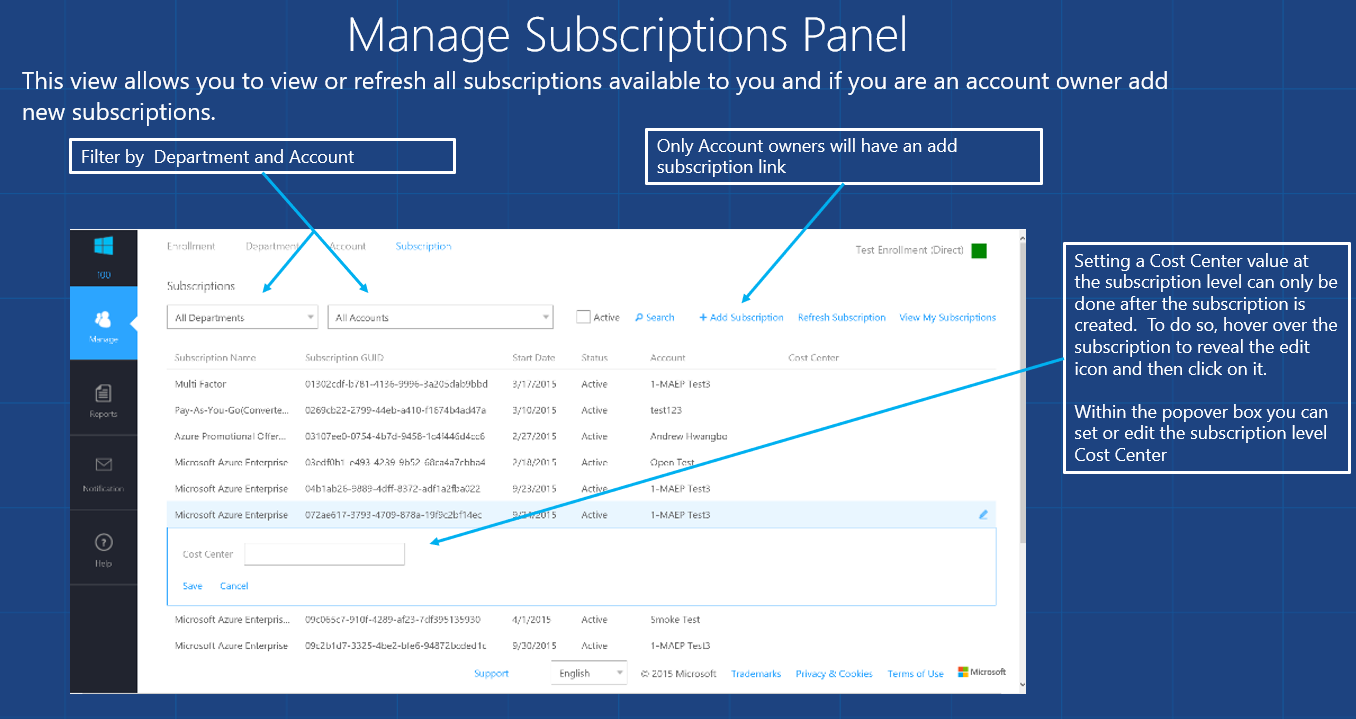 Photo by Author ©
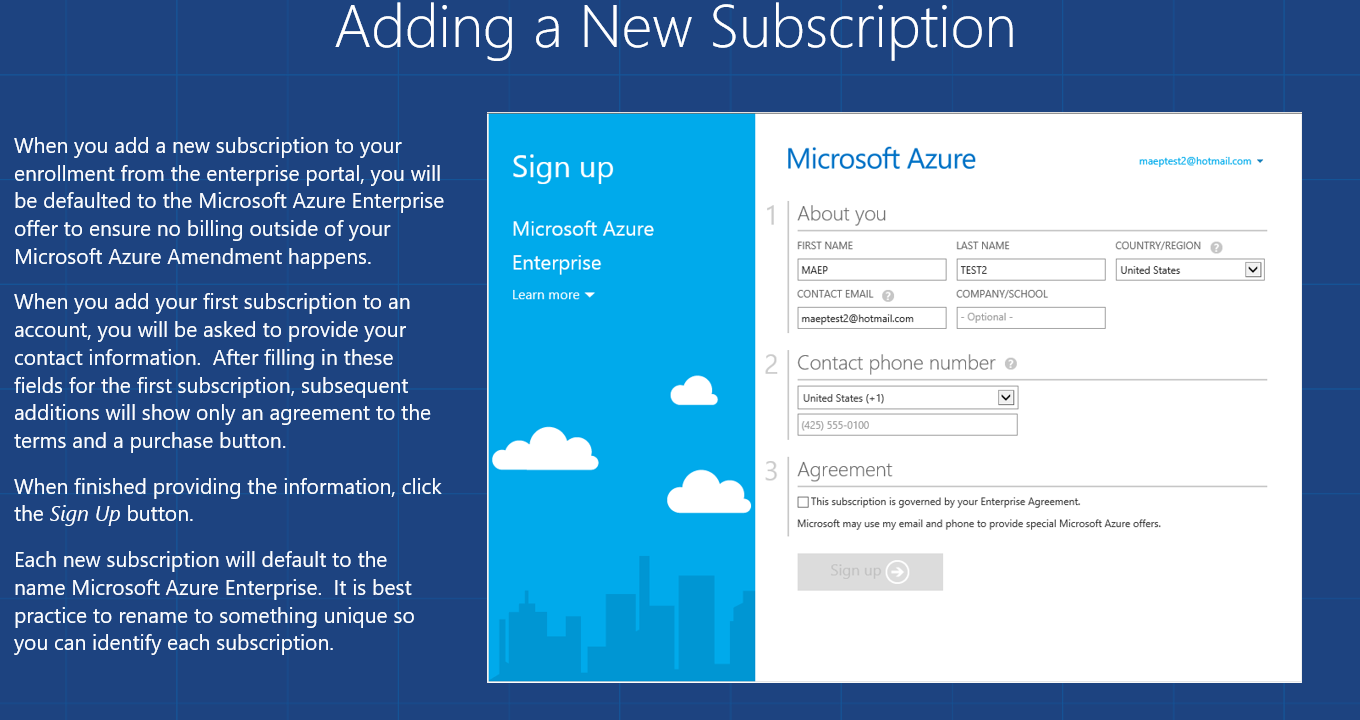
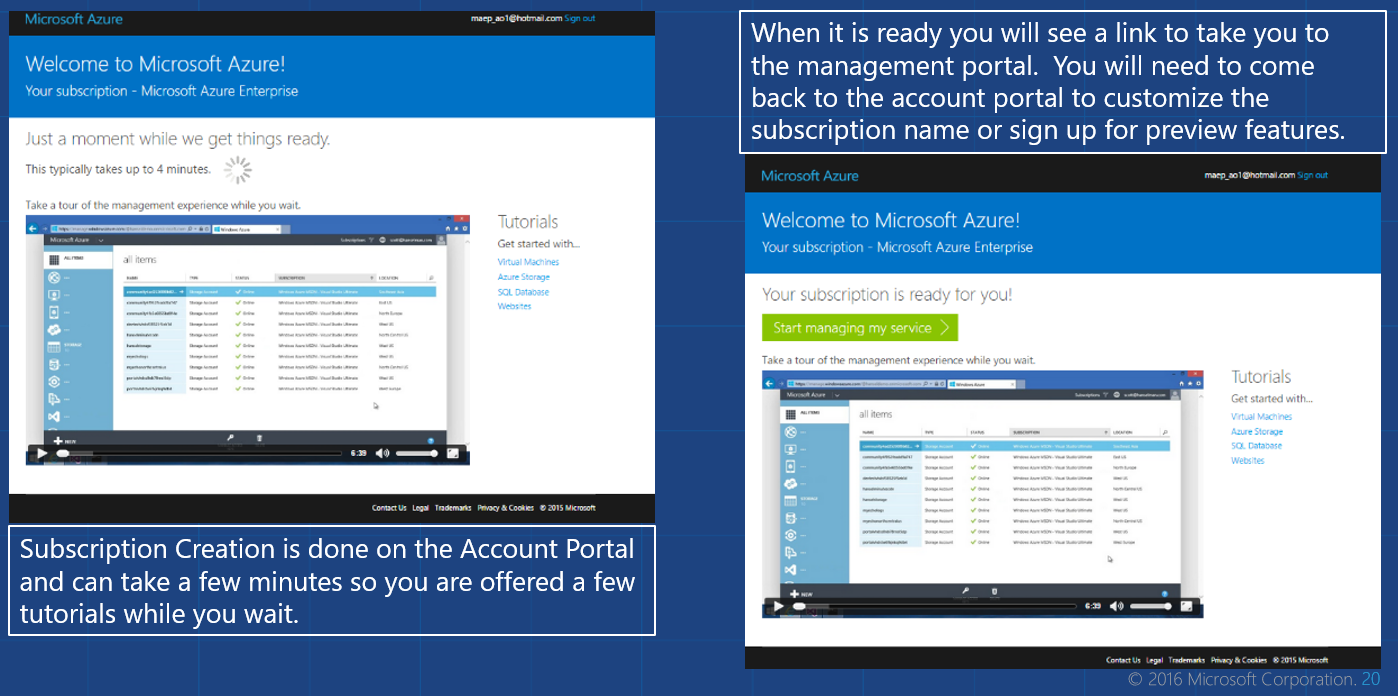
The Microsoft Azure Enterprise offer name will be used by default as the subscription name when you create a new subscription.
We advise you to update the subscription name on a regular basis. Click on the Subscription Icon, choose your subscription, and then change the name as needed. From the Subscriptions List, choose the new subscription.
After selecting the lightning bolt in the cloud icon, a menu with choices for managing subscriptions will display.
Also available is the Manage Link, which is located above the Orange information stripe. selecting “Edit Subscription Details”
This will open the Make it yours pop-up box on the Account Portal at account.windowsazure.com, where you must once more choose “Edit Subscription Details” to change the subscription name and/or Service Admin.
References:
I'm writing on medium you can follow my article here How to onboard new AD tenant under EA enrollment? | by Musunuru Sharmila | Jul, 2022 |


![Nekodex – Earn 20K+ NekoCoin ($20) [Highly Suggested]](https://cdn.bulbapp.io/frontend/images/b4f0a940-f27c-4168-8aaf-42f2974a82f0/1)


