venom
Mastering the Venom Testnet: A Comprehensive Guide to Interacting with dApps, NFTs, and DeFi Protocols
 Venom Network
·
Follow
20 min read
·
Apr 25, 2023
10.2K
266
The Venom Testnet is an innovative platform that offers a secure and user-friendly environment for developers, users, and enthusiasts to interact with decentralized applications (dApps), non-fungible tokens (NFTs), and decentralized finance (DeFi) protocols. In this comprehensive guide, we will walk you through the entire process, providing step-by-step instructions, tips, and best practices to help you get the most out of your Venom Testnet experience.
Part 1: Setting Up your Venom Testnet Wallet
Setting up Your Venom Wallet
To set up a wallet on the Venom Testnet. Follow these steps:
a. Visit the official Venom Testnet website.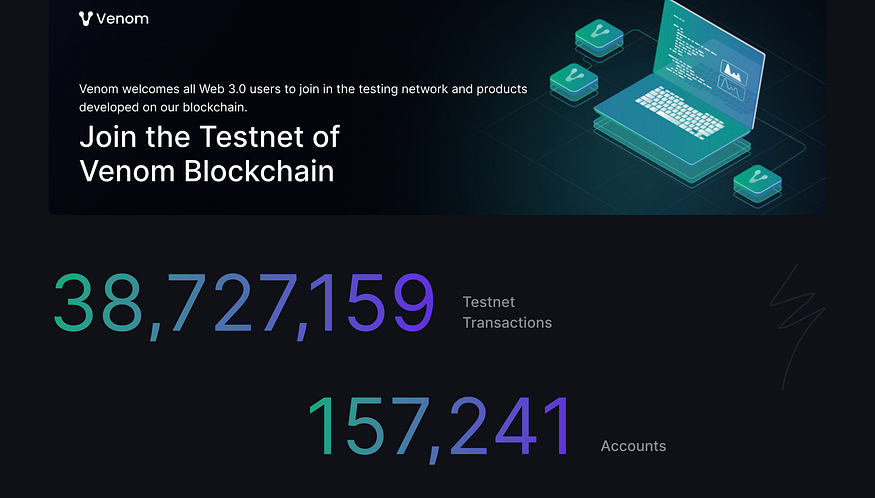 b. Locate and click on the “Install Venom Wallet” button within the “How it works” section.
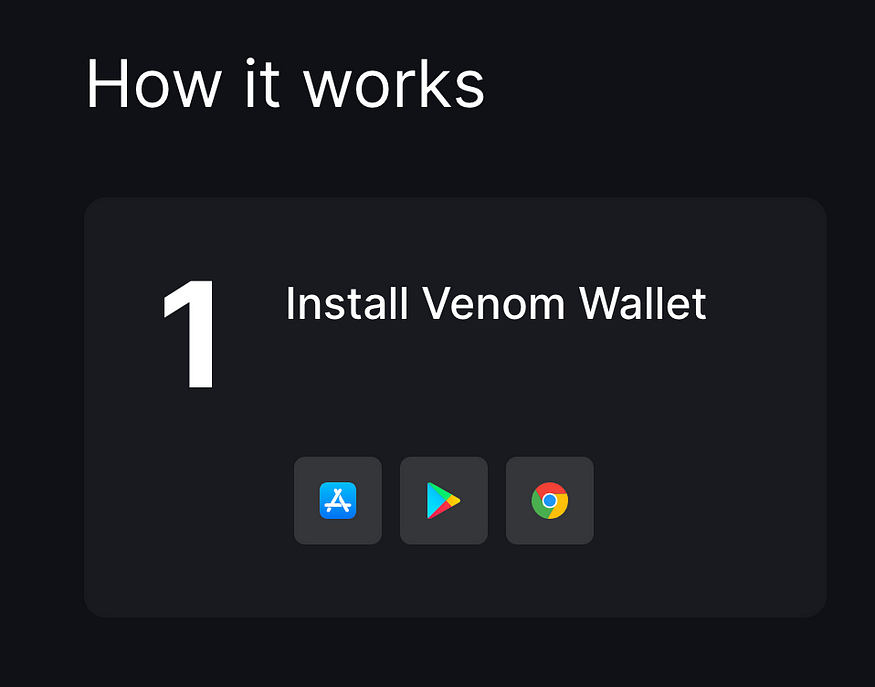 c. Follow the on-screen instructions to set up your wallet, including creating a secure password and writing down your unique seed phrase for backup purposes.
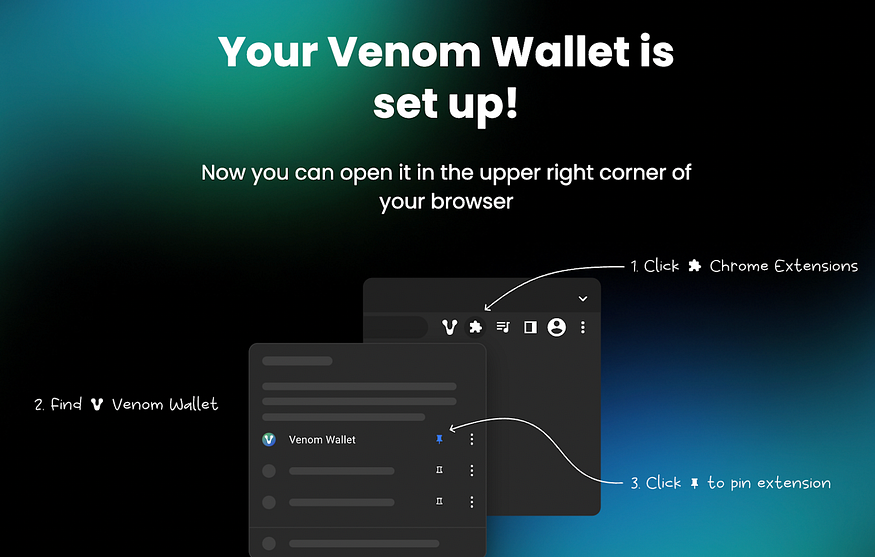
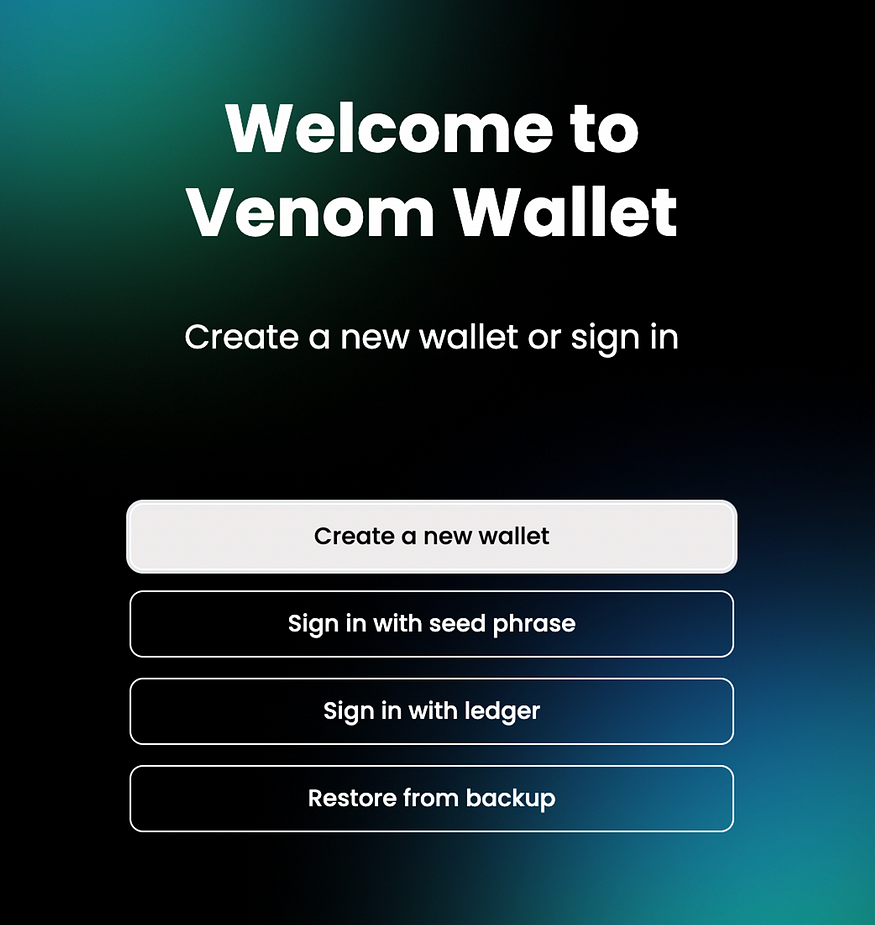 d. Once your wallet is set up, you will be all set to start exploring the platform!
Part 2: Claiming your Testnet Tokens
- Claiming your first Testnet Tokens
To claim your first testnet token. Follow these steps:
a. Visit the official Venom Testnet website.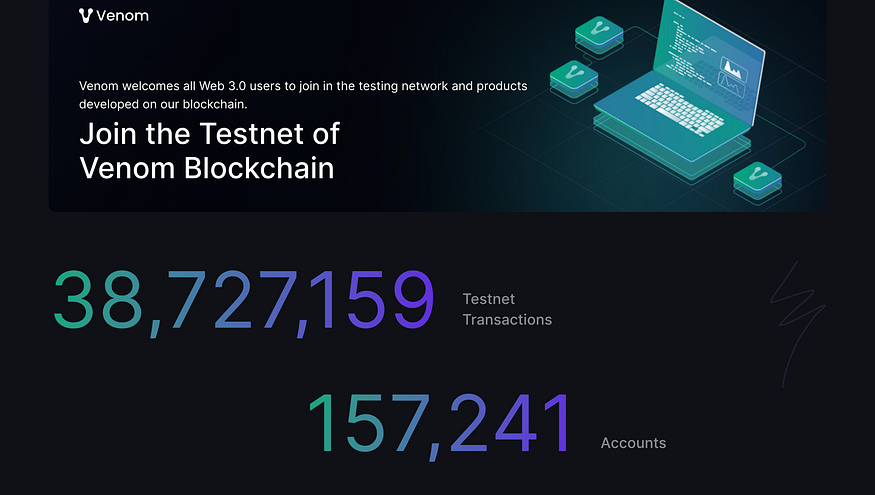 b. Locate and click on the “Start testnet” button within the “How it works” section.
 c. Follow the on-screen instructions to set up your wallet, including connecting your Venom wallet, logging in with your Twitter account, and following Venom Foundation on Twitter.
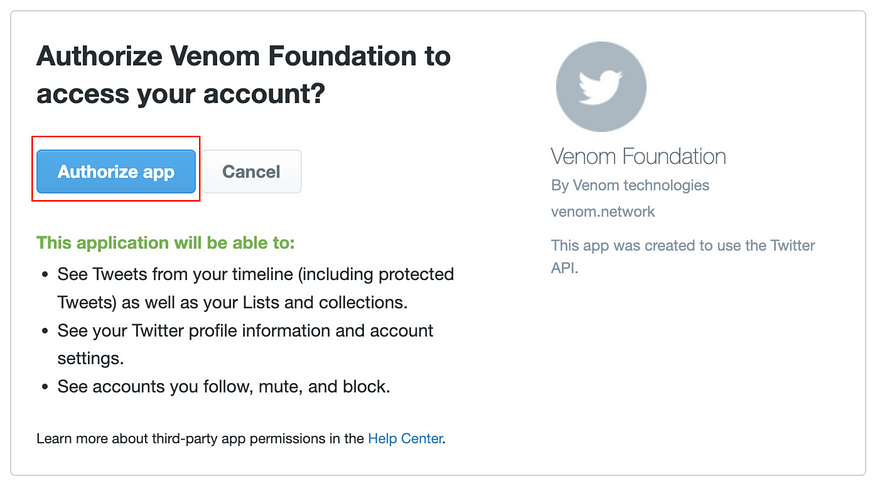
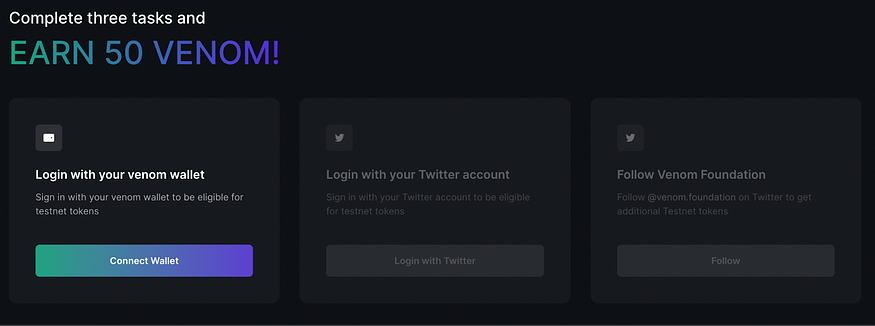 d. When connecting Twitter for the first time, you will receive a pop-up asking for your authorization. You will need to authorize Venom to access your account in order to continue.
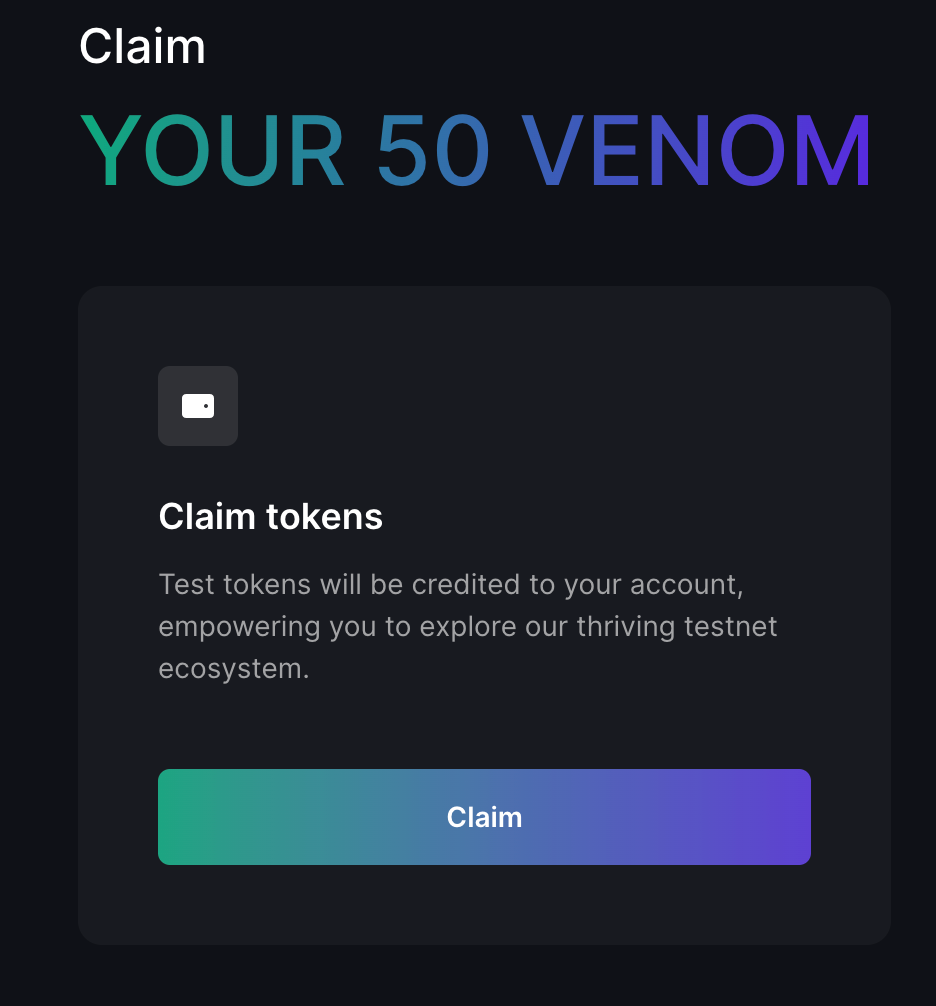
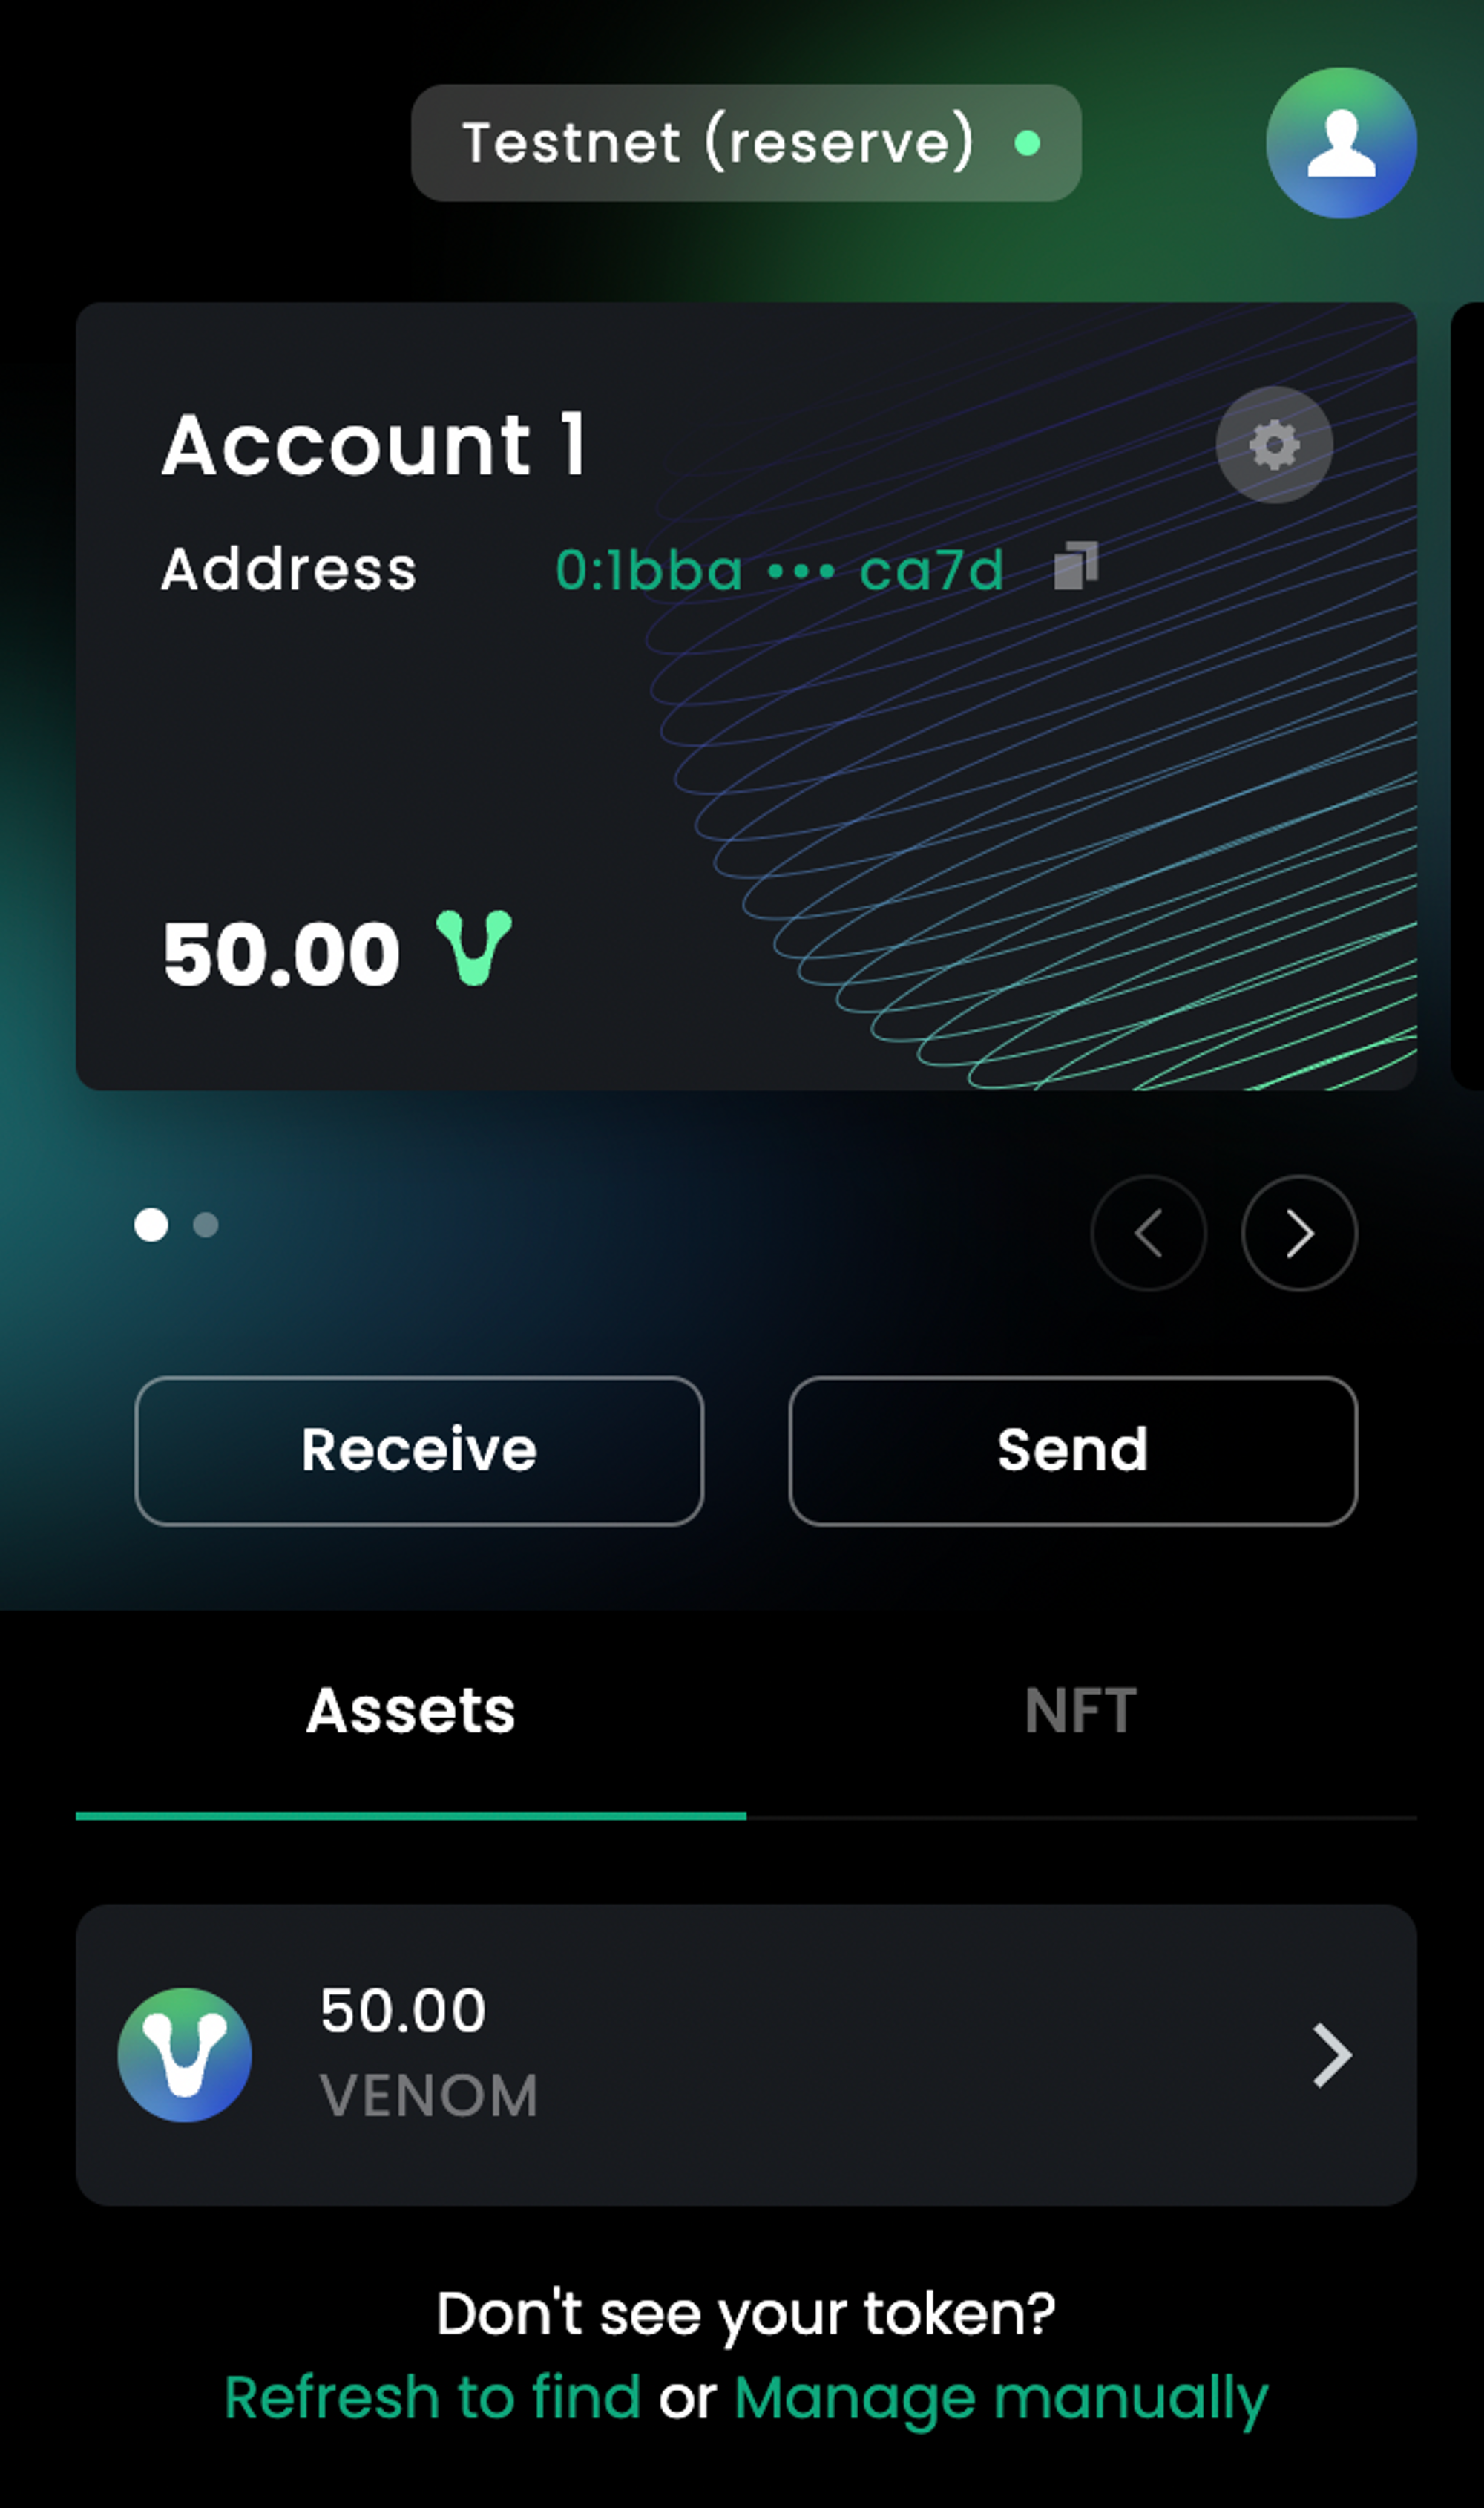
 e. Once all the tasks have been completed you need to click “Claim” to claim 50 Testnet VENOM tokens. If for any reason you encounter any issues with claiming your tokens, please refresh the page.
Part 3: Interacting with dApps and NFTs
Venom Foundation
- Completing tasks
a. Once you have completed the first three tasks of connecting your Venom wallet, logging in with your Twitter account, and following Venom Foundation on Twitter, you will be presented with our testnet ecosystem explorer. It is here where you will complete tasks in order to test out our dApps.
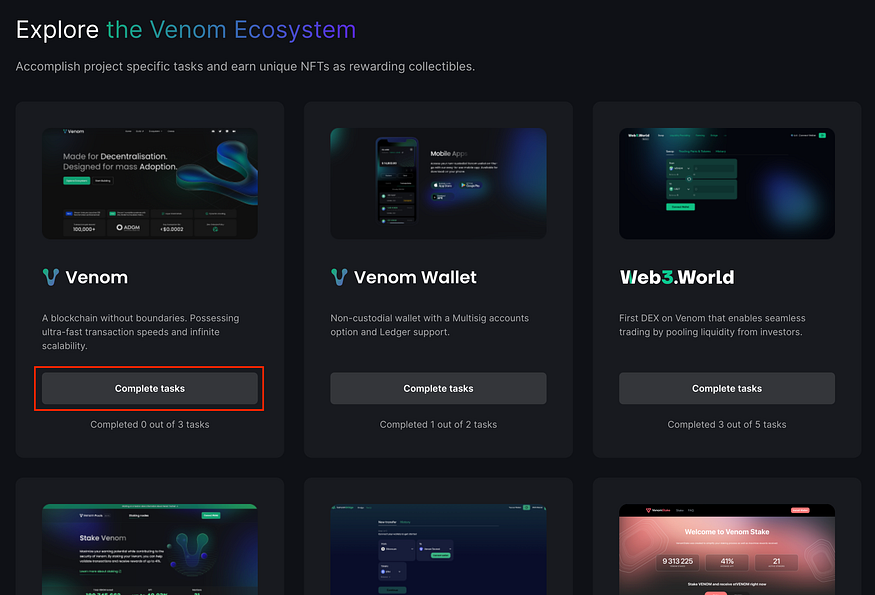
Please note that if the testnet ecosystem page does not appear, please refresh your page.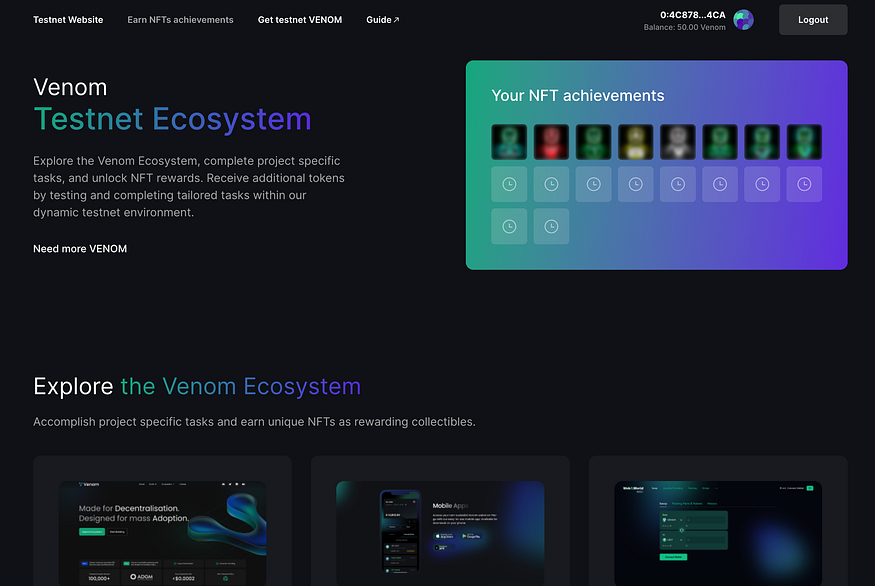 b. If you scroll down on the task page, under “Explore the Venom Ecosystem” you will see a list of dApps that you are able to interact with. To begin your first interaction with the testnet, click on the “Complete tasks” button under Venom.
 c. On this page you will find the tasks that you will need to complete in order to mint the “Venom Foundation” Testnet NFT.
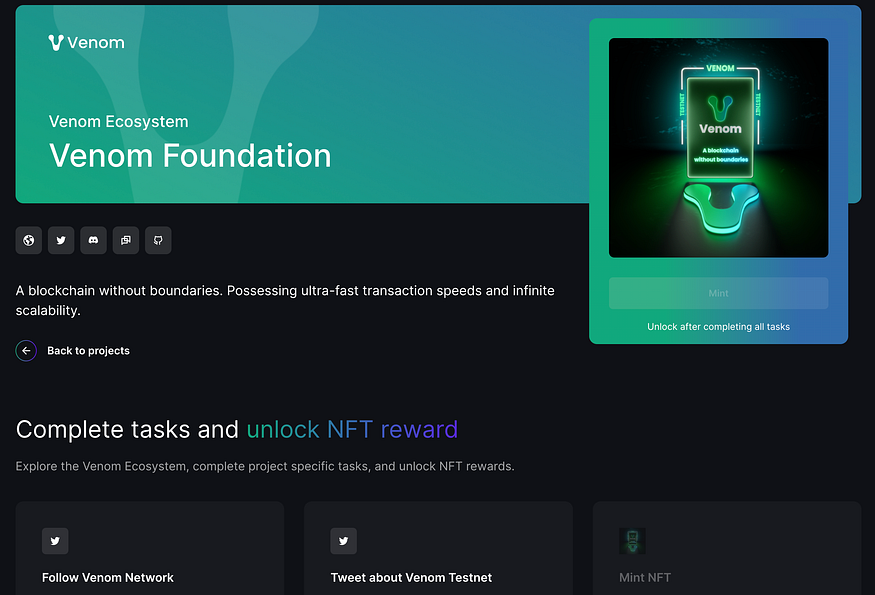 2. Follow Venom Network on Twitter
Follow these steps to complete your first task.
a. Click on the “Follow Button” b. A new window will open to Twitter, where you will receive a pop-up asking if you want to follow. Click follow to confirm.
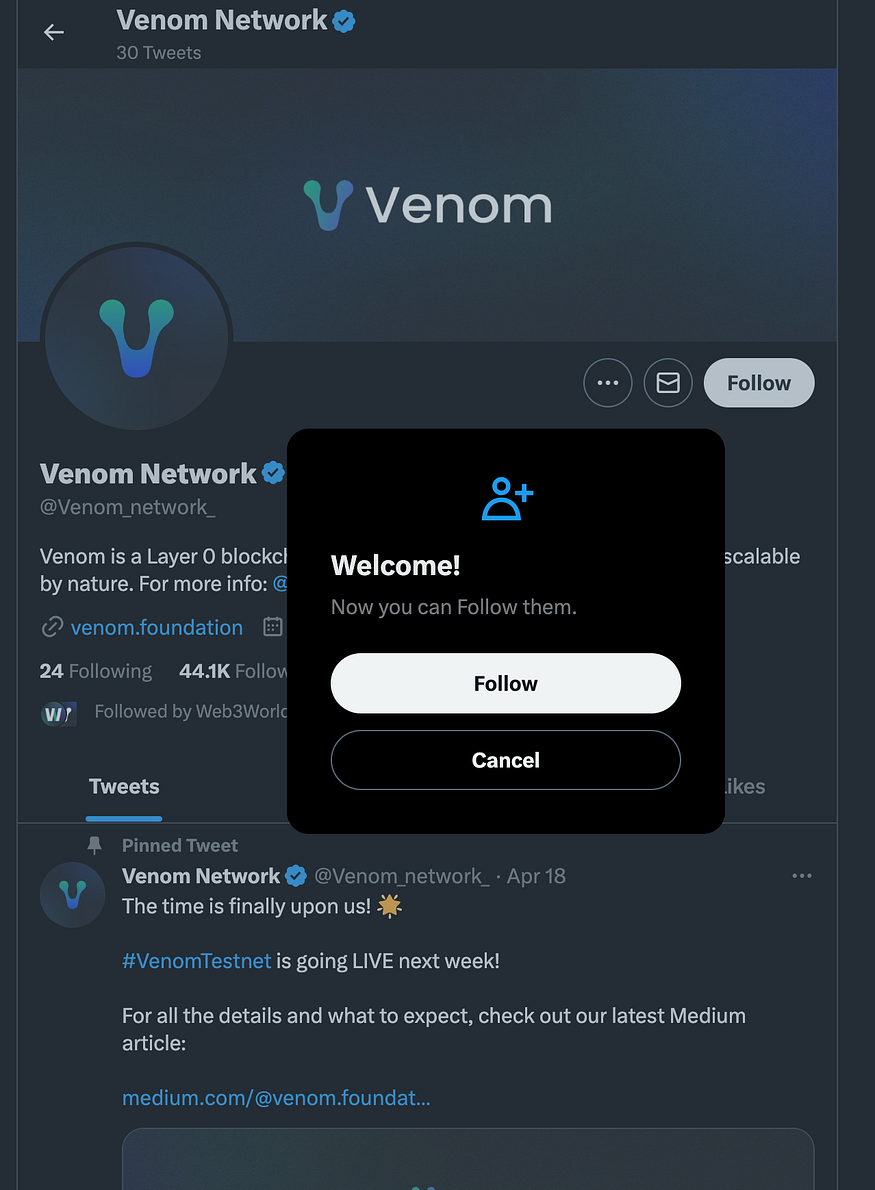 c. Close the twitter window and return back to the Venom Foundation task list. You will notice that the first task box has changed, click on the new box labelled “Check” for the system to confirm that you are following Venom Network on Twitter.
d. Once the check has been completed, you will get a confirmation saying that you have completed the task. The task will now be greyed out, with a checkmark in the top left, indicating you can now move on to the next task.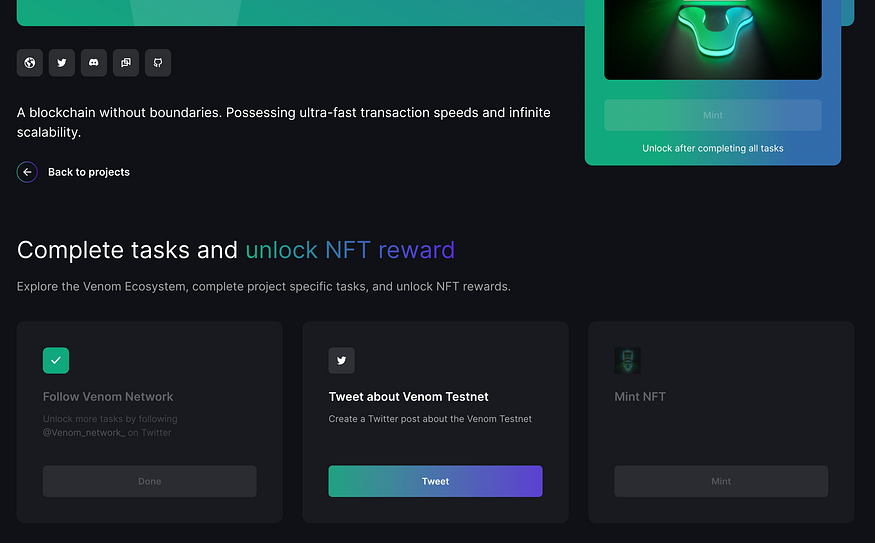 3. Tweet about Venom Testnet
Follow this guide to post your first tweet about the Venom Testnet.
a. Click on the “Tweet” button under the second task.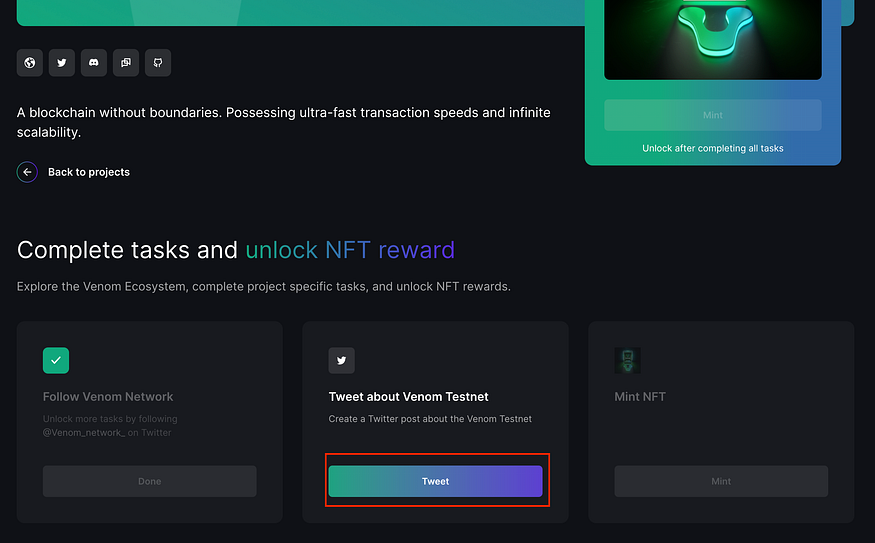 b. A new Twitter will open up. The Tweet will automatically be filled for you. To continue, click on “Tweet”.
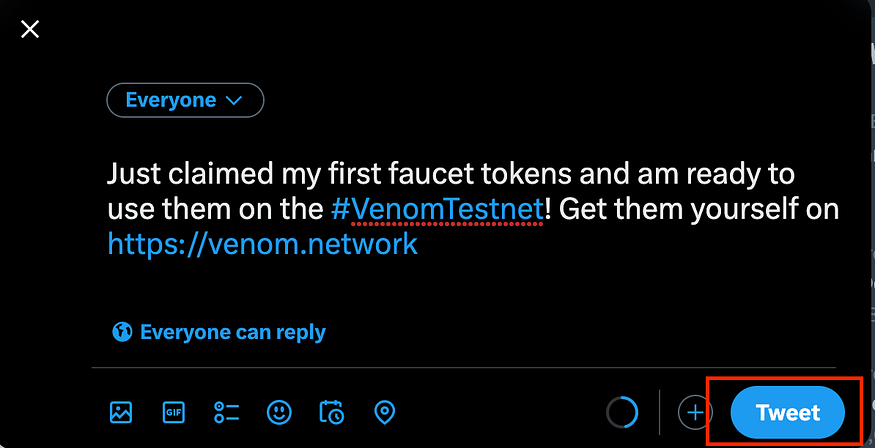 c. Once the tweet has gone through, return back to the Venom Foundation task list and click on “Check” to verify that you have Tweeted.
d. You will get a confirmation confirming the completion of the task. You are ready to move on to minting your NFT.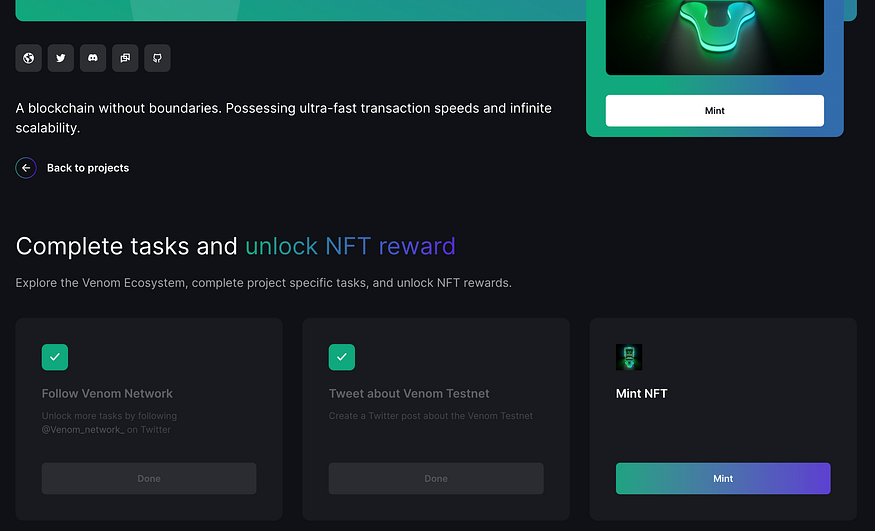 4. Mint NFT
Follow these steps to mint the Venom Foundation Testnet NFT
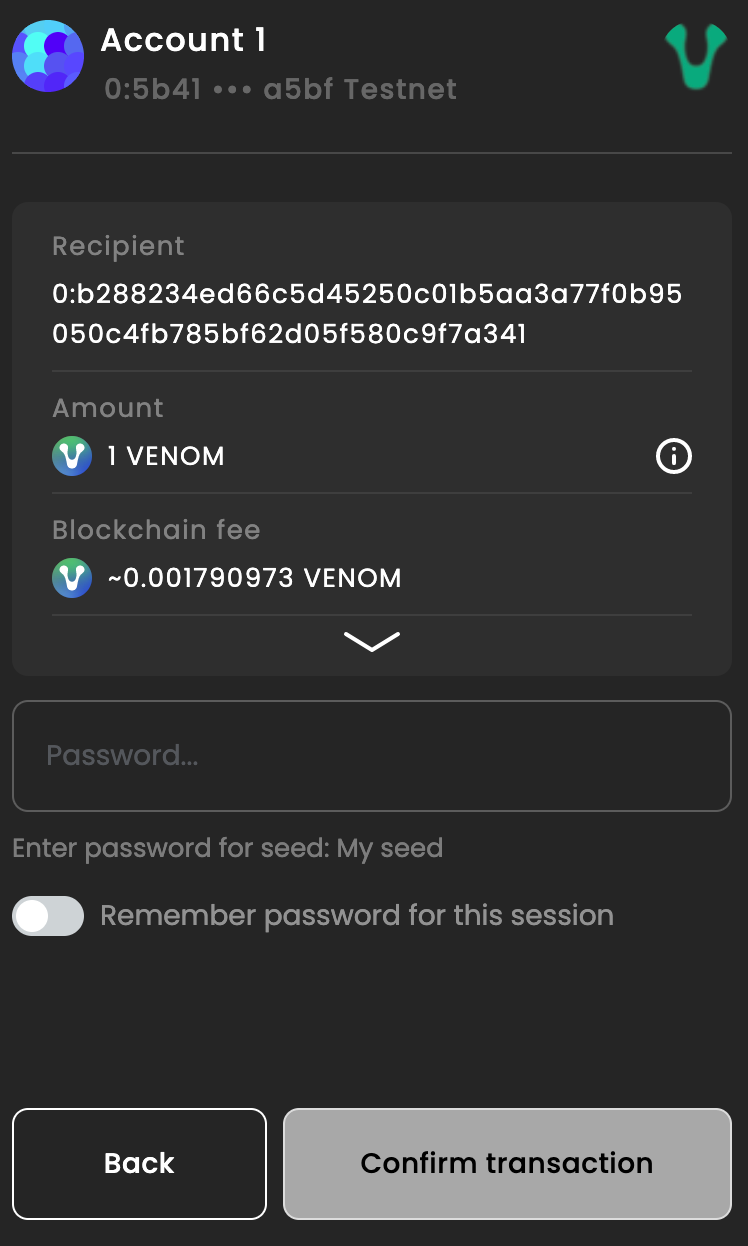
a. Click on either “Mint” button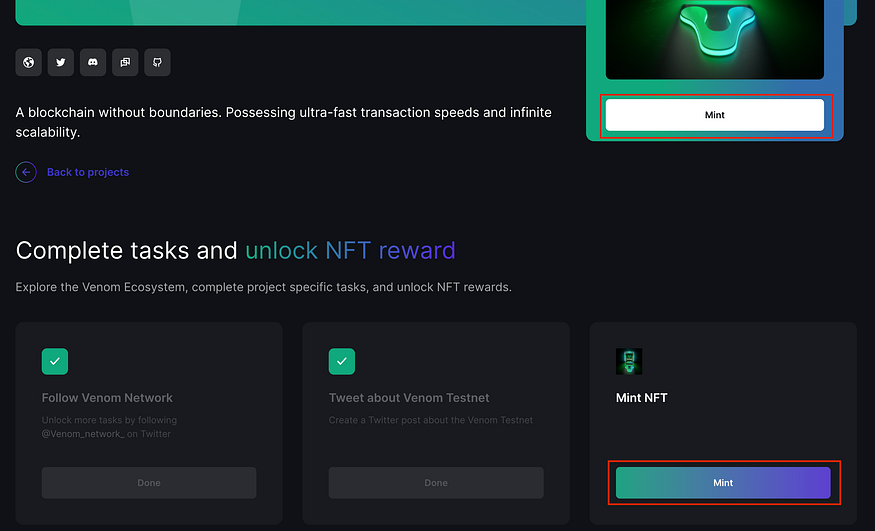 b. The Venom Wallet will open a new window asking you to confirm the transaction. Enter your wallet password and click on “Confirm transaction” in the bottom right to continue.
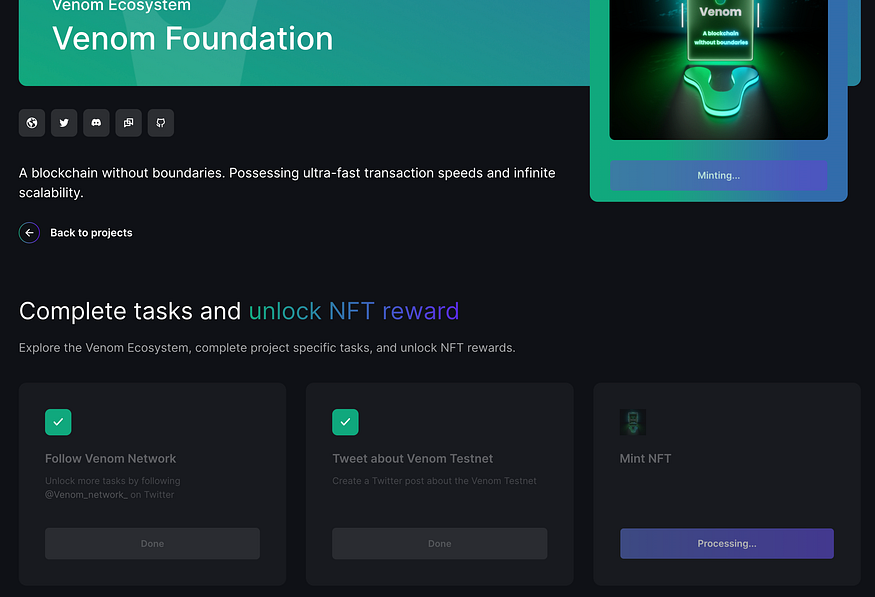
 c. Once the transaction is confirmed, you will see the buttons change to “Minting” and “Processing”. Please be patient during this time, as in some cases in can take up to 20 seconds for the minting process to complete.
 d. Congratulations on earning your first Venom NFT! Its now time to move on to interacting with our dApps, starting with the Venom Wallet.
Venom Wallet
- Send VENOM from your Venom Wallet
To send tokens through your wallet, follow these steps:
a. Open your wallet and click on the “Send” button located in the middle of the wallet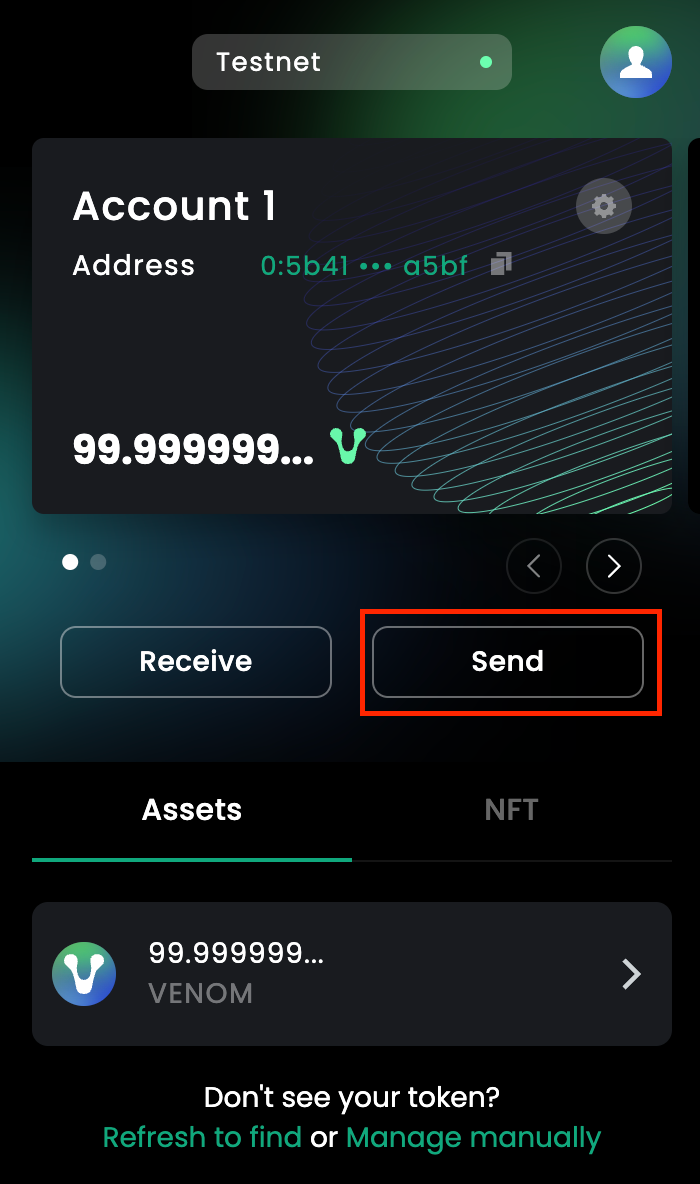 b. In the “Receiver address” box, input the following contract address: 0:077873f1453fa67b0f1ce77f1e806675acd19c4694b9738be61fd406618f2f7a
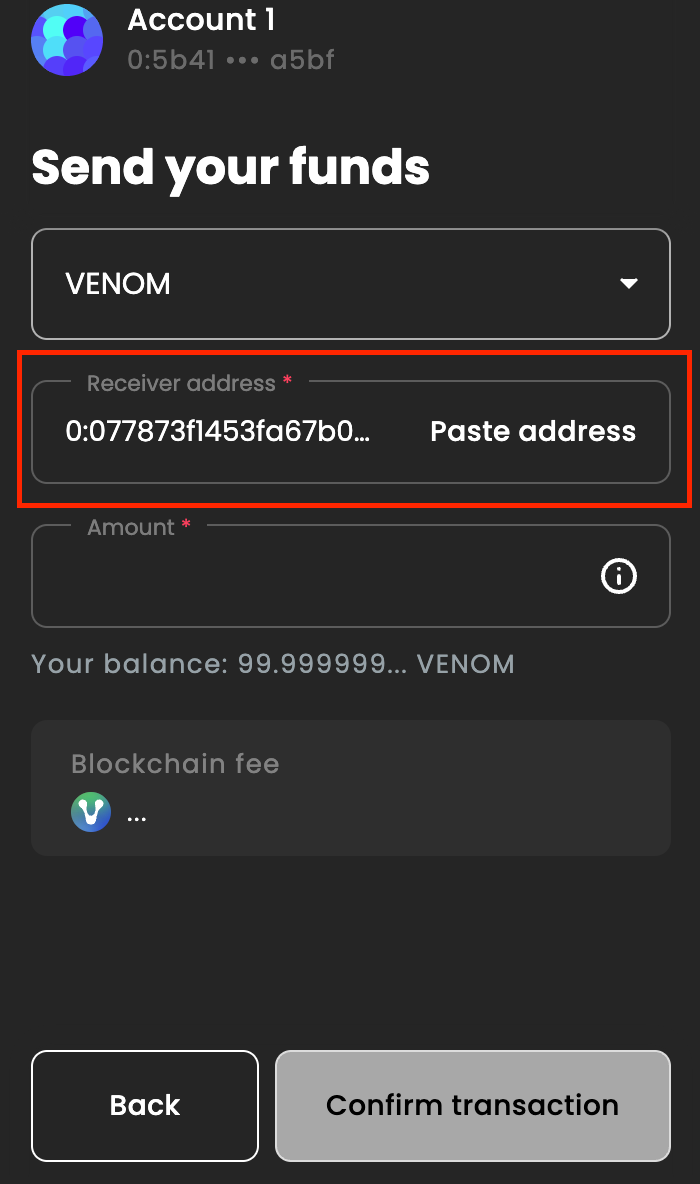 c. In the “Amount” box, enter 1 VENOM. Sending as little as 1 VENOM is enough to qualify for the activity. Next, click on “Confirm transaction”.
 d. Once the transaction has been sent, you will be shown the following screen:
 2. Mint NFT
Follow these steps to mint your Venom Wallet Testnet NFT.
a. On the Venom Wallet task list, click on either “Mint” button displayed.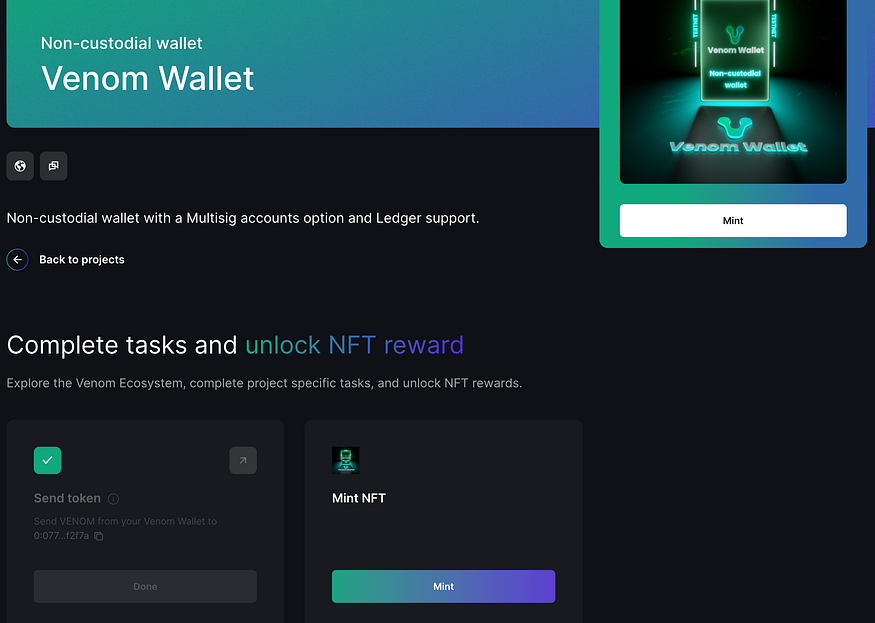 b. Confirm the transaction through your wallet by entering your password and clicking “Confirm Transaction”
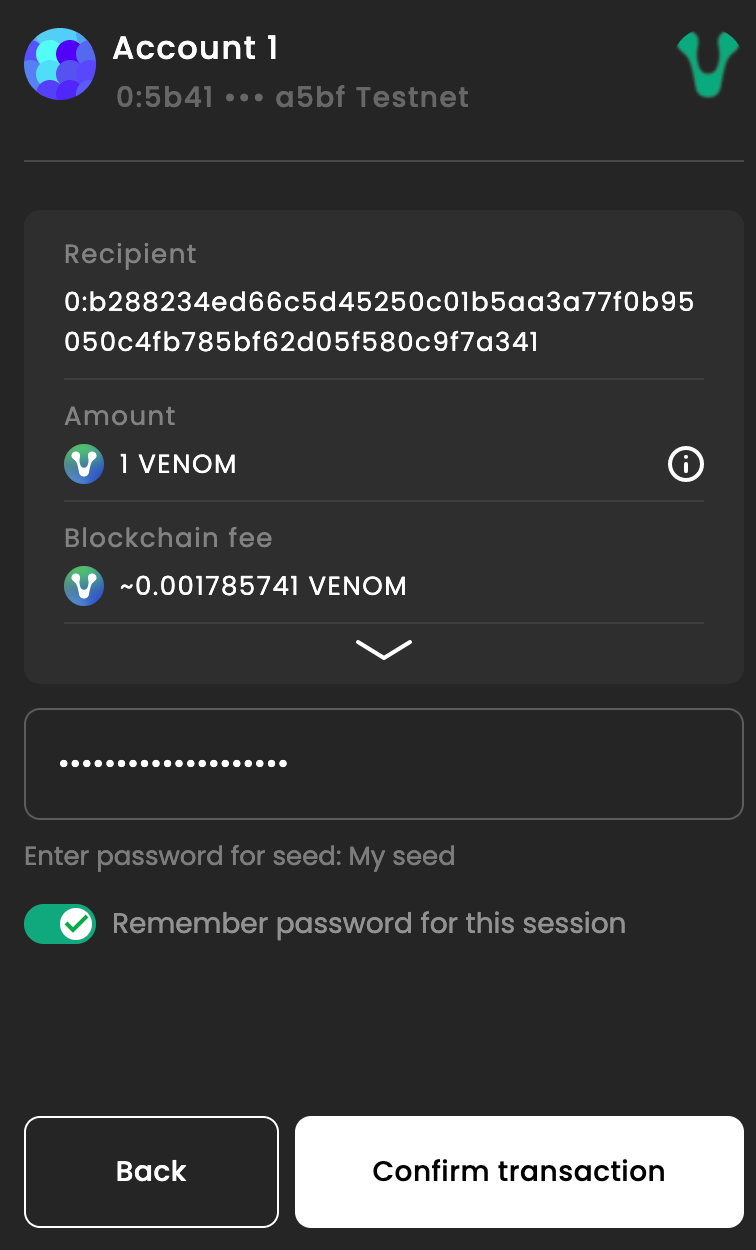 c. Once the transaction has finished processing, you will be rewarded with a Venom Wallet Testnet NFT.
Web3 World
- Follow Web3.World on Twitter
a. Click the “Follow” Button under the task. This will open up a new window on Twitter.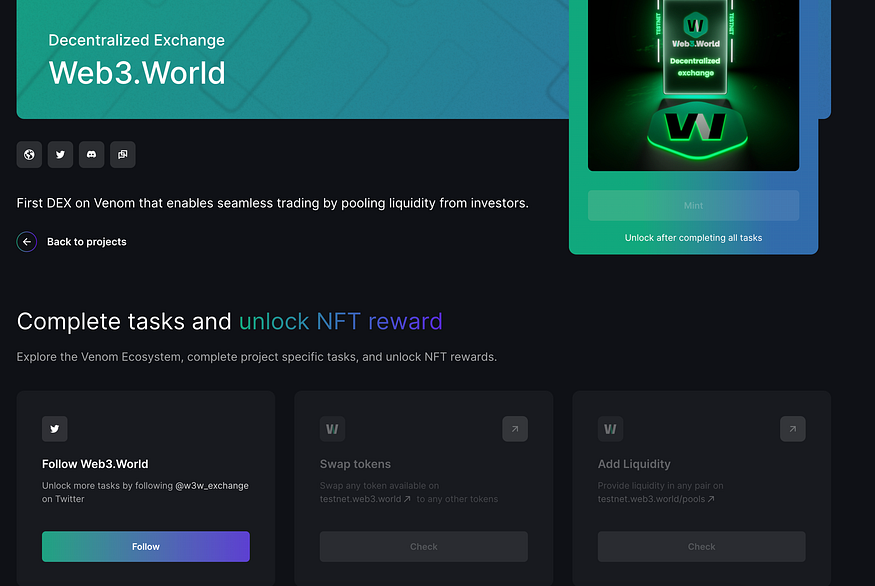 b. Click on “Follow” to follow Web3.World on Twitter.
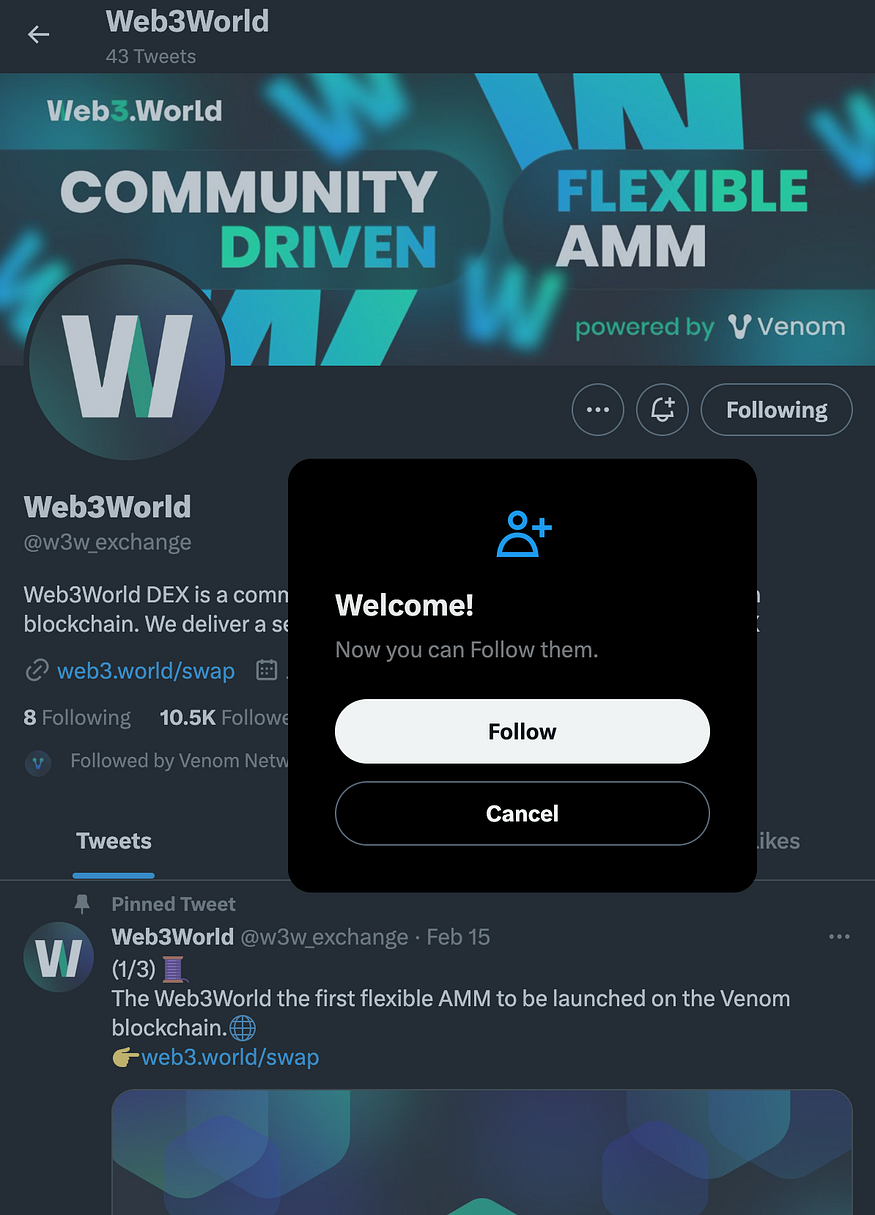 c. Return back to the Web3.World task list to verify that you have completed the task.
2. Swap Tokens
Follow these steps to swap your VENOM for USDT
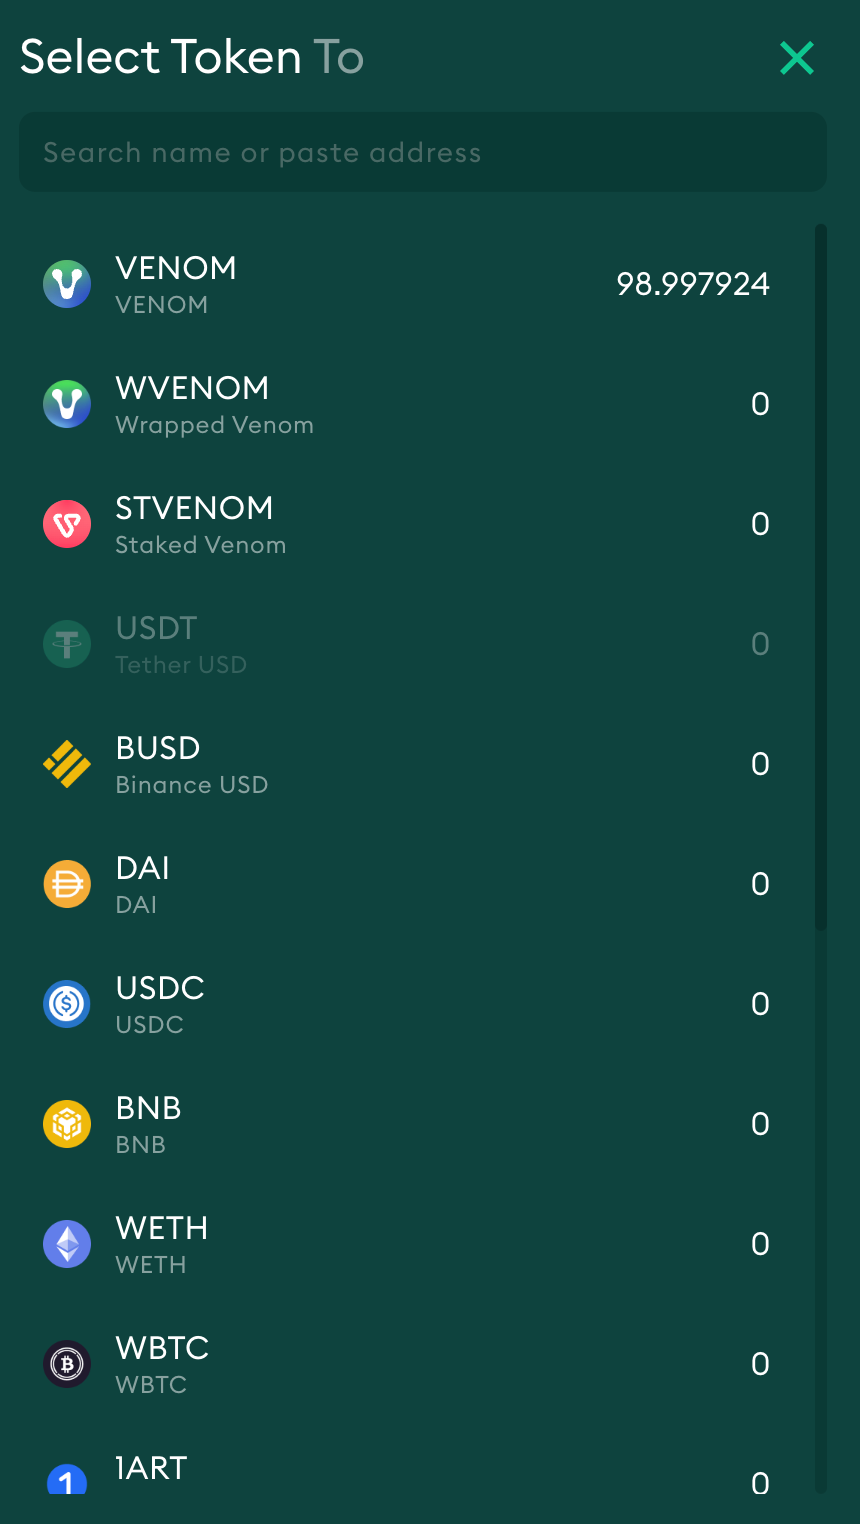
a. On Web3World, you will be presented with two boxes, asking you which tokens you want to convert. By default, the “From” is set to Venom, and “To” is set to USDT. However, there is a range of testnet tokens that you can exchange.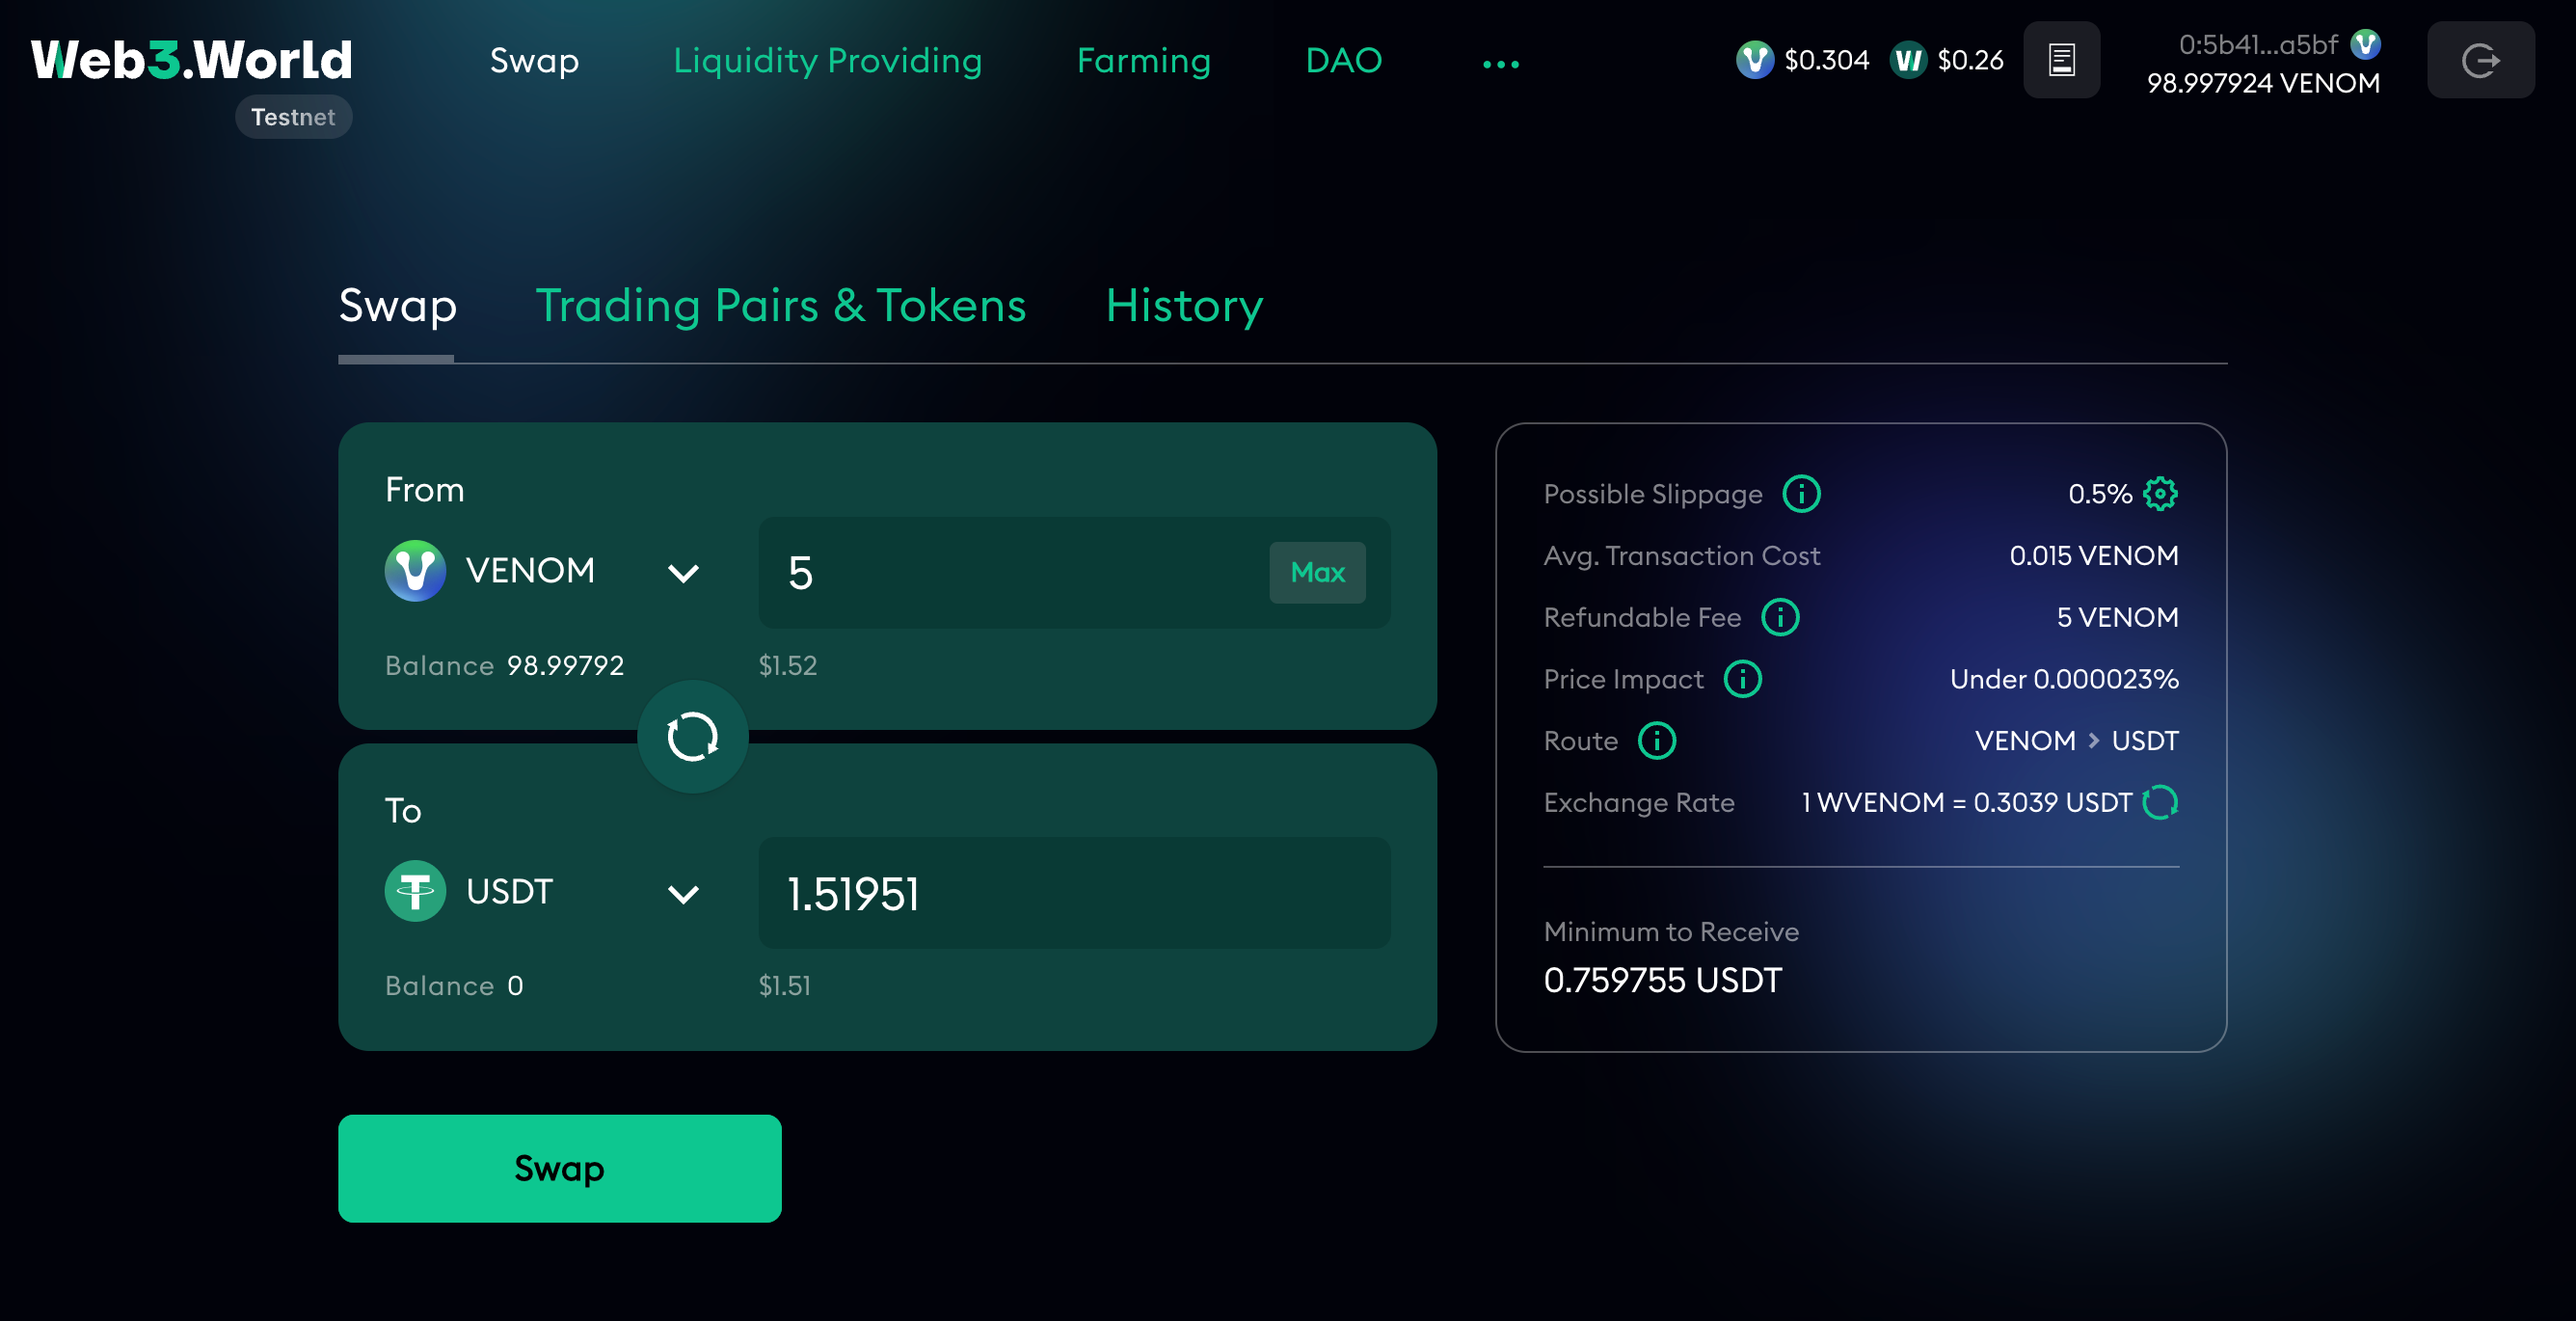
 b. Input the amount of Venom you want to convert in the “From” box. In this example, we will be transferring 5 VENOM. You will see a number appear in the “To” field, indicating how much USDT you will receive. Click on “Swap” to exchange your tokens.
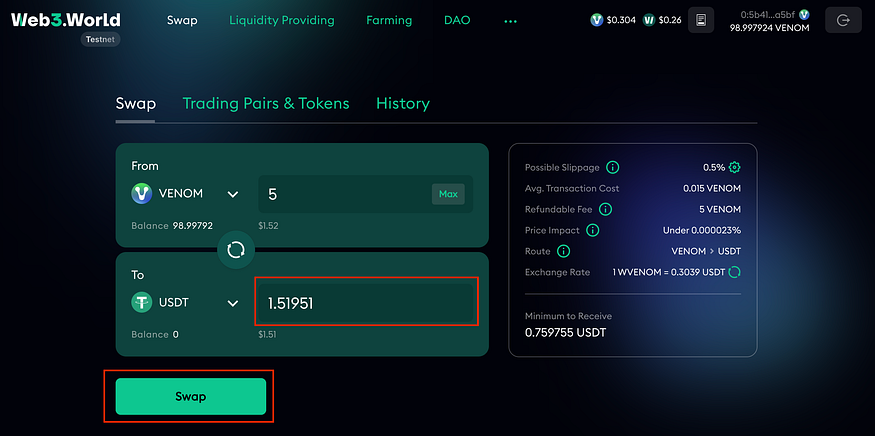 c. A popup will appear asking you to confirm your transaction. Click on “Confirm” to continue.
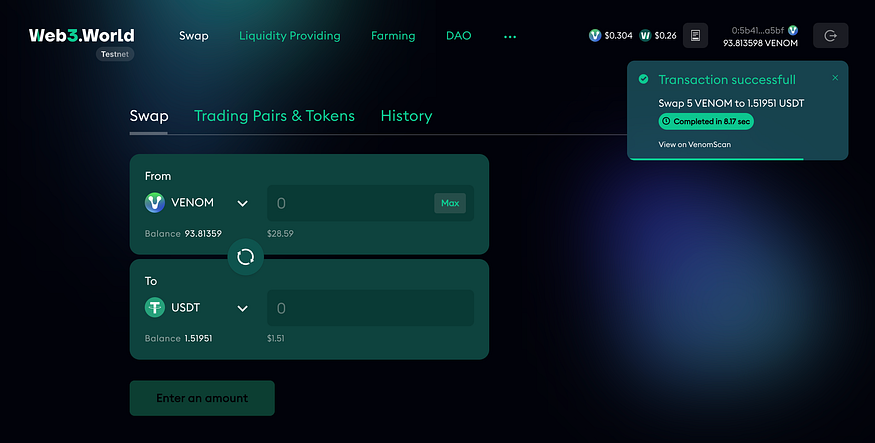
d. The Venom Wallet will now open, you will need to click on “Confirm transaction” to proceed e. Once the transaction has gone through, on the top right of your browser screen you will get a pop-up confirming the transaction.
 3. Add Liquidity
Follow these steps to learn how to add liquidity to different pairs. In this example, we will be providing liquidity to “USDT/WVENOM”
a. The first step is to acquire Wrapped VENOM. To do this, follow the steps. for the previous task to exchange your VENOM tokens for WVENOM.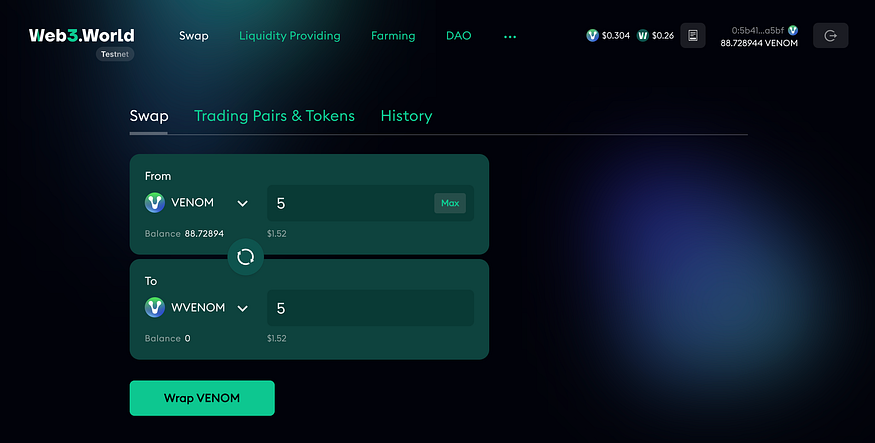 b. Navigate to “Liquidity Providing” in the navigation bar at the top.
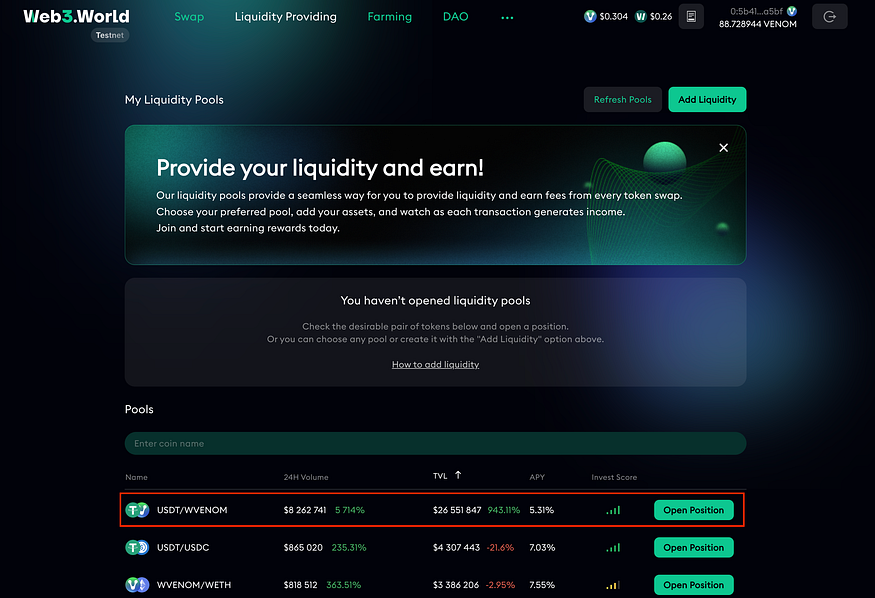
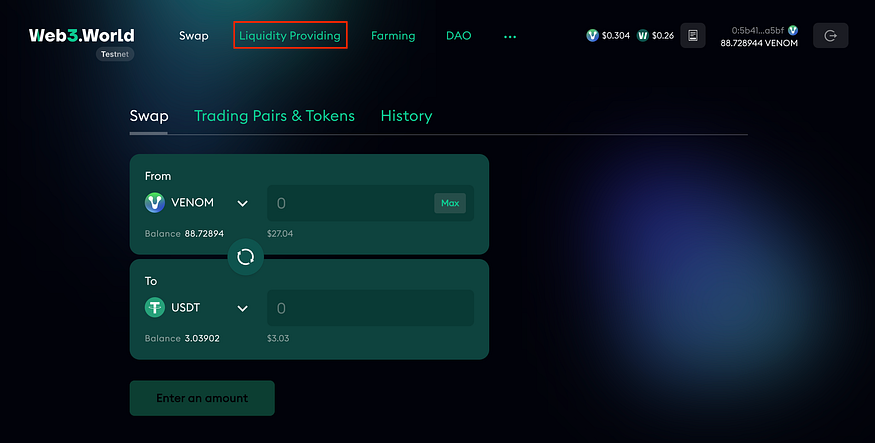 c. USDT/WVENOM are the first pairs on the list. You will be presented with different statistics regarding this pair such as the 24H volume, TVL, and APY. To open a position, click “Open Position”
 d. Click on “Connect Account” right at the bottom to connect your wallet. You will need to confirm this transaction through a Venom Wallet pop-up.
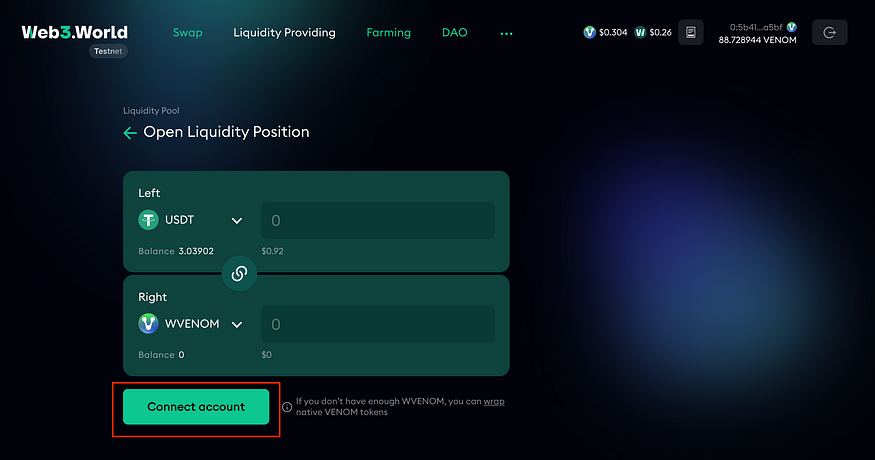 e. You will get a confirmation that your account has been connected through a pop-up notification in the top right of your browser.
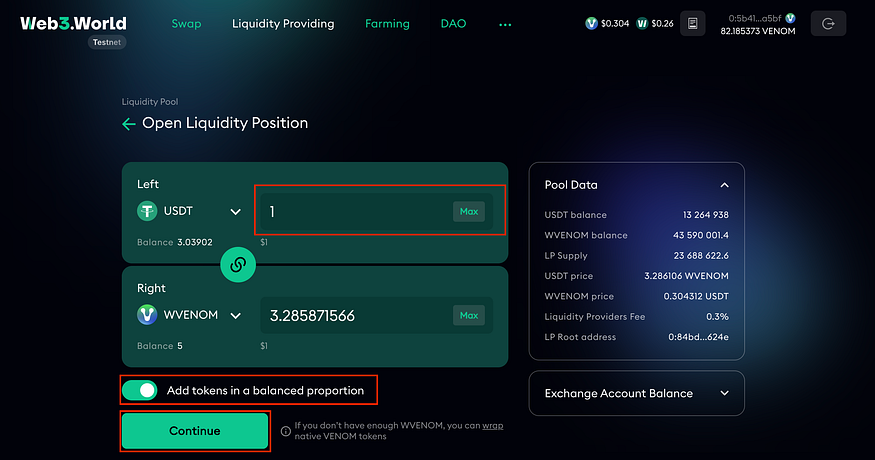
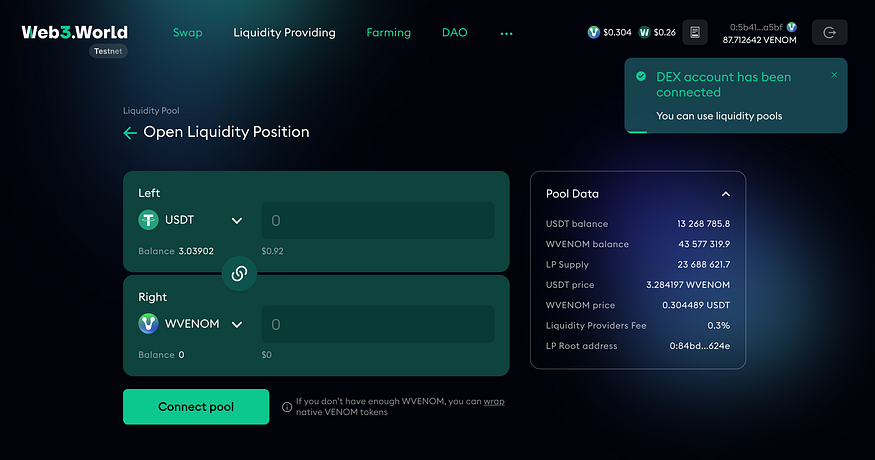 f. Input “1 USDT” into the top box. You can choose to add tokens in a balanced proportion by clicking the toggle above to continue, by doing this, the number in the bottom field will auto-fill.
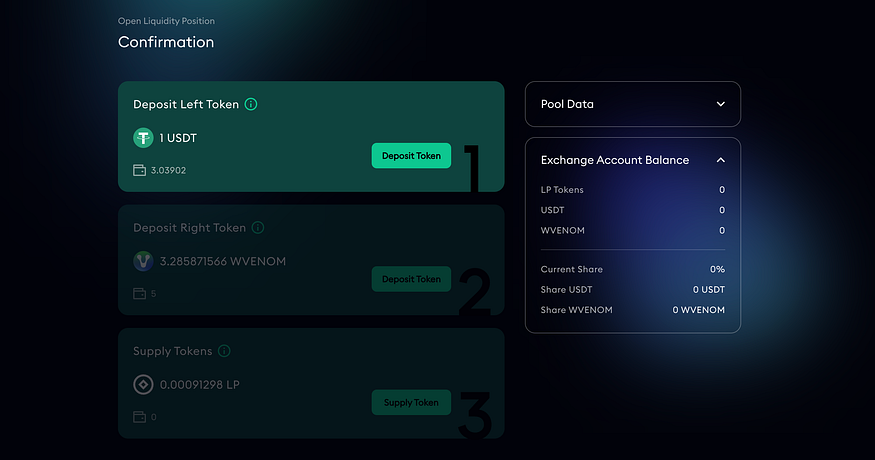
 g. You will need to deposit tokens in the form of USDT and WVENOM in exchange for supply tokens. Click on “Deposit Token” for the first two tokens. The Venom Wallet will pop-up asking you to confirm each transaction.
 h. Once all steps are complete, you can click on “Supply Token” to receive your liquidity pool supply tokens. Again, you will be asked to confirm the transaction.
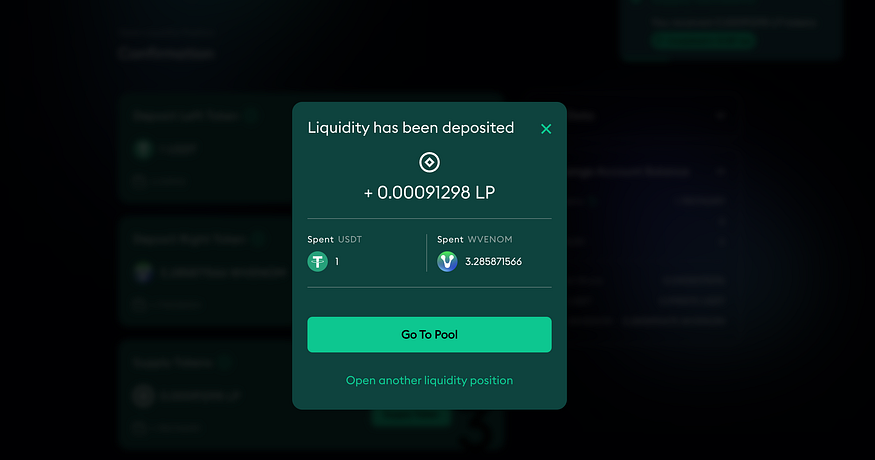
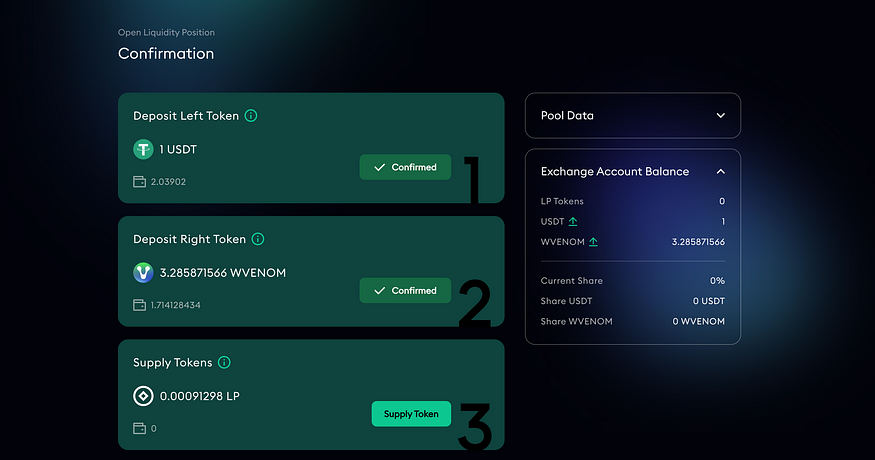 i. A pop-up will appear confirming you have received LP tokens. You have just provided liquidity to USDT/WVENOM. Feel free to provide liquidity to other pairs by following these same steps.
 4. Farm Assets
Follow these steps to learn how to contribute your LP tokens to a farming pool.
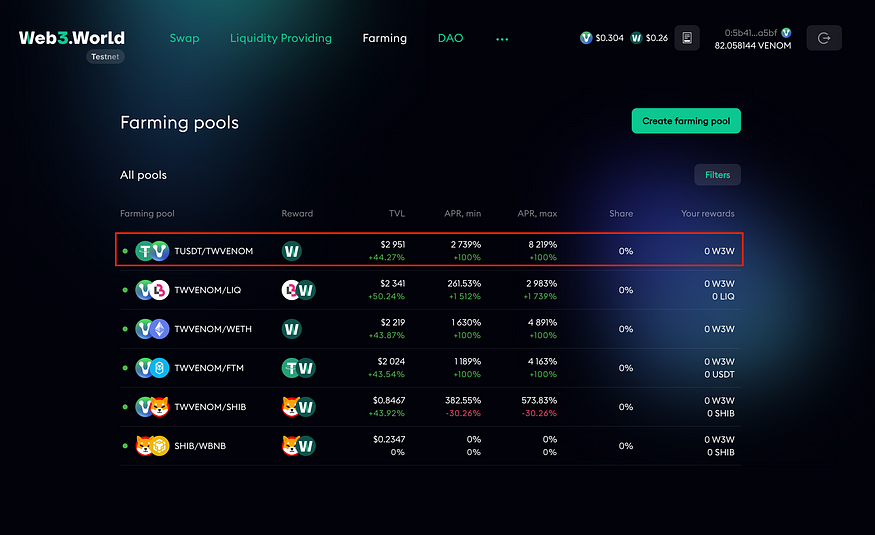
a. On the W3W homepage, hover over “Farming” in the navigation bar, and click on “Farming pools” in the drop-down menu.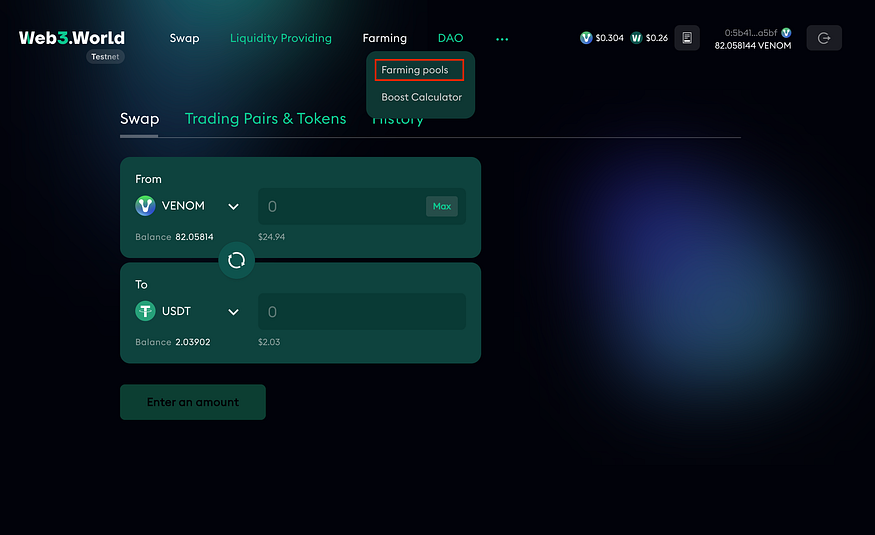 b. As we have provided liquidity to USDT/WVENOM, we will be selecting this pool. Click on the text for “TUSDT/TWVENOM”.
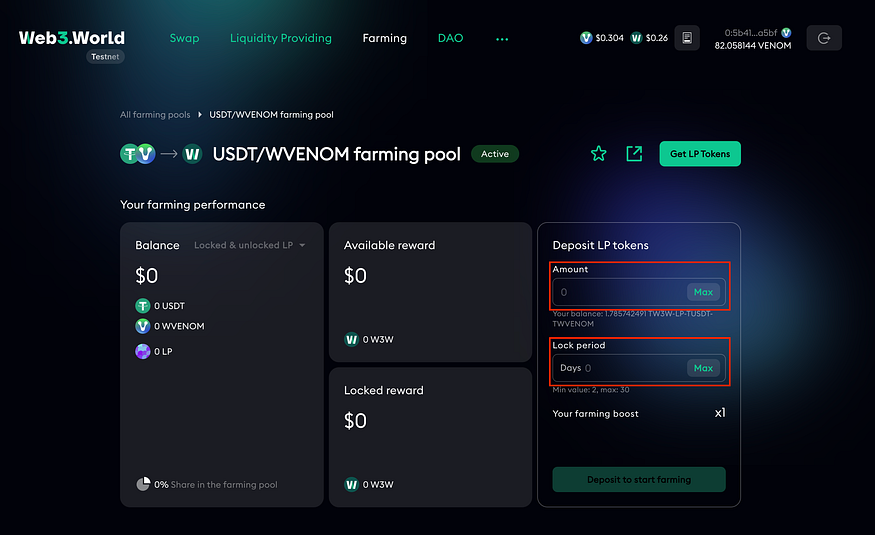
 c. On the USDT/WVENOM farming pool page, you will see an option to deposit your LP tokens. Click on “Max” for both the “Amount” and “Lock Period” boxes. Once you have done this click on the “Confirm” box. The Venom Wallet will pop up asking you to confirm the transaction. Confirm to proceed.
 d. You have deposited your LP to a yield farming pool. You can proceed back to the task page to collect your NFT.
5. Mint NFT
Follow these steps to mint your Web3.World NFT
a. Click the “Mint” button underneath the picture of the NFT. b. The Venom Wallet will pop up. Enter in your password and click “Confirm Transaction”
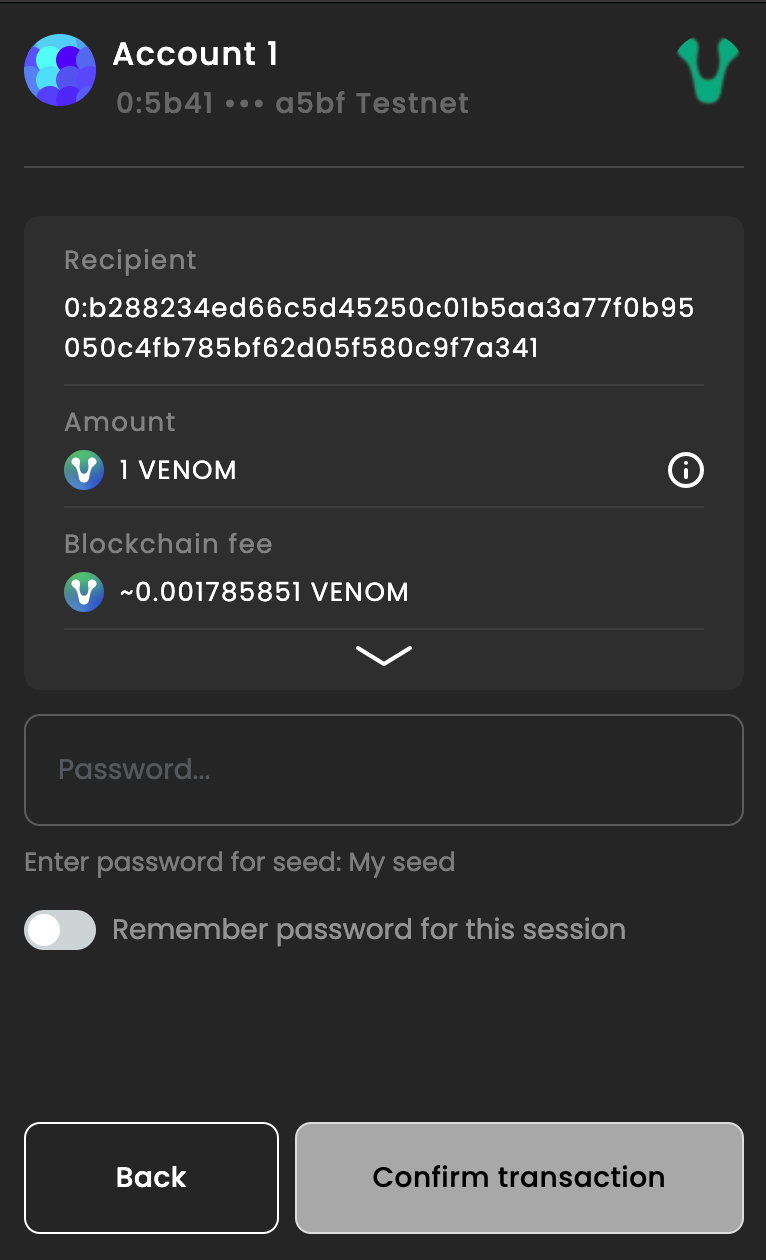 c. Please allow time for the transaction to process. Once it is done you will receive your Web3.World NFT.
Venom Pools
To stake tokens in Venom Pools, follow these steps.
a. Click on “Venom Pools” in the “Products accessible on Testnet” section.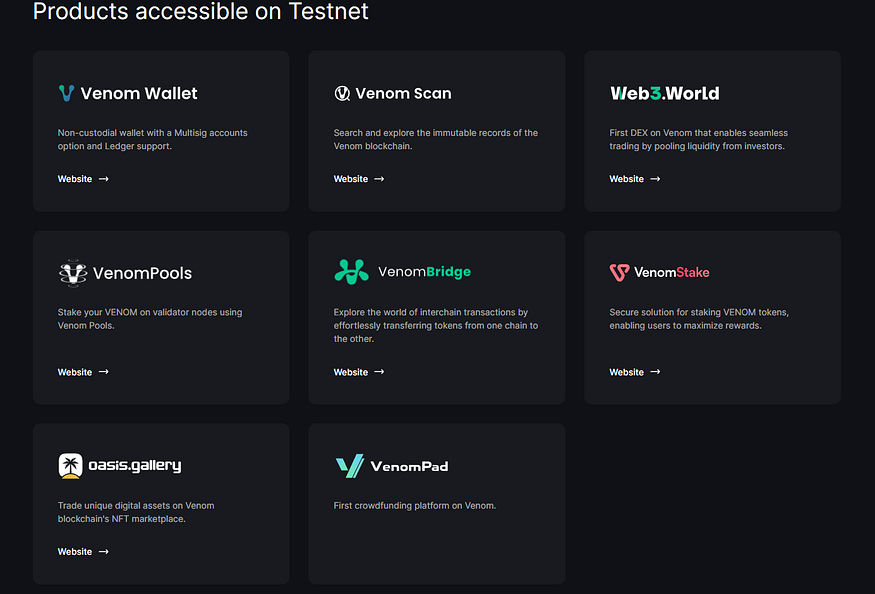 b. Browse available pools and choose one with a favorable APY.
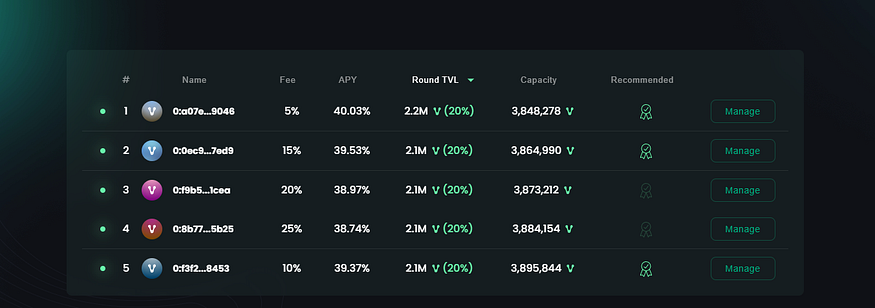 c. Click “Manage” next to the chosen pool.
 d. Connect your wallet and enter the number of tokens you want to stake. (Select “Stake Venom”)
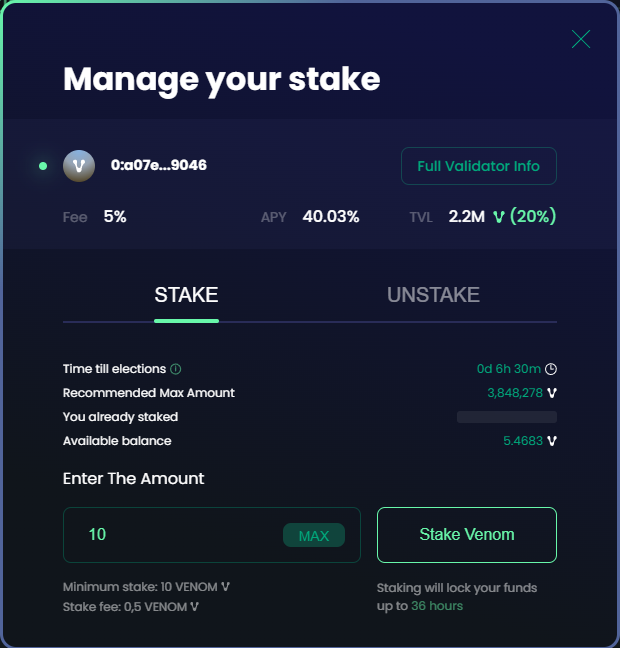 e. Confirm the transaction in your wallet.
2. Mint NFT
Follow these steps to mint your Venom Pools NFT
a. Click on either “Mint” button b. The Venom Wallet will appear as a pop-up window. You will need to confirm the transaction
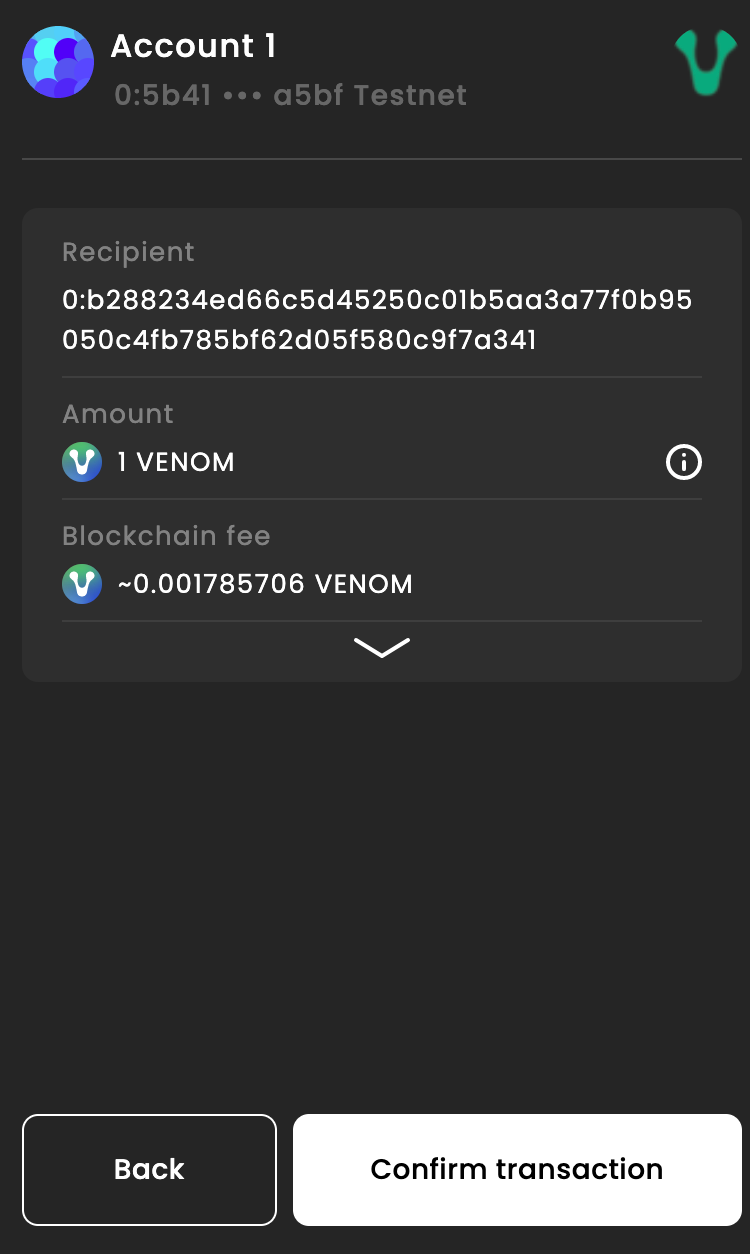 c. Once you confirm the transaction, please allow enough time for the transaction to process. You will get a confirmation confirming the transaction
d. You have successfully minted the Venom Pools Testnet NFT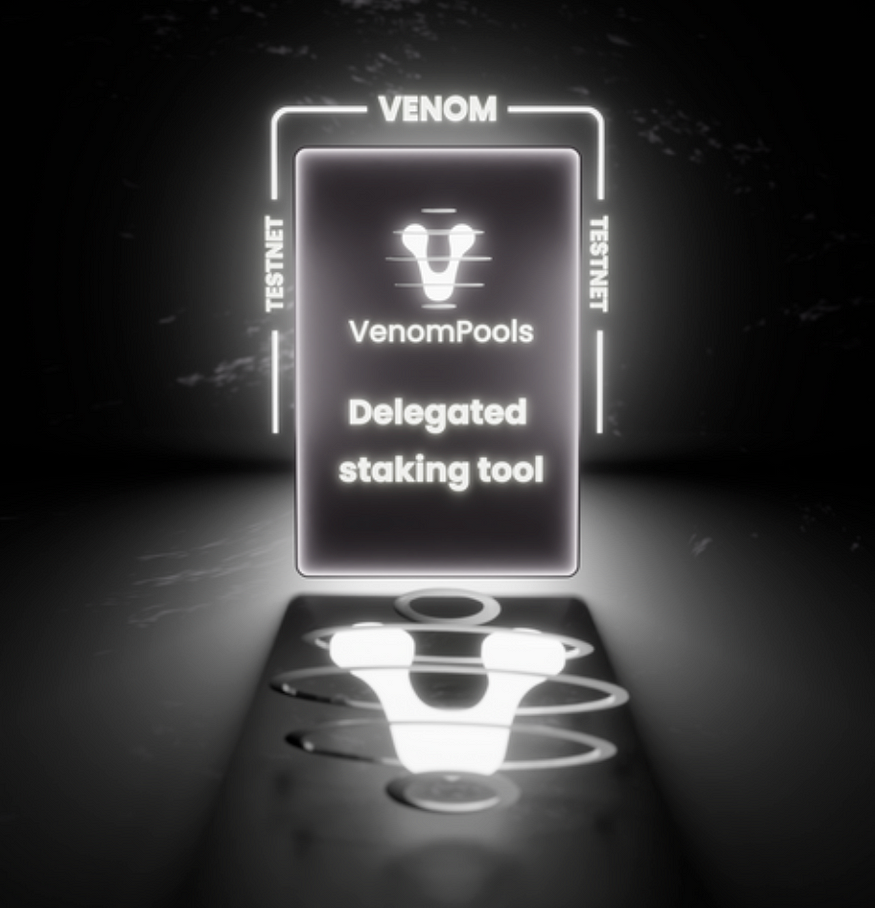
Venom Bridge
- Follow Venom Bridge
Follow these steps to follow Venom Bridge on Twitter
a. Click on the “Follow” button on the Venom Bridge task list.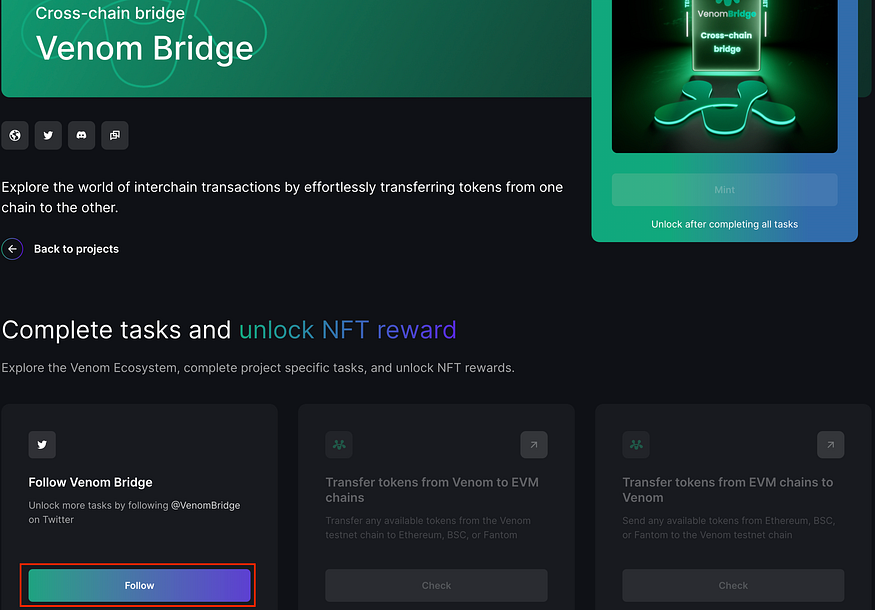 b. Twitter will appear in a new tab. Here you will need to click on the “Follow” button to follow the Twitter page.
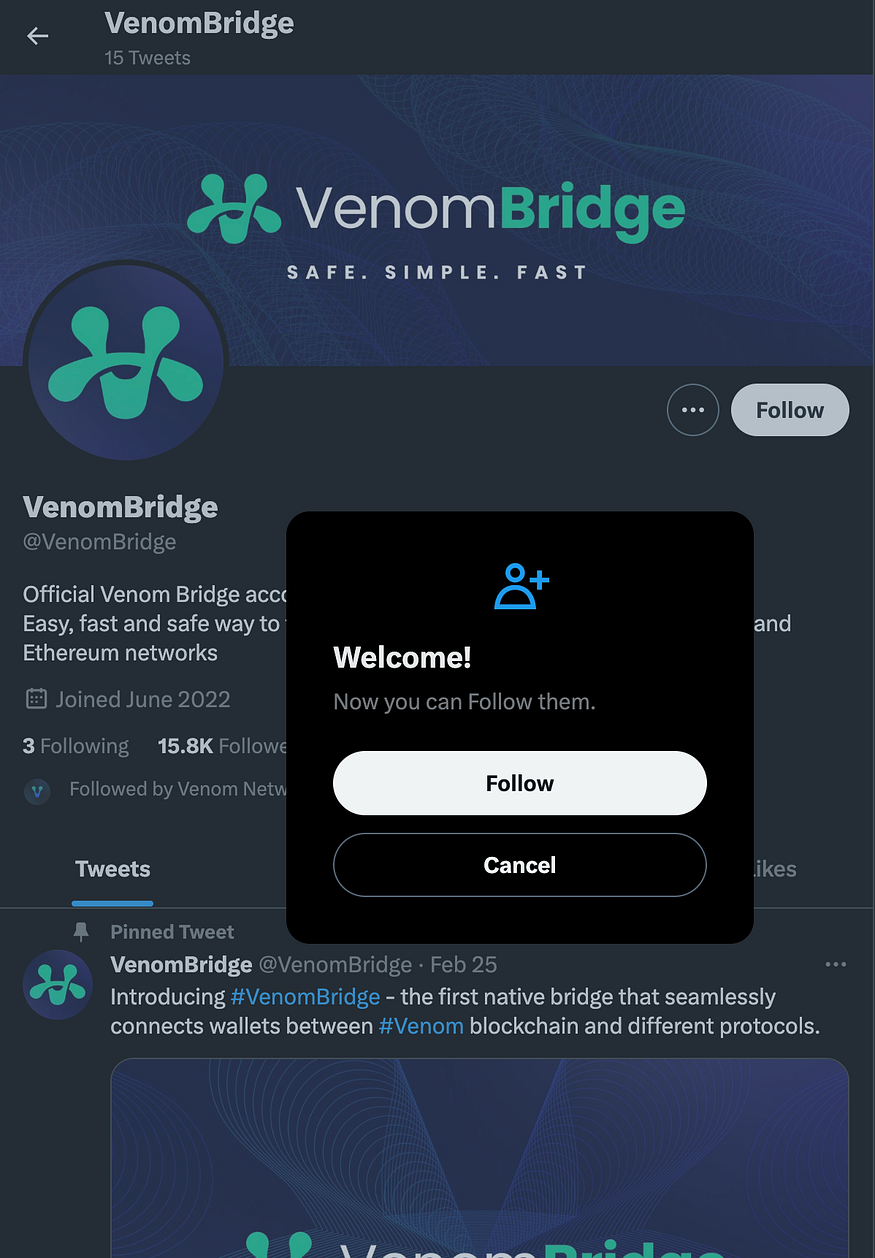 c. Return back to the Venom Bridge task list and click on the “Check” button to verify that you followed the Twitter page.
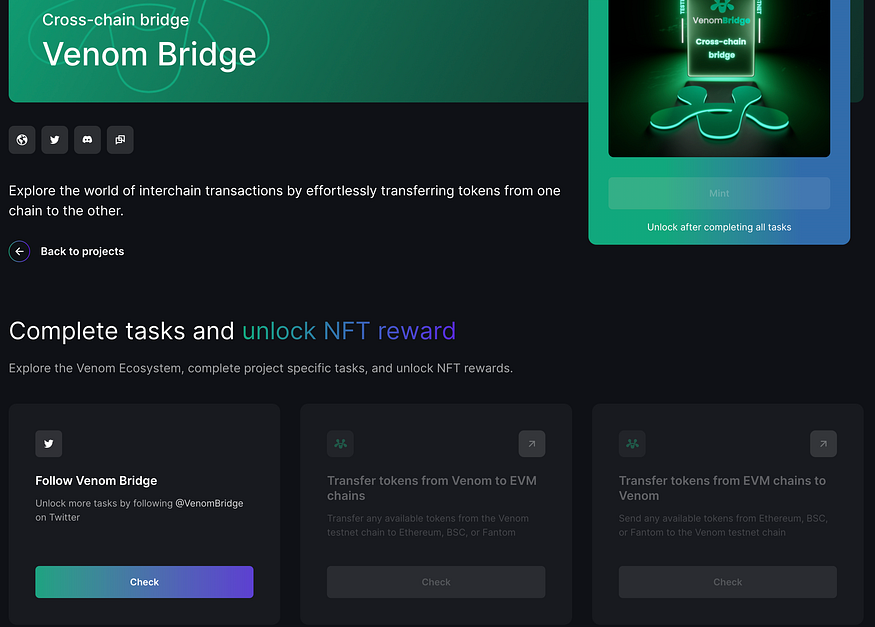 d. You will receive a confirmation message stating that the task has been completed.
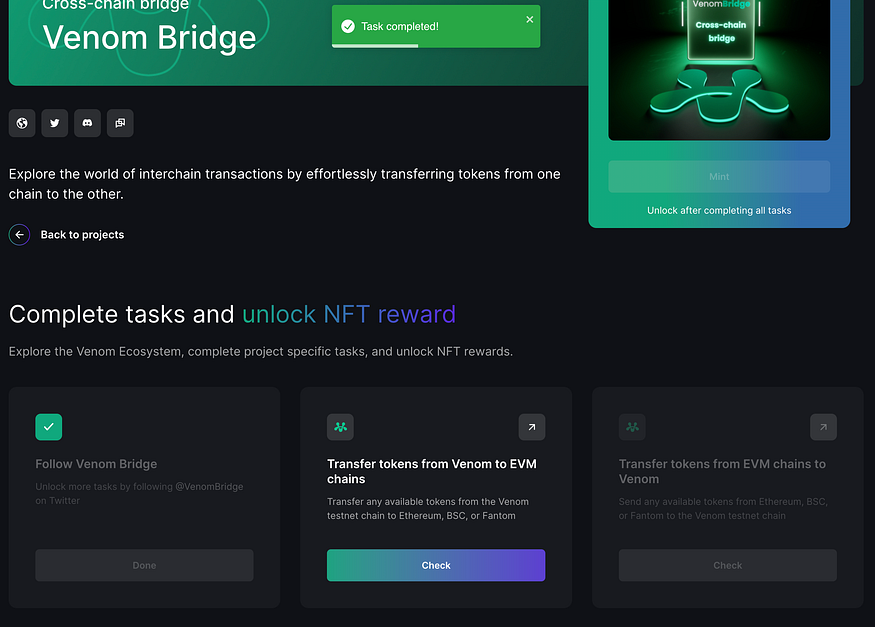 2. Transferring tokens from the Venom Testnet to an EVM Chain
To transfer tokens from the Venom Testnet to an EVM Chain (e.g., Ethereum, Binance Smart Chain, or Fantom), follow these steps:
a. Visit the Venom Bridge website. This can be found in the “Products accessible on Testnet” section. b. Connect your Venom-compatible wallet at the top right of the webpage.
 c. Select the tokens you want to transfer and enter the desired amount.
 d. Select a chain in the “To” box. To keep fees low, it is recommended to either choose “Binance Smart Chain” or “Fantom Opera” over “Ethereum”
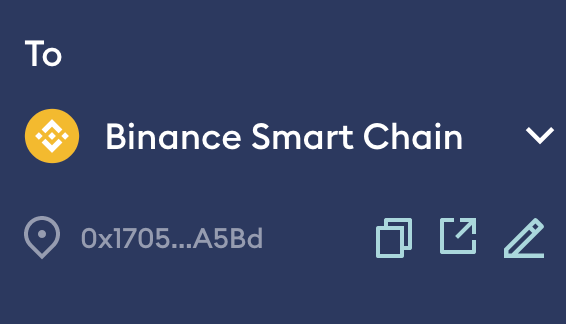 e. Click “Continue” and confirm the transaction in your wallet.
 3. Transferring tokens from an EVM Chain to the Venom Testnet
To transfer tokens from an EVM Chain to the Venom Testnet, follow these steps:
a. Visit the Venom Bridge website. Found in the “Products accessible on Testnet” section. b. Connect your EVM Chain-compatible wallet at the top right of the webpage.
 c. In the “From” box it is recommended to choose either “Biannce Smart Chain” or “Fantom Opera” to keep fees low.
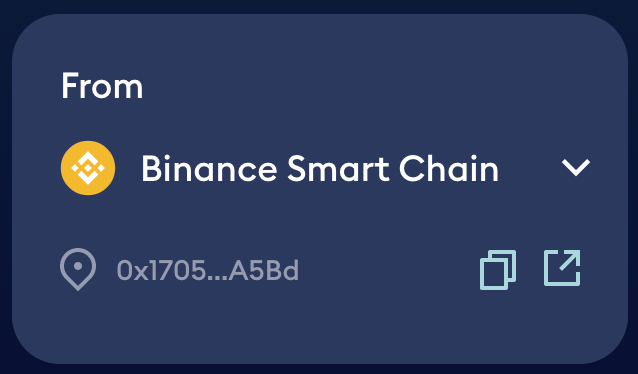 d. Choose the Venom Testnet from the dropdown menu to send to.
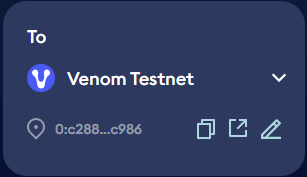 e. Click “Continue” and confirm the transaction in your wallet.
 4. Mint NFT
Follow these steps to mint your Venom Bridge NFT
a. Click on the “Mint” button under the NFT display. b. A pop-up for Venom Wallet will appear, confirming the transaction to continue.
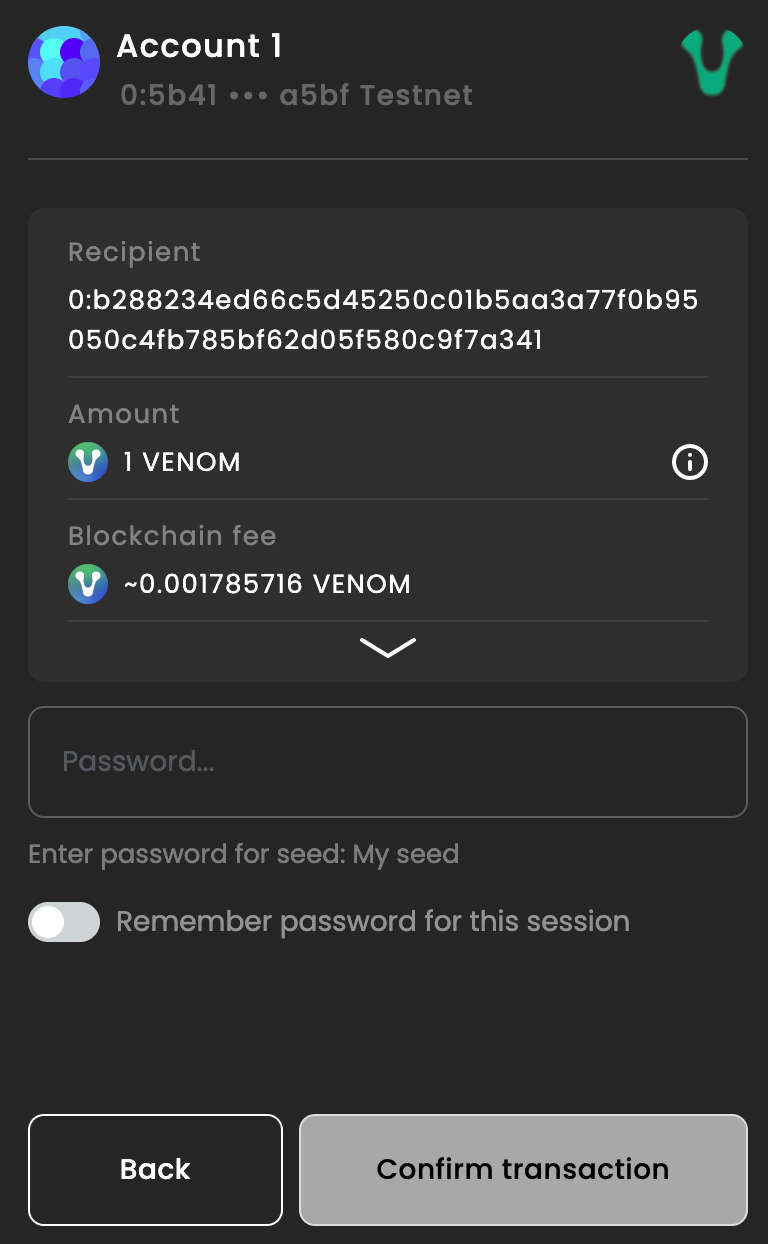 c. Once the transaction has been processed, you will receive your Venom Bridge Testnet NFT.
Venom Stake
To stake tokens in Venom Stake, follow these steps:
a. Click on “Venom Stake” in the “Products accessible on Testnet” section. b. Connect your wallet and enter the amount of tokens you want to stake. Once you decided how much you want to stake, click on “Stake”.
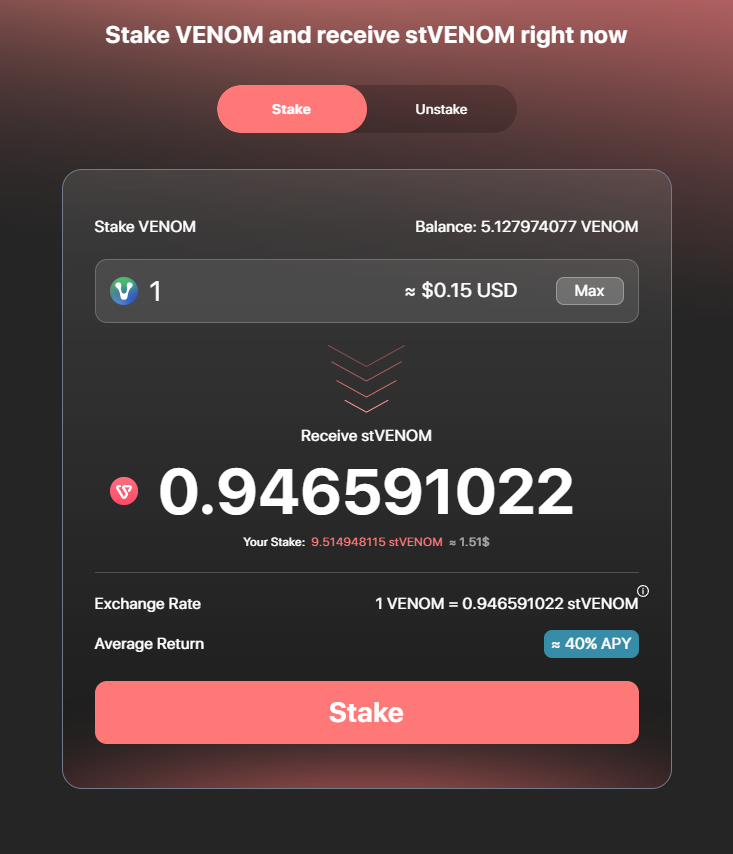 c. Confirm the transaction in your wallet.
2. Mint NFT
Follow these steps to mint your Venom Stake Testnet NFT
a. Click on either “Mint” button on the Venom Stake task list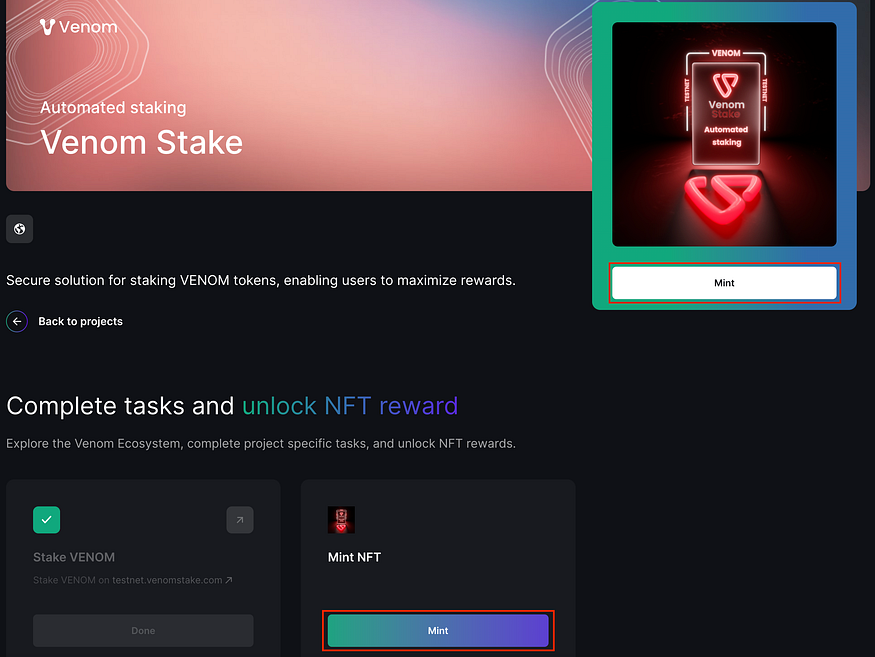 b. The Venom Wallet will appear as a pop-up, confirming the transaction to continue.
c. Once the transaction has been processed you will receive your Venom Stake Testnet NFT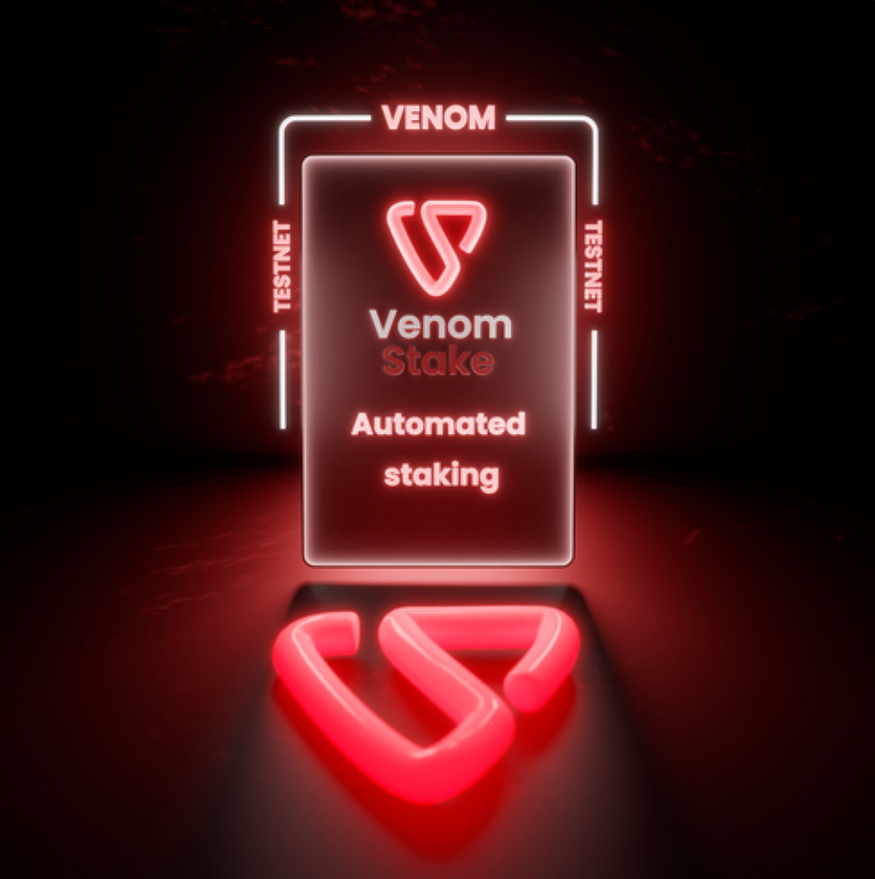
Oasis Gallery
- Follow Oasis Gallery
Follow these steps to follow Oasis Gallery on Twitter.
a. On the Oasis Gallery task list, click on the “Follow” button.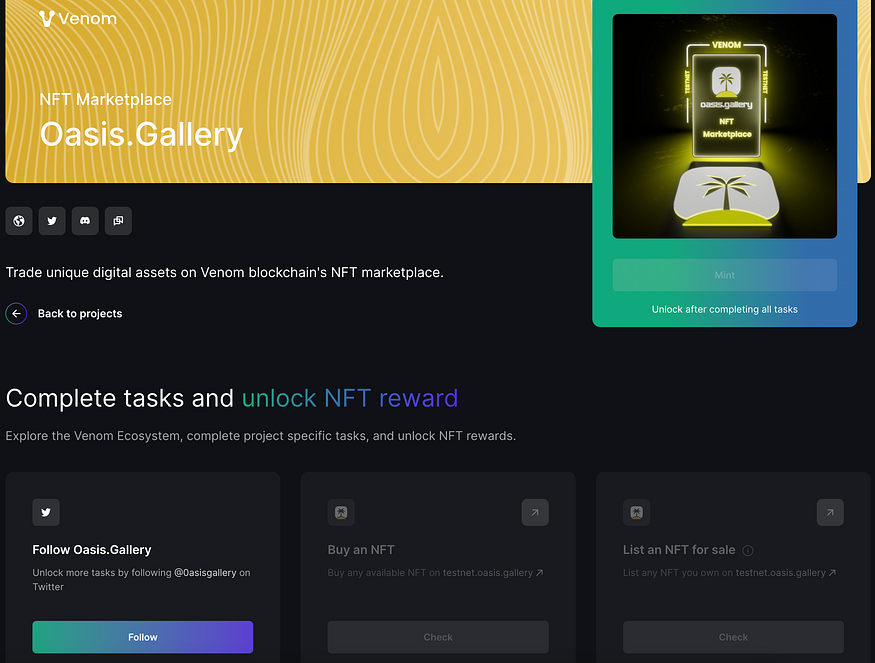 b. A new tab will open on Twitter asking for your permission to follow the account. Click on “Follow” to complete the task.
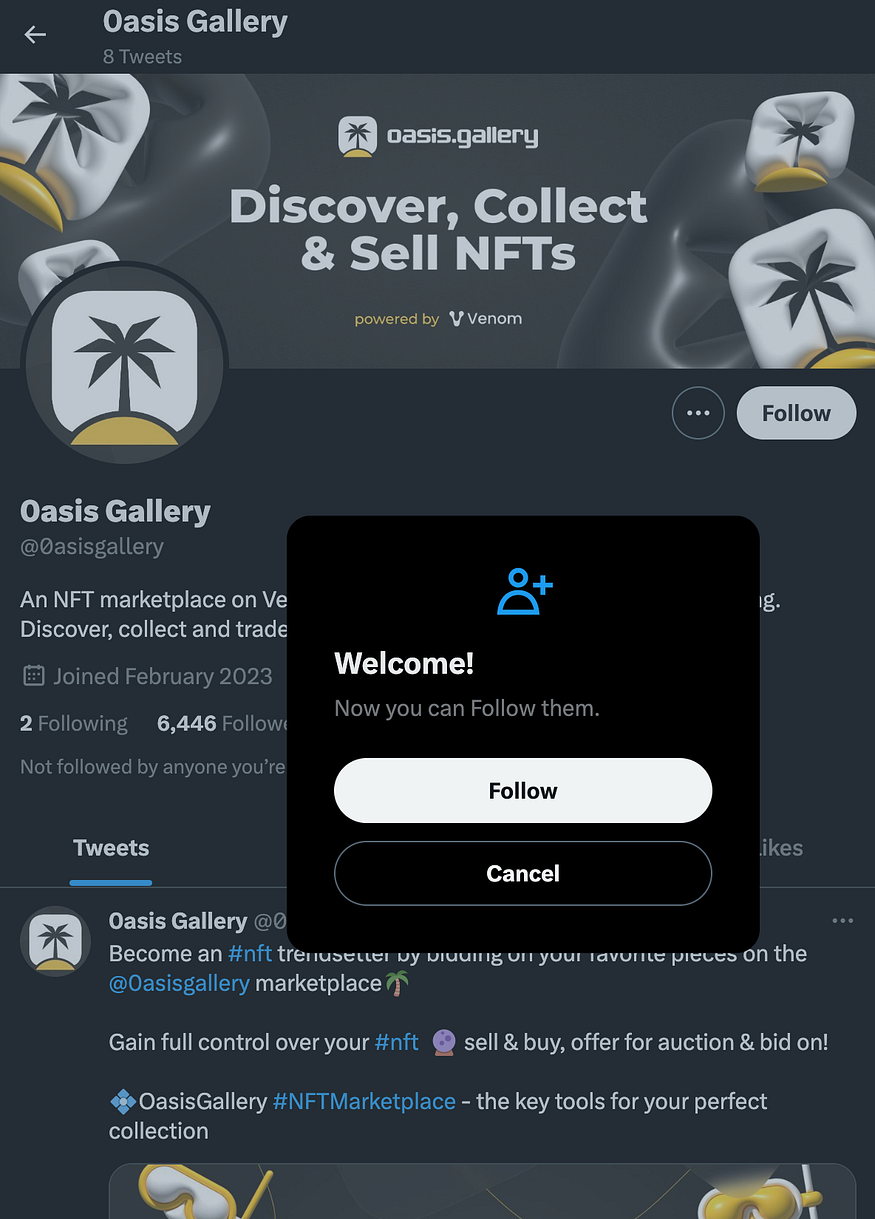 c. Return to the Oasis Gallery task list and click on the “Check” button. This will verify that you have followed the account.
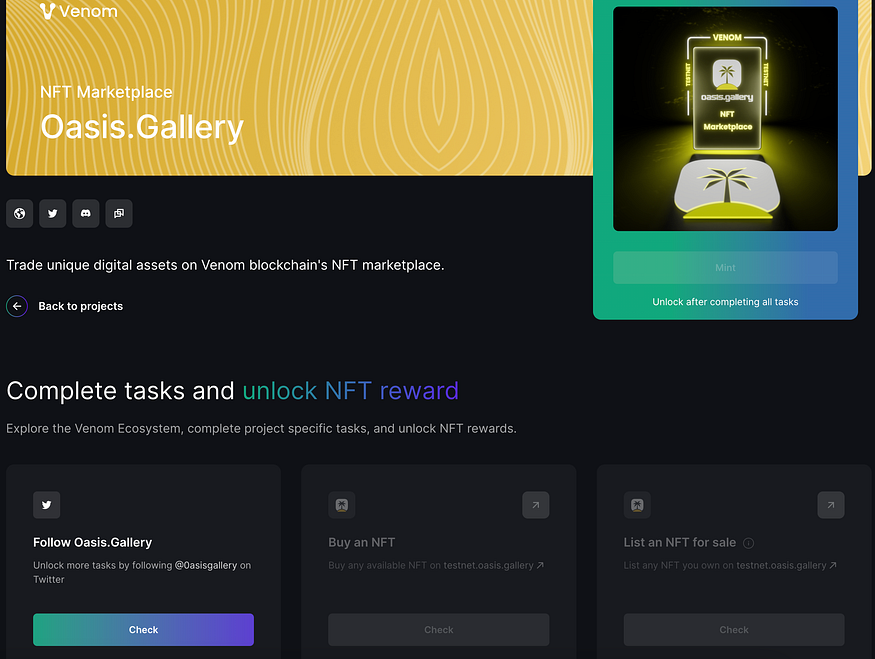 2. Buy an NFT
To explore the Oasis Gallery NFT Marketplace, follow these steps:
a. Click on “Oasis Gallery” in the “Products accessible on Testnet” section.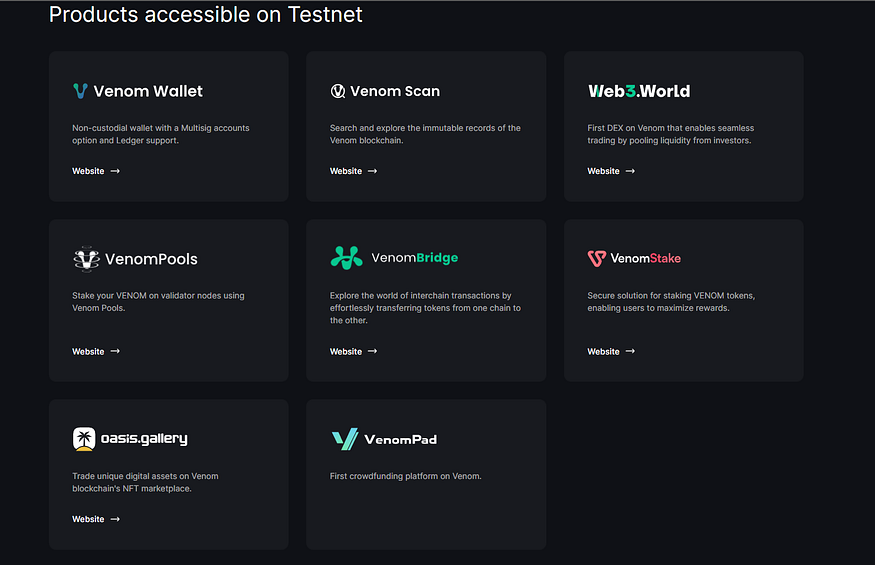 b. Browse available NFTs and select one you like.
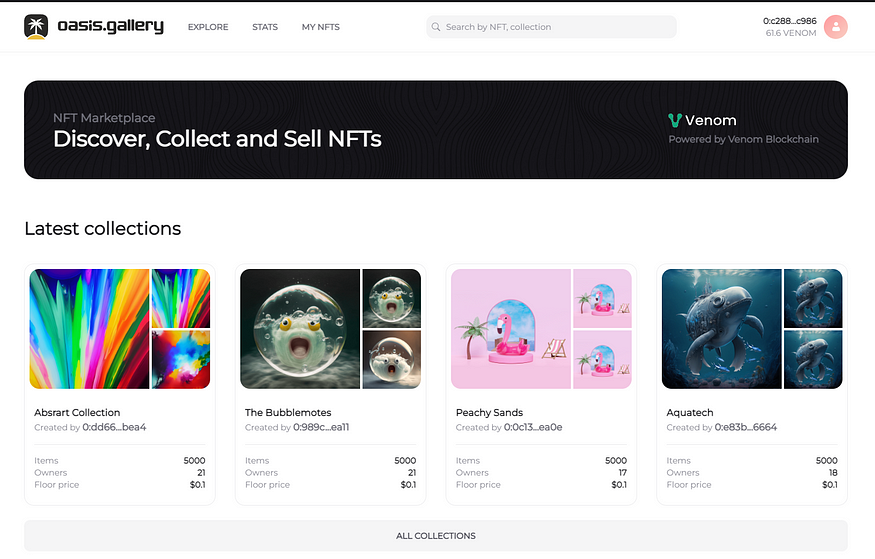 Here The Bubblemotes collection was selected.
 c. Click “Buy Now” and confirm the transaction in your wallet.
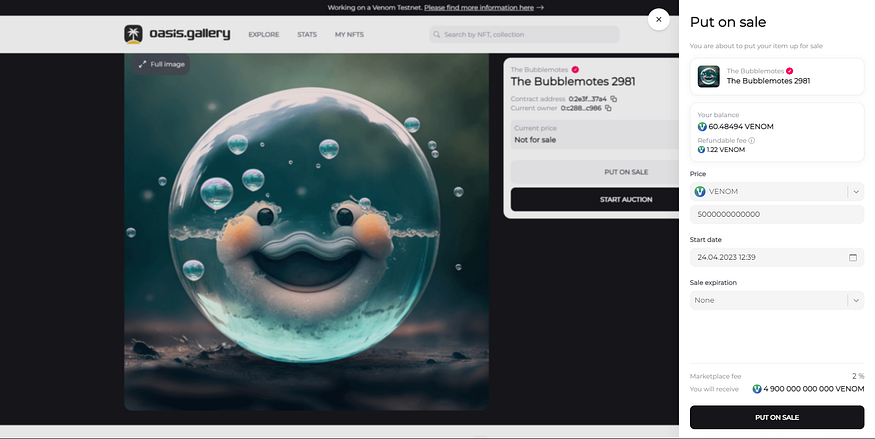
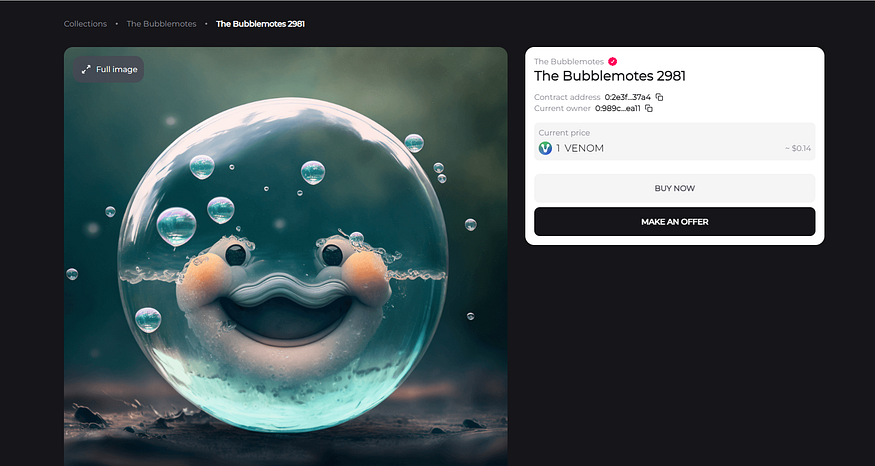 3. Listing an NFT for sale
To list an NFT for sale, follow these steps:
a. Go to your NFT collection in Oasis Gallery. Under “MY NFTS” b. Select the NFT you want to list for sale.
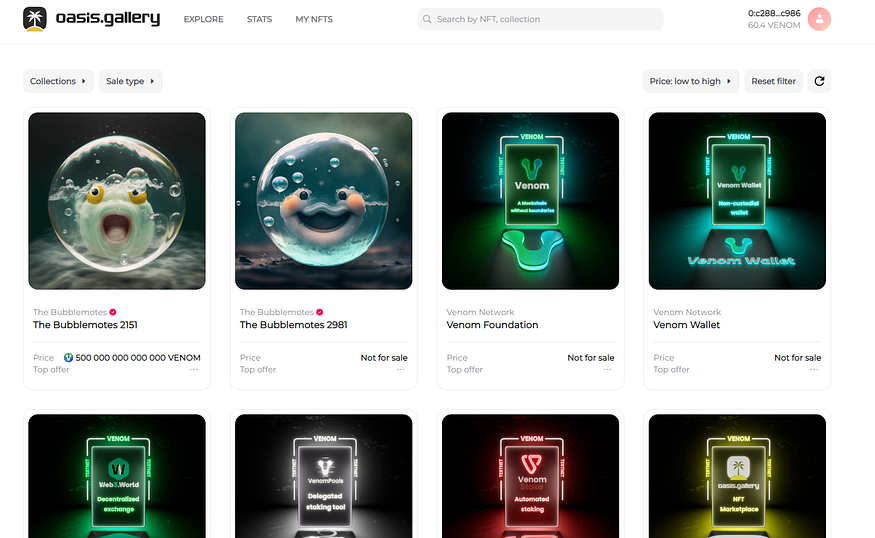 c. Select “Put on sale” & Set your desired selling price.
 d. Click “List” and confirm the transaction in your wallet. (As per example, you can list at any price.)
 4. Mint NFT
Follow these steps to mint the Oasis Gallery Testnet NFT.
a. Click on the “Mint” button displayed under the NFT.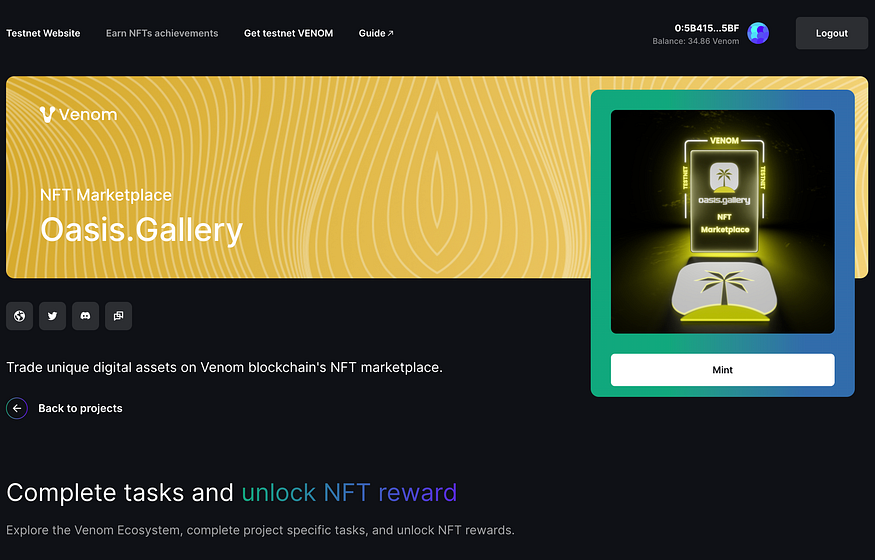 b. The Venom Wallet will appear as a pop-up. Confirm the transaction to continue.
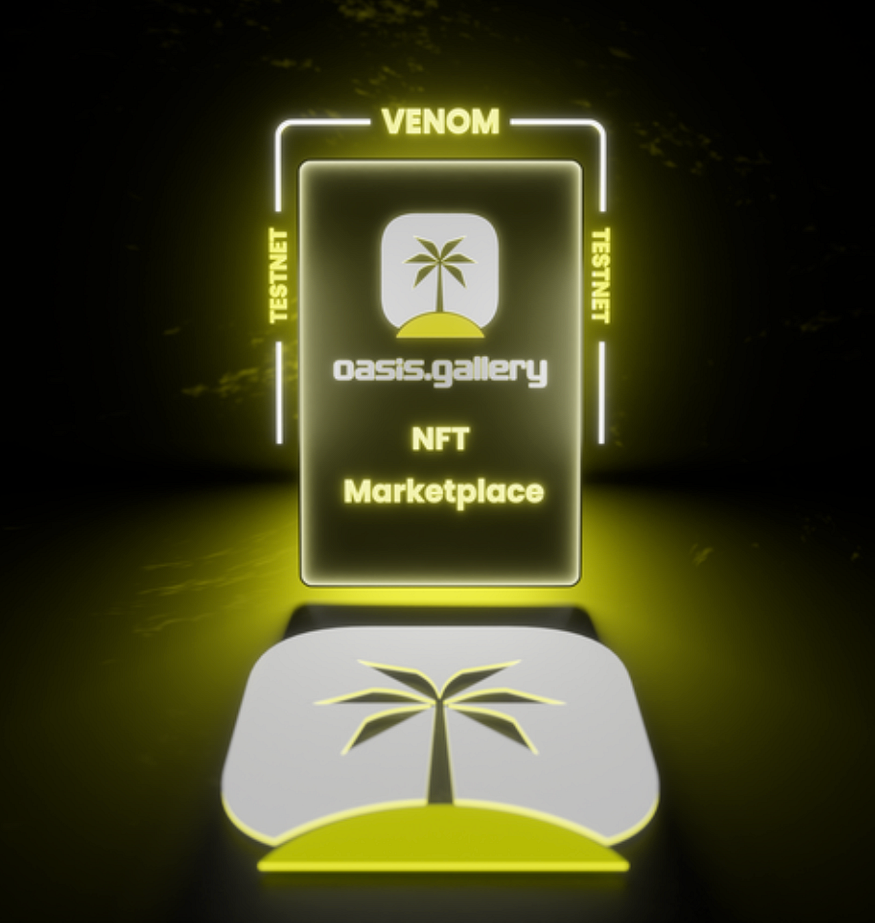
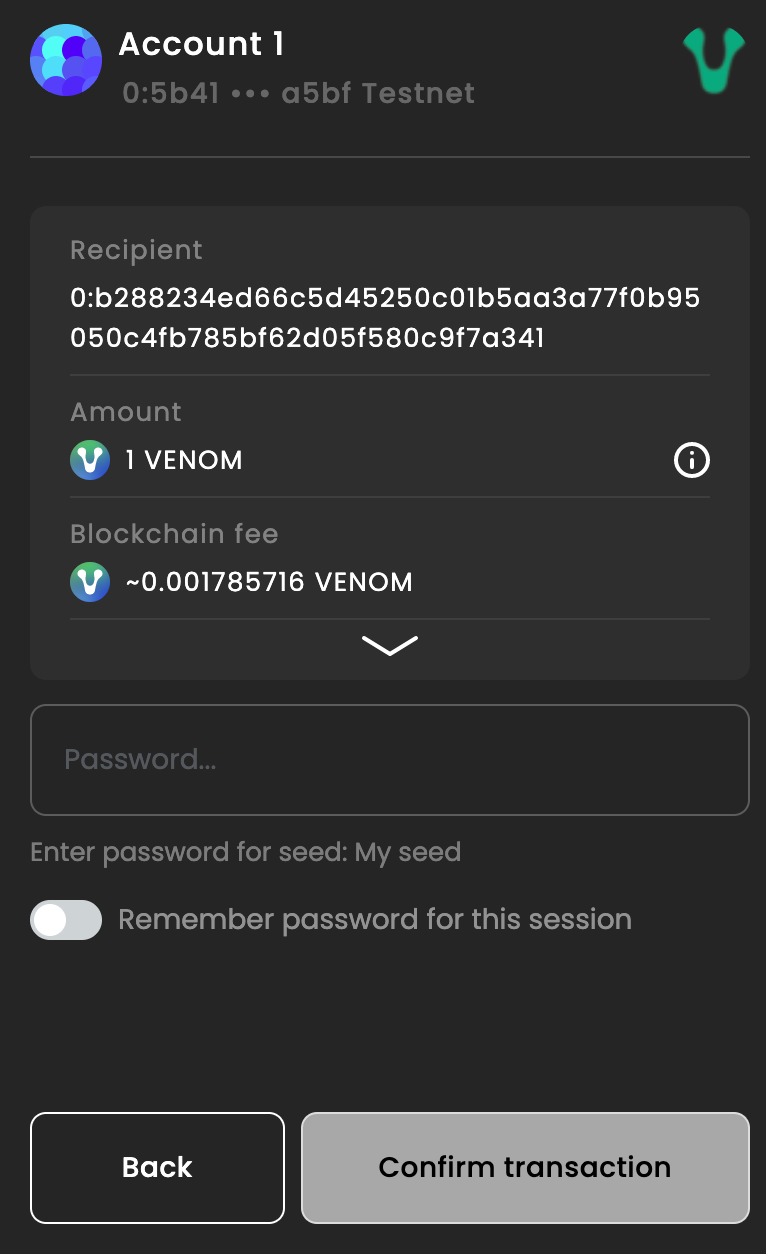 c. Once the transaction has proccessed, you will recieve a confirmation that your NFT has been minted.
VenomPad
- Follow VenomPad
Follow VenomPad on Twitter.
a. Click on the “Follow” button underneath the task b. Twitter will open a new tab where it will ask for your confirmation that you want to follow the page. Click “Follow” to continue.
 c. Close Twitter and return to the VenomPad tasks page. Click the “Check” button to verify that you are following the account.
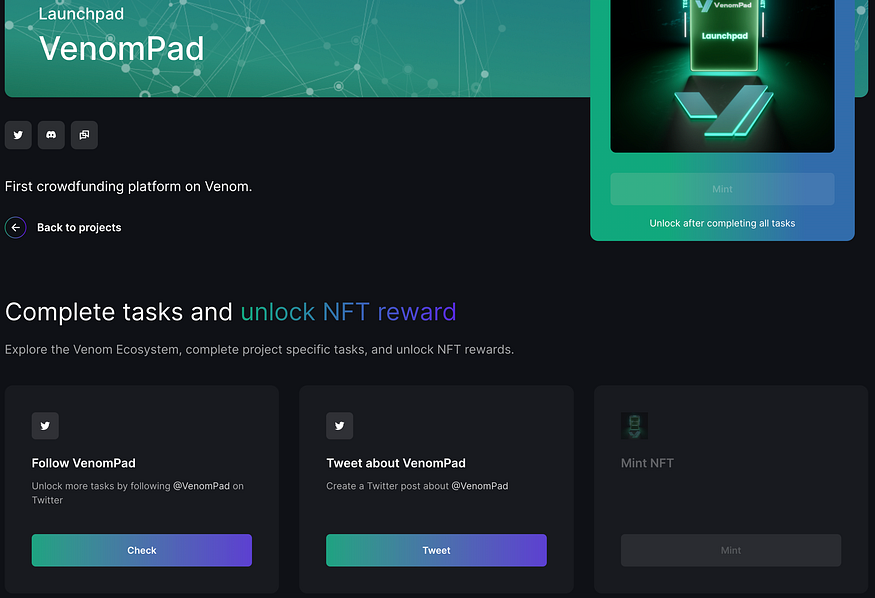 d. You will get a notification saying that the task has been complete.
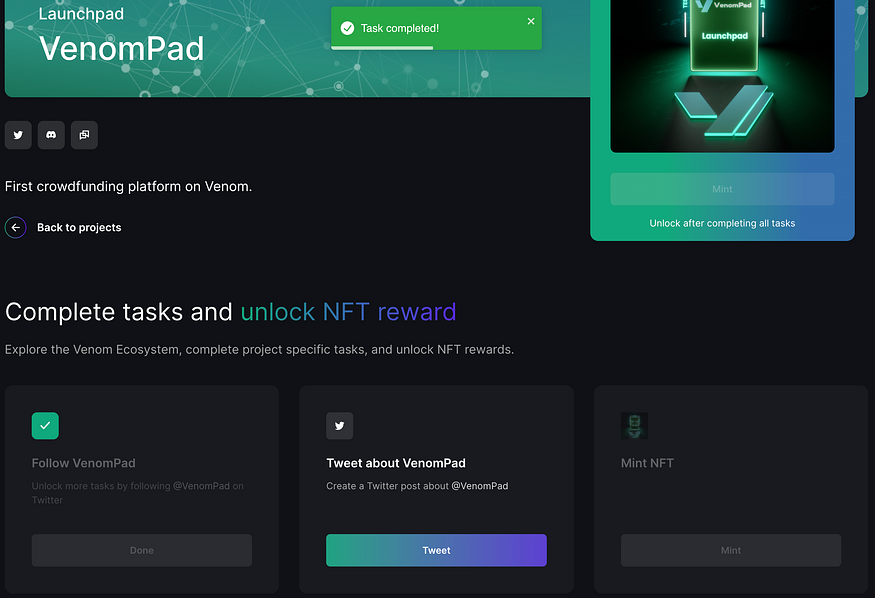 2. Tweet about VenomPad
Follow these steps to create a tweet about VenomPad.
a. Click on the “Tweet” button underneath the task.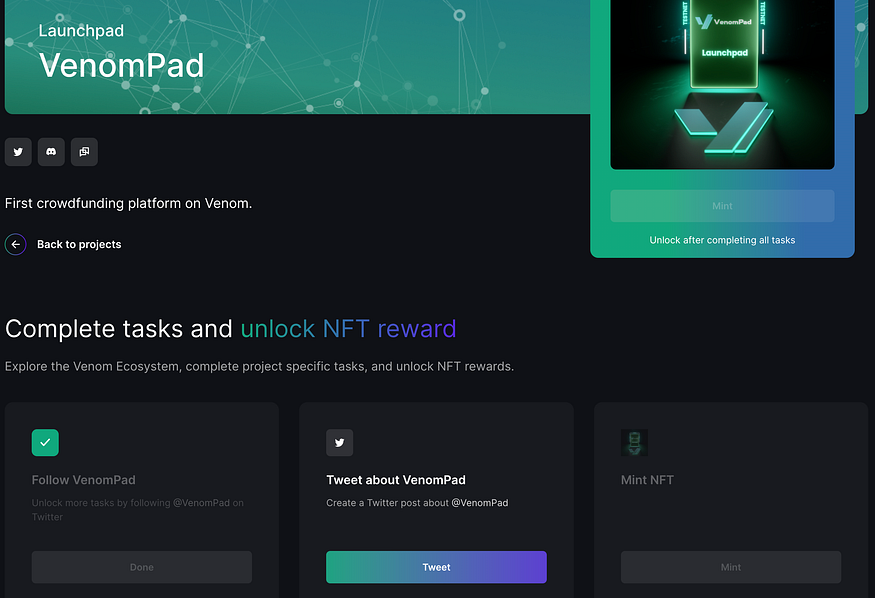 b. Twitter will open in a new tab. The Tweet has been automatically filled for you, all you need to do is click on “Tweet”.
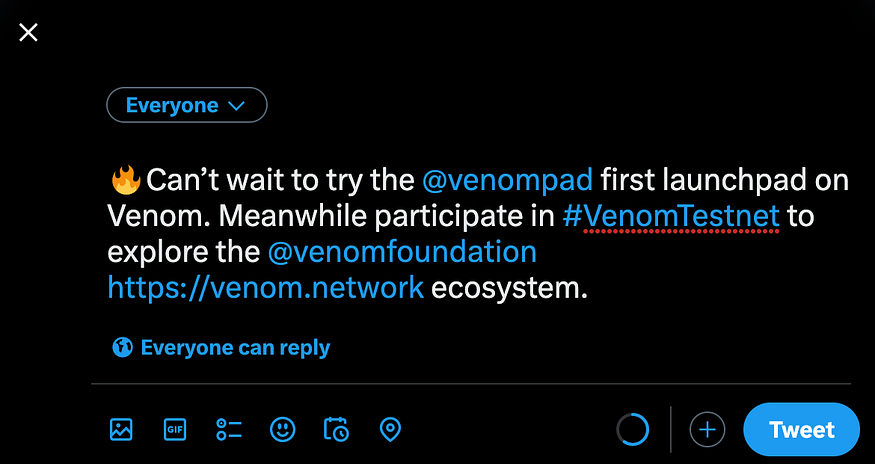 c. Once the Tweet has been published, you can close Twitter and return to the VenomPad task page, where you will need to click on the “Check” button to verify that the Tweet has gone out.
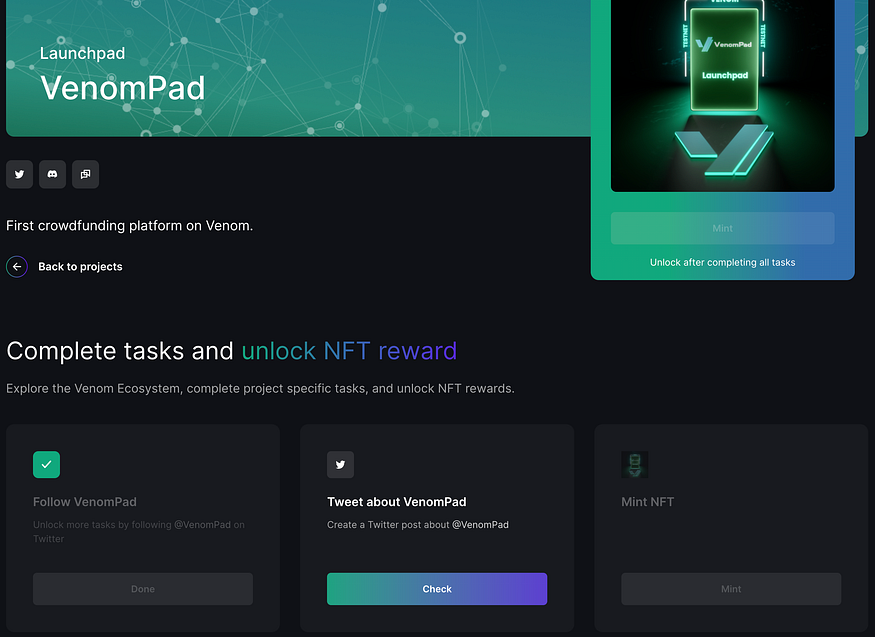 d. You will receive a confirmation that the task has been complete once all checks have concluded.
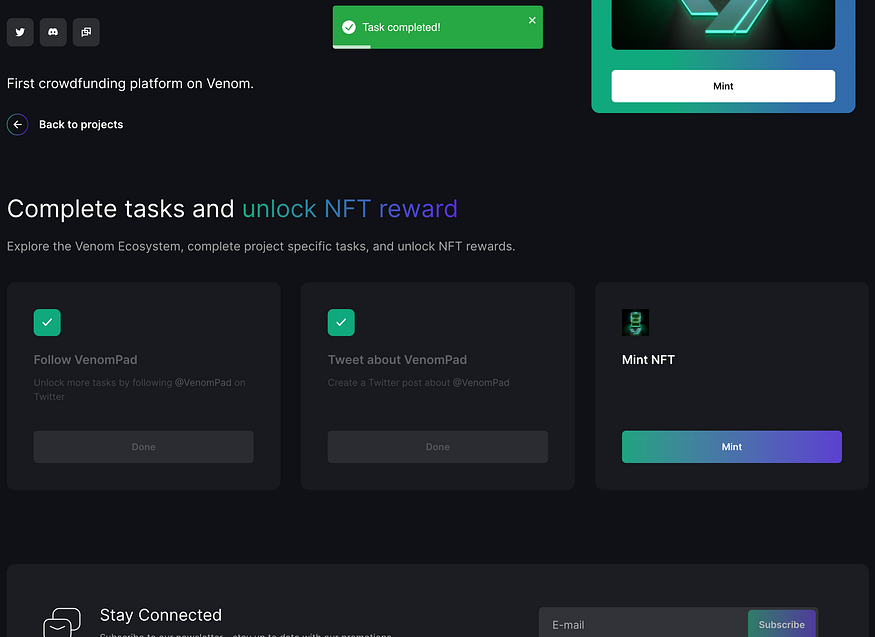 3. Mint NFT
Follow these steps to mint the VenomPad Testnet NFT
a. Click on either “Mint” buttons that are displayed.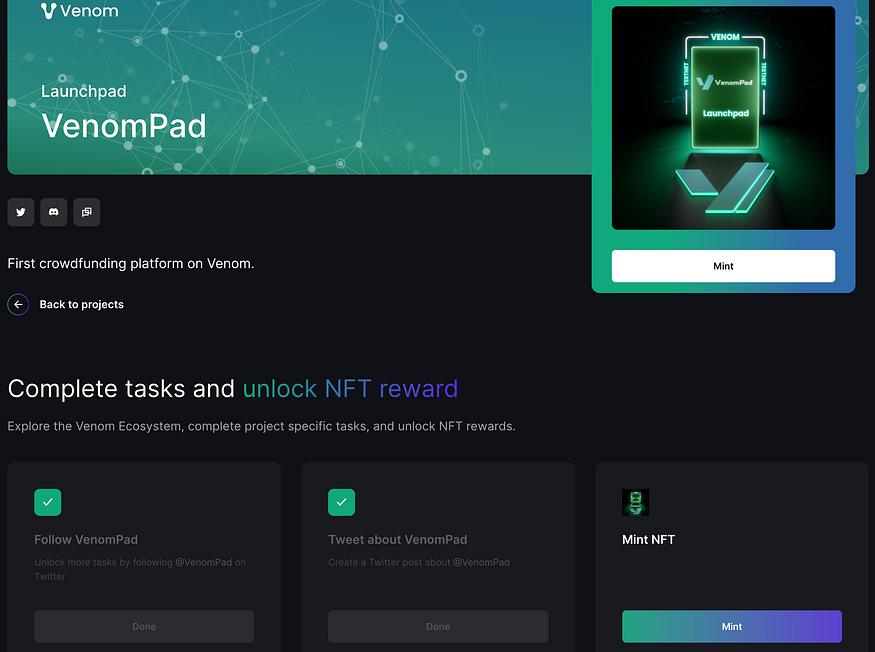 b. The Venom Wallet will appear in a pop-up window. You will need to click on “Confirm transaction” to proceed.
c. Once your transaction has been confirmed, you will receive your NFT to your wallet.
Snipa Finance
- Follow Snipa Finance on Twitter
a. Click the “Follow” button beneath the task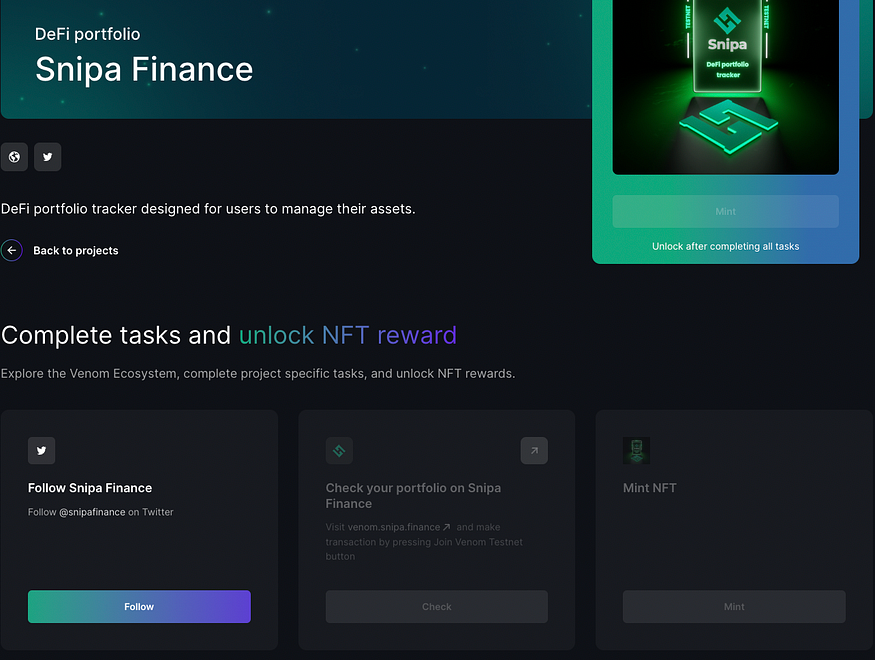 b. A new Twitter tab will open, asking for your confirmation to follow the page. Click Follow to continue.
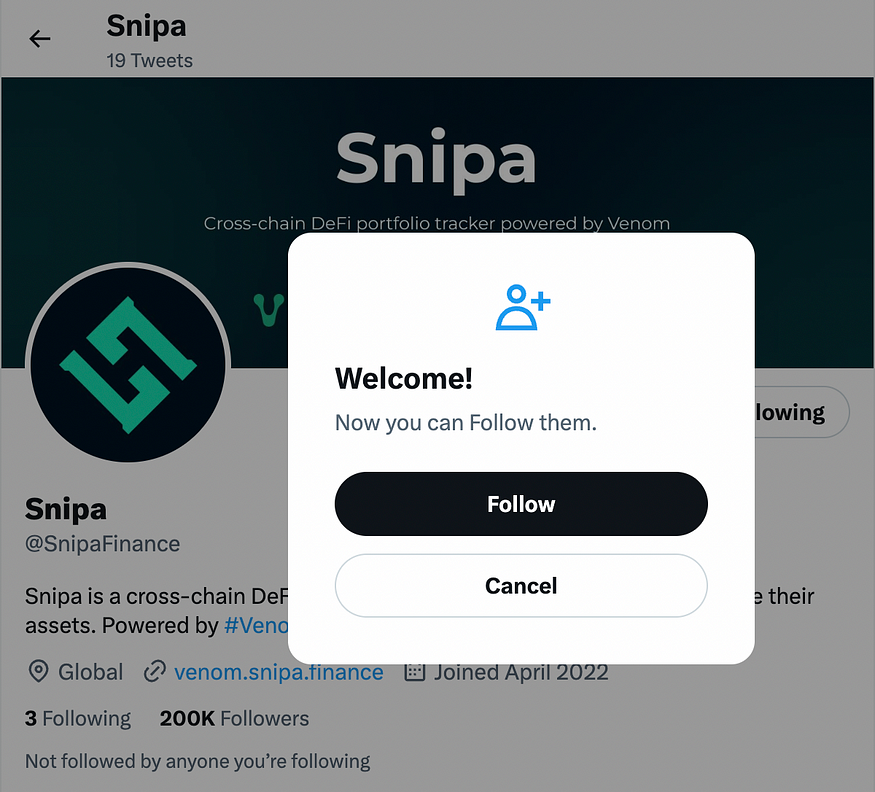 c. Return to the Snipa Finance tasks page. Click the Check button to verify that you are following the account.
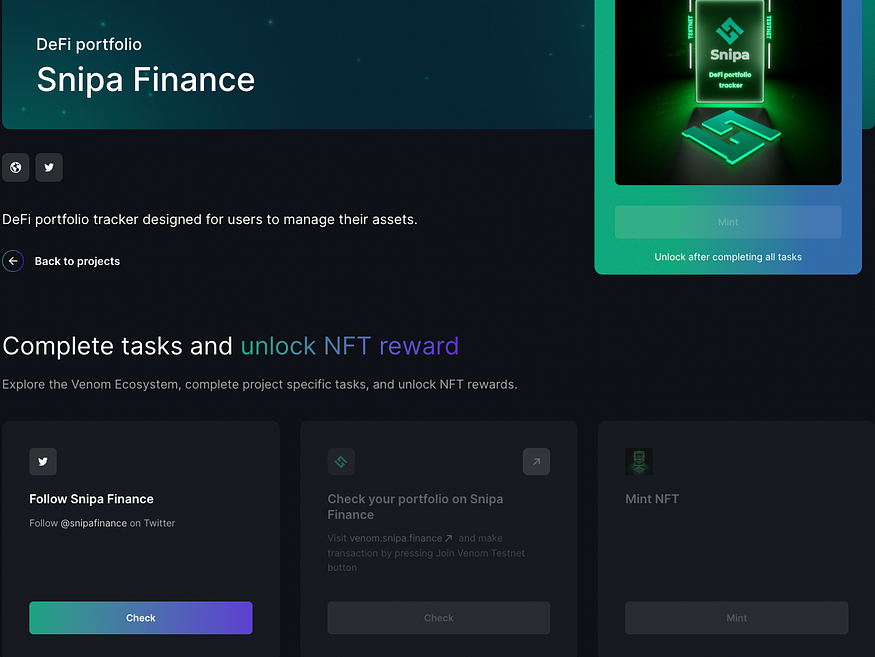 2. Check your portfolio on Snipa Finance
a. Visit the Snipa Finance website
b. Click the “Explore now with Venom Wallet” button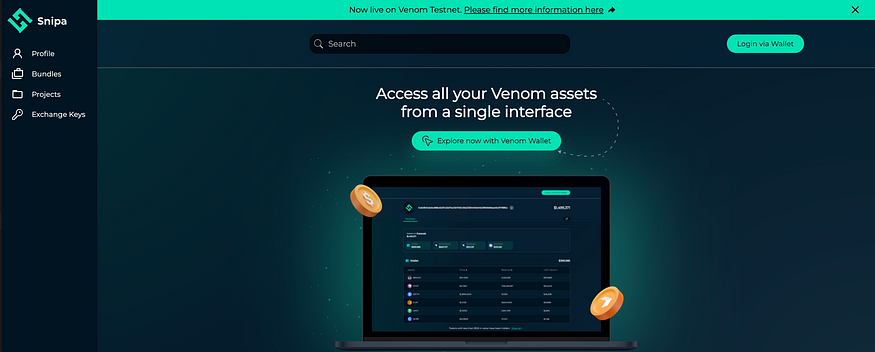 c. Select how you’d like to connect your Venom Wallet and confirm
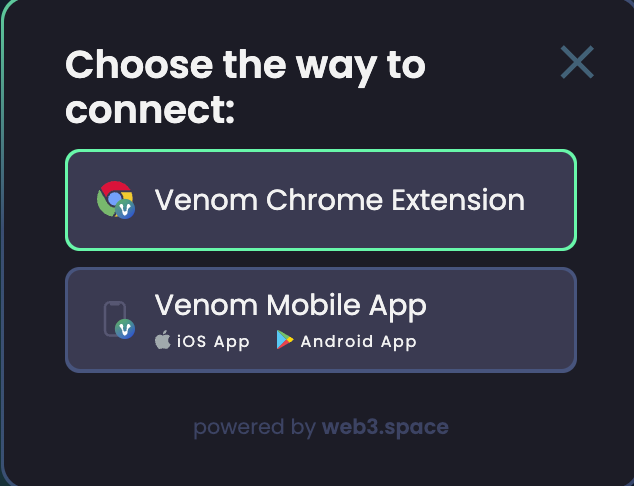 d. Return to Snipa Finance and click the “Join Venom Testnet” button
 e. A pop-up will appear. Enter your password and click “Confirm transaction”
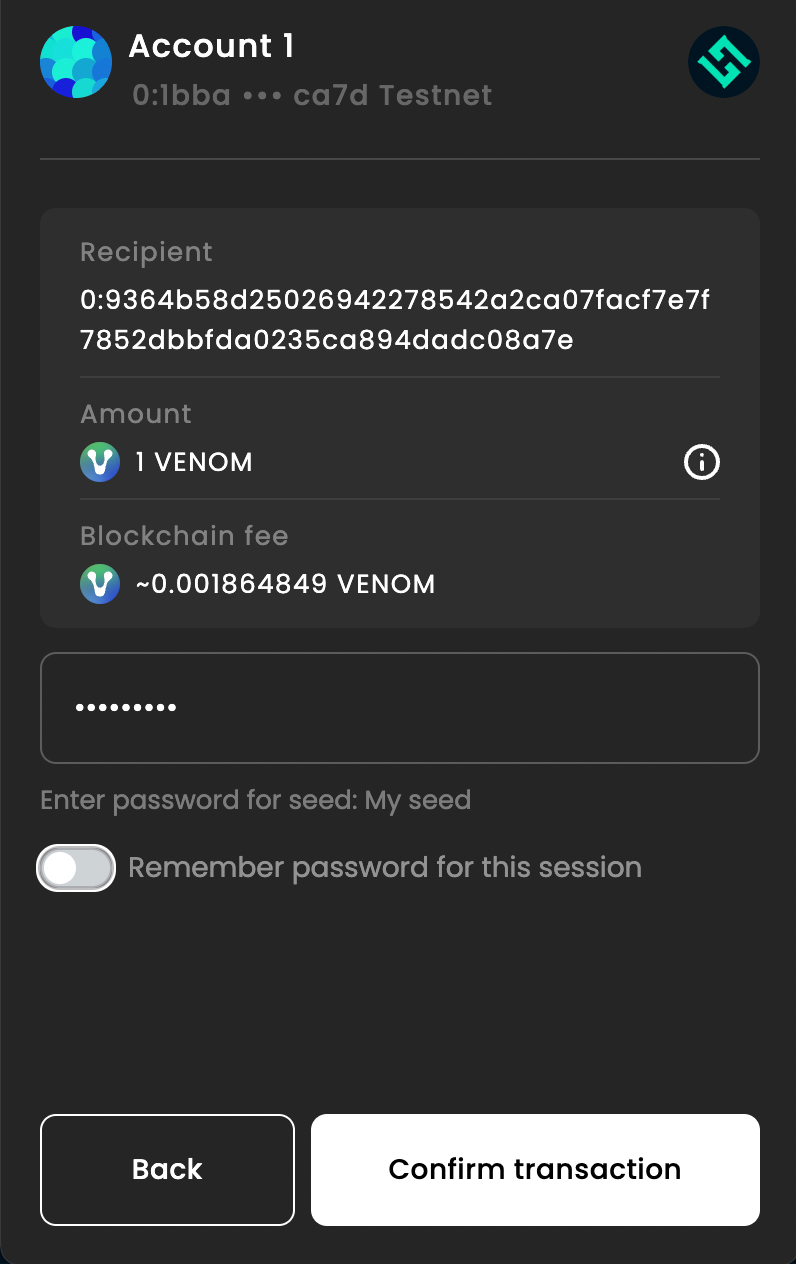 f. Return to the Snipa Finance tasks page. Click the Check button to verify that you have completed the task.
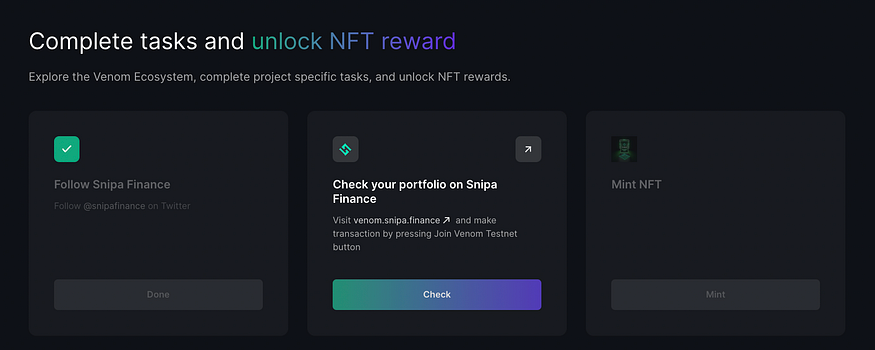 3. Mint NFT
a. Click on either “Mint” buttons that are displayed.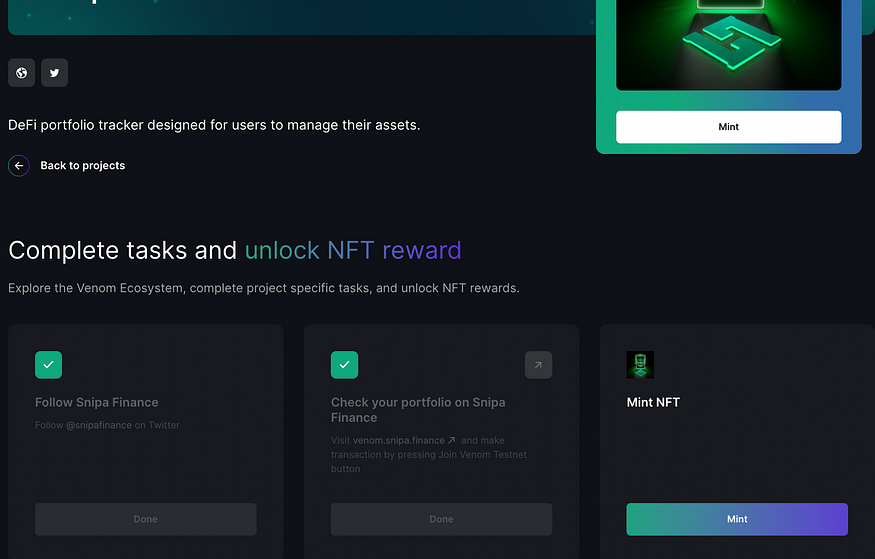 b. A Venom Wallet pop-up will appear. Click Confirm transaction to proceed.
c. Once your transaction has been confirmed, you will receive your NFT in your wallet.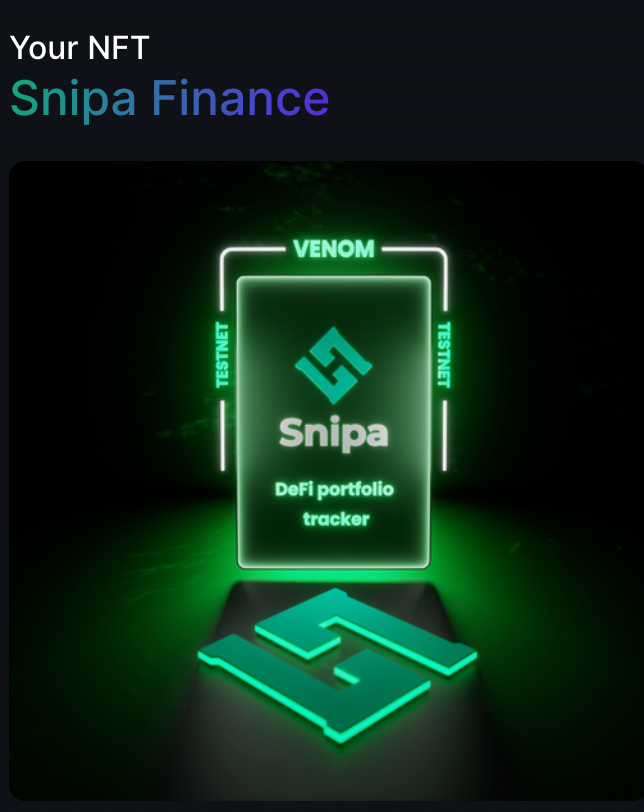
Part 4: Viewing your NFTs
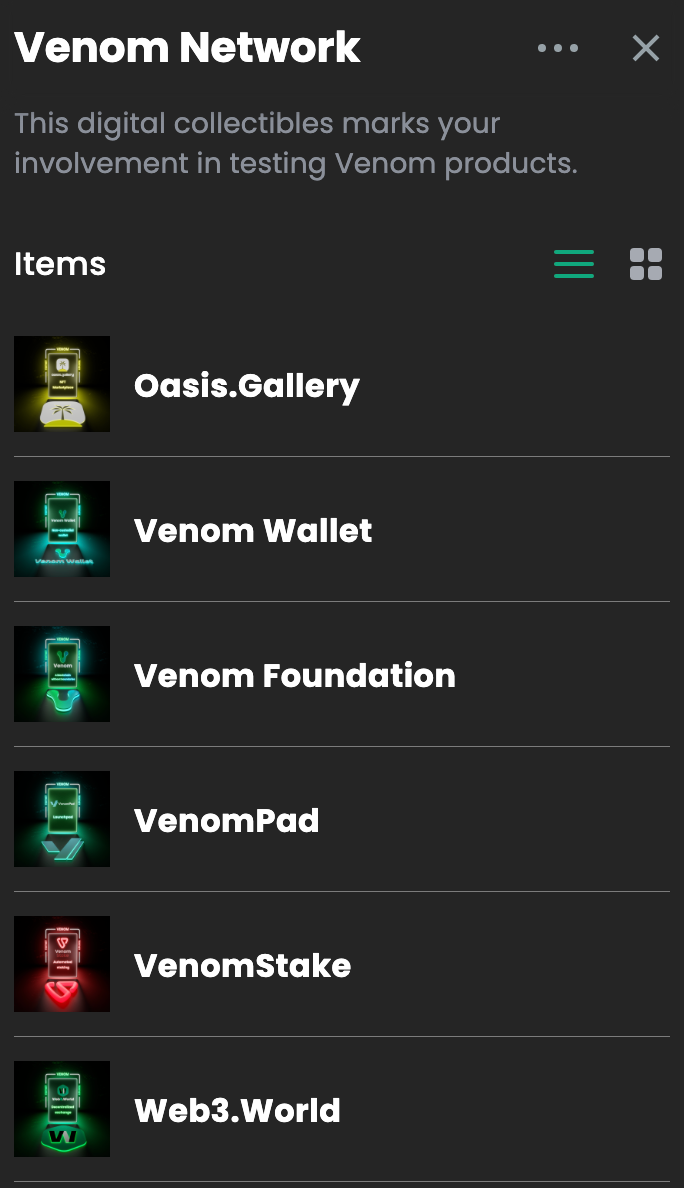
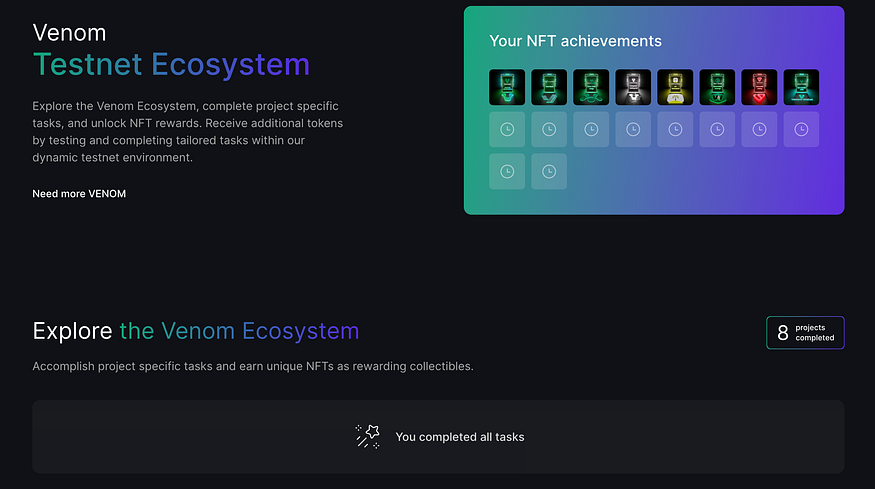 We appreciate your active involvement in the initial phase of our testnet. By completing the testnet activities, you have earned a total of 8 NFTs, representing your valuable contribution to the early days of Venom. As the testnet progresses and grows, we will introduce more tasks accompanied by additional NFT rewards for you to add to your collection. To view the NFTs you’ve collected at any point, simply follow these steps:
- Open your Venom Wallet
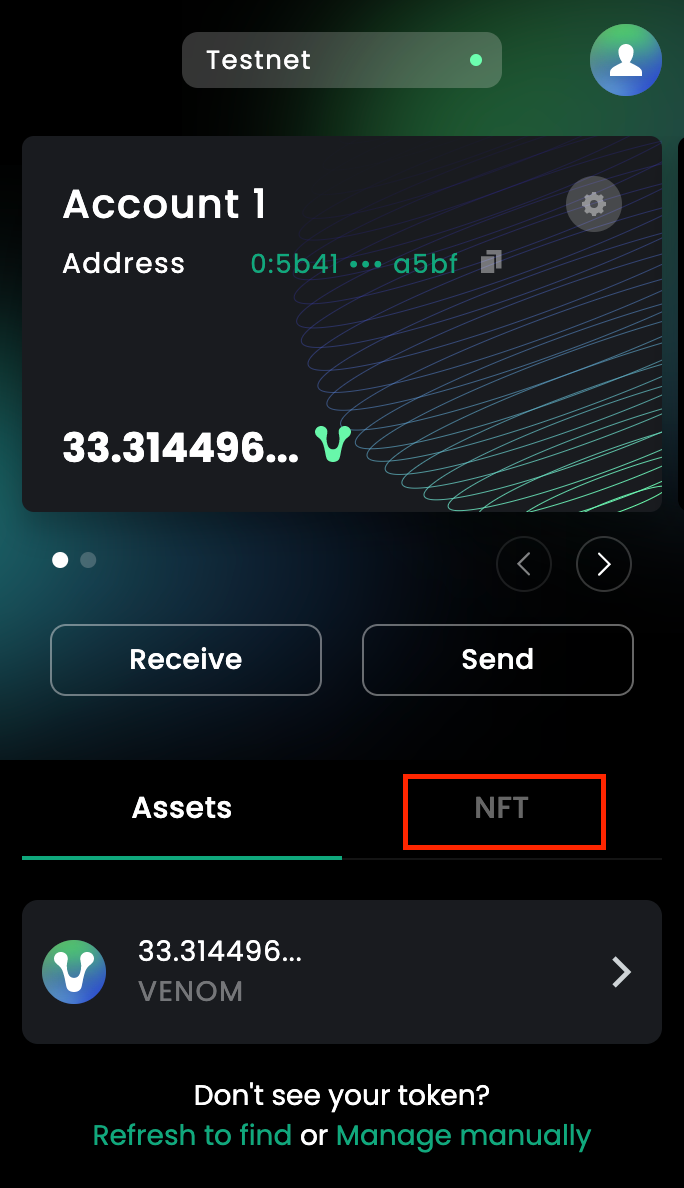
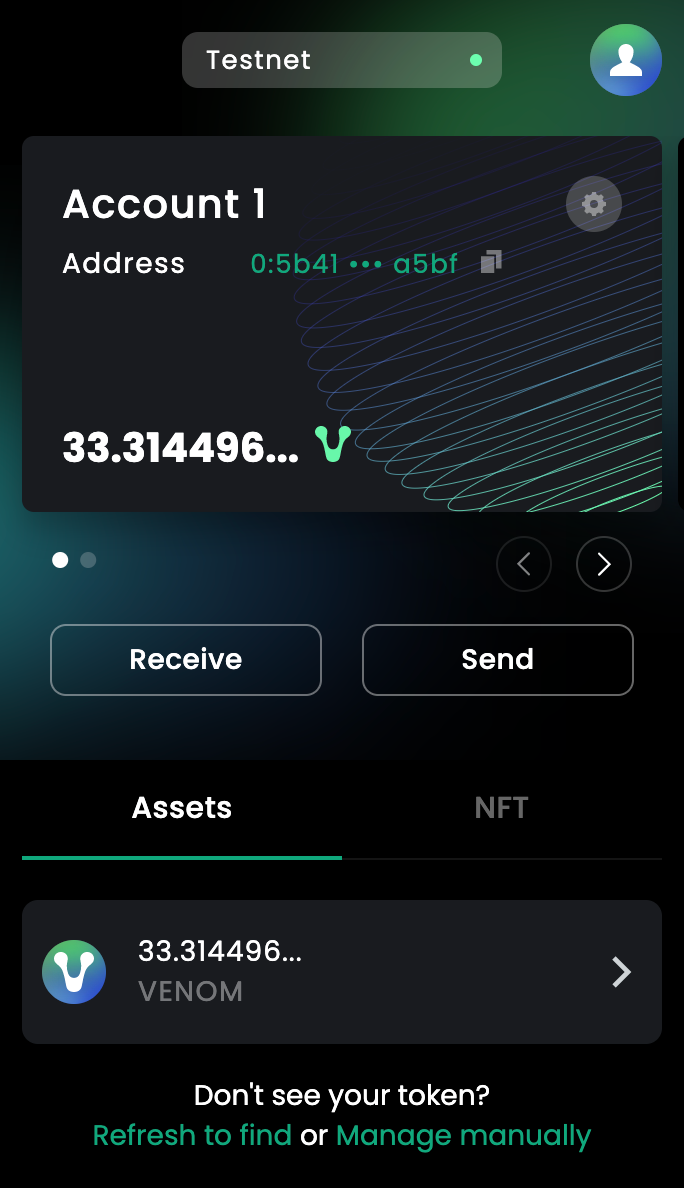 2. Click on the “NFT” tab located next to “Asset”
 3. Scroll down till you see your “Collections”. Click on “Venom Network”
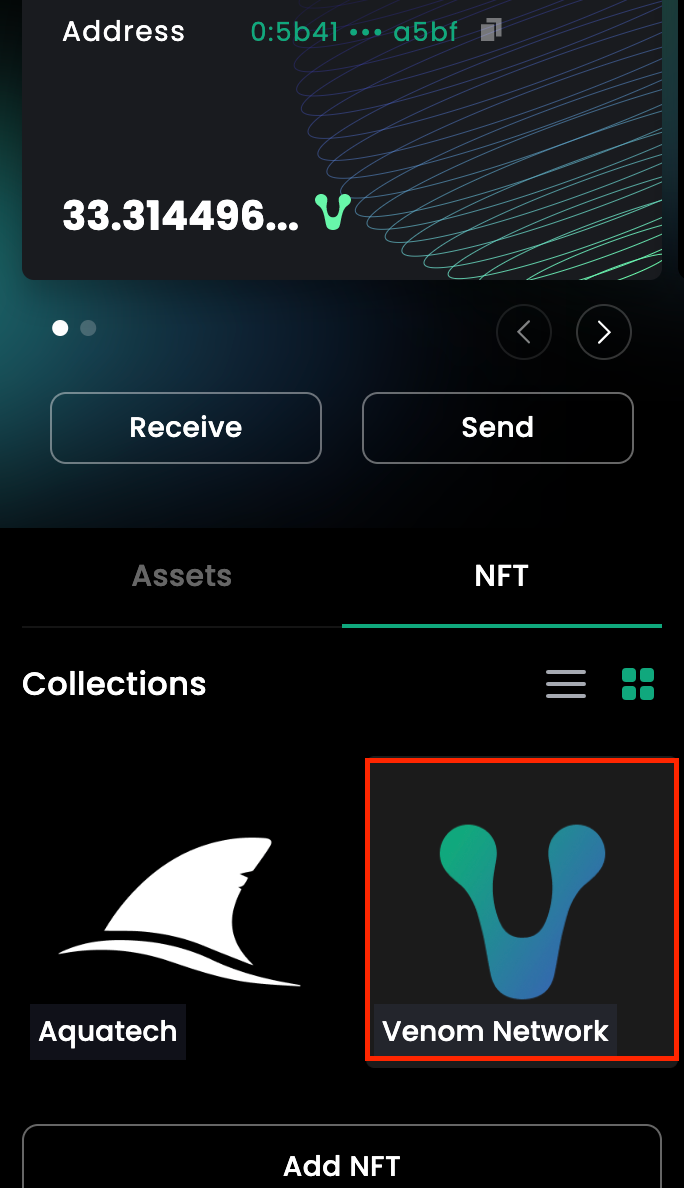 4. You can now view all of the NFTs that you have collected during the testnet.
Part 5: Claiming More Venom Testnet Tokens
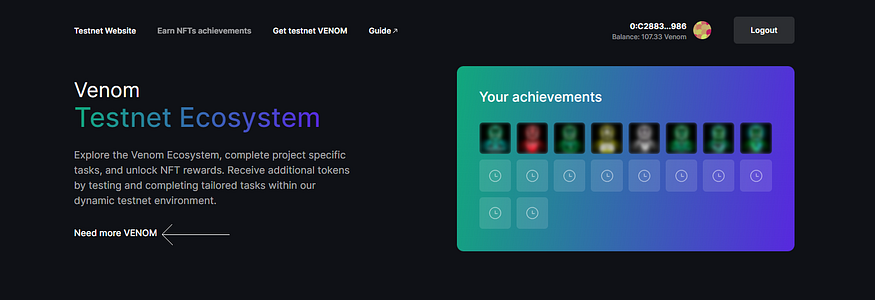
To claim more testnet tokens, should it prove necessary. Follow these steps:
- Head to Earn NFT Achievements and click Need more VENOM
 2. Complete the given tasks to claim more Testnet VENOM tokens
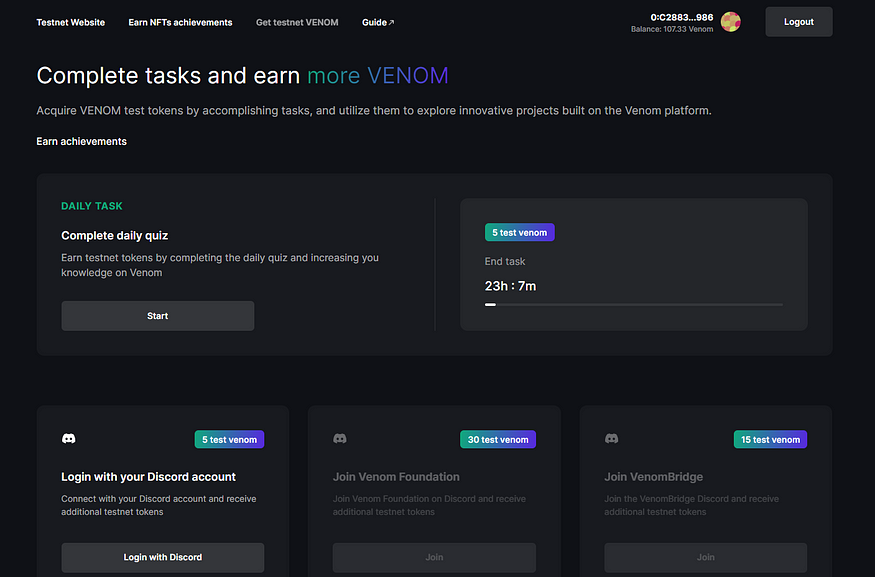 3. Keep a lookout for daily quizzes that test your knowledge about Venom blockchain and our ecosystem.
Part 6: Leaving feedback
Once you’ve explored the Venom Testnet ecosystem, make sure to leave us your feedback via our Discord. Our mission is to build a blockchain that will function as the main infrastructure for a global ecosystem of Web3 applications, and we highly value your feedback as it enables us to improve our services and achieve our mission of building a blockchain for all users.
As the testnet evolves and new dApps are added, we will continue to update this guide to ensure that it remains a comprehensive and up-to-date resource for users navigating the ever-growing Venom ecosystem.
The Venom Testnet provides a powerful platform for users to explore and interact with various dApps, NFTs, and DeFi protocols in a secure and user-friendly environment. This comprehensive guide has covered the key aspects of the Venom Testnet, from setting up and connecting your wallet to interacting with dApps, NFTs, and DeFi protocols. By following these detailed steps, you’ll be well on your way to mastering the Venom Testnet and making the most of its exciting opportunities.
Remember to stay updated with the latest developments by following the Venom Testnet on social media and joining the community on Telegram and Discord.
To find out more about Venom, check out the links below:
Website: https://venom.foundation/
Testnet: https://venom.network/
Whitepaper: https://venom.foundation/Venom_Whitepaper.pdf
Documentation: https://docs.venom.foundation/
Medium: https://medium.com/@venom.foundation
Twitter: https://twitter.com/Venom_network_


![[LIVE] Engage2Earn: McEwen boost for Rob Mitchell](https://cdn.bulbapp.io/frontend/images/c798d46f-d3b8-4a66-bf48-7e1ef50b4338/1)


![[ℕ𝕖𝕧𝕖𝕣] 𝕊𝕖𝕝𝕝 𝕐𝕠𝕦𝕣 𝔹𝕚𝕥𝕔𝕠𝕚𝕟 - And Now What.... Pray To The God Of Hopium?](https://cdn.bulbapp.io/frontend/images/79e7827b-c644-4853-b048-a9601a8a8da7/1)