Babylon Chain: Doğrulayıcı Node Kurma (bbn-test-3)

 Babylon Chain'e aşina değilseniz ve bu projeye giriş yapmak istiyorsanız veya sadece hızlı bir tazelemeye ihtiyacınız varsa, gerekli tüm ayrıntılar için önceki blog yazıma göz atmaktan çekinmeyin.
bbn-test-3 zincirinde aktif bir doğrulayıcı olmak, listedeki son doğrulayıcıdan daha fazla ubbn tokenine sahip olmanız gerektiği anlamına gelir ve bu da size ağda daha fazla oylama gücü sağlar. Bu, musluktan çok sayıda testnet tokeni talep etmeniz ve ardından bunları düğümünüze devretmeniz gerekebileceği anlamına gelir. Zirvede olmak için yeterli jeton elde etmek zorlu bir rekabettir, bu yüzden mücadeleye hazır olduğunuzdan emin olun.
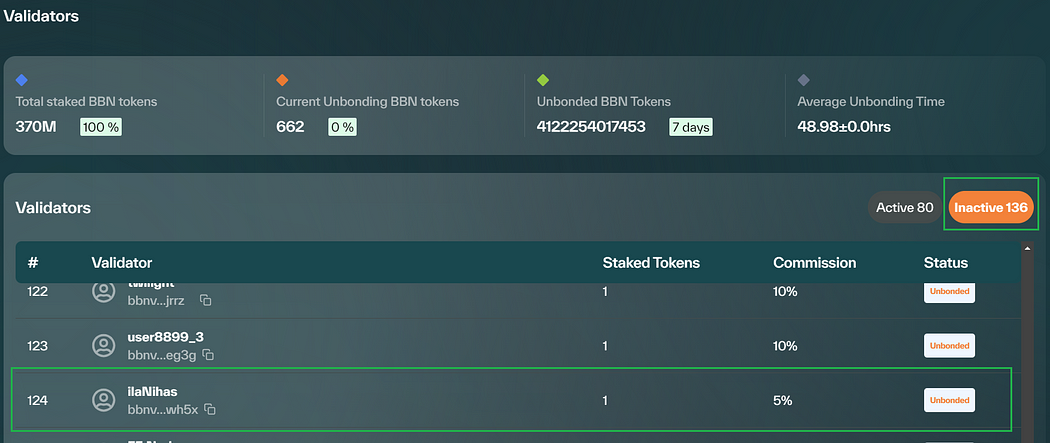
Kaç jetona ihtiyacınız olabileceğini görmek için Babylonscan web sitesine göz atın. Tokenlerin doğrulayıcılar arasında nasıl dağıldığını gösterir ve bu da aktif bir doğrulayıcı olma stratejinizi planlamanıza yardımcı olabilir.
1. Adım: VPS'nizi Sipariş Edin ve Yapılandırın
Zaten bir doğrulayıcı kurduysanız, bu kısmı atlayabilirsiniz. Aksi takdirde, devam etmek için bir VPS (Sanal Özel Sunucu) kiralamanız gerekir. VPS kullanmak, gelişmiş performans, ölçeklenebilirlik ve güvenilirlik gibi çeşitli avantajlar sunar. Daha düşük bir maliyetle VPS kiralama sürecinde size rehberlik edeceğim ve nasıl yapılandıracağınızı göstereceğim. VPS'nizi düğüm kurulumuna hazır hale getirmek için aşağıdaki adımları izleyin. VPS sağlayıcılarını araştırın: Piyasada bulunan farklı VPS sağlayıcılarını keşfetmek için biraz zaman ayırın. İhtiyaçlarınıza en uygun olanı bulmak için fiyatlandırma, itibar ve müşteri yorumları gibi faktörleri göz önünde bulundurun. Düğümünüzü desteklemek için uygun miktarda kaynak (CPU, RAM, depolama) sunan planları arayın. Contabo, uygun fiyat, güvenilir performans ve kullanıcı dostu arayüz kombinasyonu nedeniyle tercih ettiğim seçimdir.
I personally use and trust Contabo for my blockchain nodes. I’ve recently joined their affiliate program to recommend their services. If you decide to use my affiliate links for Contabo, you’ll be supporting my work at no extra cost to you. This support is important for continuing our journey together in the fascinating world of crypto, and using these affiliate links is a direct and impactful way to back my efforts. Thank you very much for your support!
Minimum hardware specifications needed for this node:
4 CPU
32 GB RAM
1 TB NVMe
While the new hardware requirements are higher now, I’ll stick with the Cloud VPS 2 package for the time being. However, considering the network’s growth, it might be wise to opt for the Cloud VPS 3 package in the long run. I will initially select a rental period of 1 month, with the flexibility to extend it later if needed:
 Make sure to choose the option “European Union (Germany)”:
 For the best storage solution, I recommend selecting the 400GB SSD storage type.
 To access Docker with Ubuntu 22.04, navigate to the “Apps & Panels” section and make the appropriate selection:
 To prioritize security, I highly recommend to generate a password and securely store it to ensure maximum protection:
 For the final step, it’s recommended to leave the sections titled “Object Storage”, “Networking”, and “Add-Ons” in their default state without any modifications. If you are new to Contabo, please create an account; otherwise, login using your existing credentials. Provide your personal data by filling in the required fields. Complete the remaining fields with your personal information, and click the “Next” button to proceed with the payment. After successfully completing the payment for your order, you will receive an initial email. Within approximately 15 minutes, you will receive a second email containing all the information needed to connect to your VPS.
Step 2: Connect To Your VPS via SSH
Download and install most recent edition of PuTTY by visiting the official website: You will find the IP adress of your VPS in the second email. Launch PuTTY, enter the IP address of your VPS and click “Open”:
 Once the server interface is open, you will be prompted to provide login details; simply enter “root” as the user and use your chosen password:
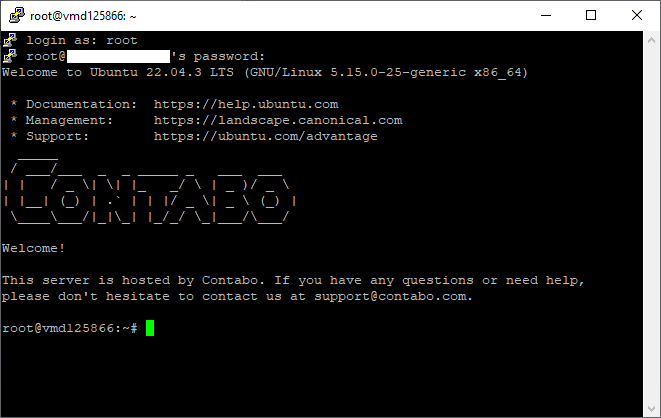
 Congratulations! You are now successfully logged into your server:
Step 3a: Preparations — Update Packages
To continue, we can update the packages by running the following commands in the terminal. The first part of the command (sudo apt update) updates the package lists for upgrades, and the second part (sudo apt upgrade -y) actually performs the upgrades with the “-y” flag allowing for automatic confirmation of prompts during the upgrade process:
sudo apt update && sudo apt upgrade -y
Step 3b: Preparations — Install Build Tools
sudo apt -qy install curl git jq lz4 build-essential
Step 4: Backup Your Keys
If you are not already running a validator node, you can move ahead to the next steps. But if you do, it’s important to back up your existing keys.
- Navigate to the Configuration Directory: Start by moving to the directory where your Babylon node’s configuration files are stored, by entering the following command in your terminal:
cd /root/.babylond/config/
2. Open and Backup Keys: You’ll find several key files here that are essential for your node’s identity and security. Open each file one at a time with nano, copy its contents, and save them securely on your local computer. Here are the commands to open each file:
# For the address book:
nano addrbook.json

# For the blockchain's initial configuration:
nano genesis.json

# For your node's unique identifier:
nano node_key.json

# For your validator's private key:
nano priv_validator_key.json
3. Move to the Data Directory: Some keys are stored in a different directory. Change to the data directory and back up your validator state, use these command:
cd /root/.babylond/data/
nano priv_validator_state.json
4. Backup Wallet Information: Finally, make sure you have a backup of your wallet information. Navigate to the key ring directory and open the wallet information file:
cd /root/.babylond/key_ring/
nano wallet.info
Step 5: Install GO
Make sure you install the latest version of GO, whether it’s a fresh installation or an update:
ver="1.22.0"
wget "https://golang.org/dl/go$ver.linux-amd64.tar.gz"
sudo rm -rf /usr/local/go
sudo tar -C /usr/local -xzf "go$ver.linux-amd64.tar.gz"
rm "go$ver.linux-amd64.tar.gz"
echo "export PATH=$PATH:/usr/local/go/bin:$HOME/go/bin" >> $HOME/.bash_profile
source $HOME/.bash_profile
Step 6: Declare Your Moniker Variable
Begin by replacing “YOUR_MONIKER_GOES_HERE” with your desired validator name. This can be either the same as your previous validator or an entirely new one.
export MONIKER=YOUR_MONIKER_GOES_HERE
Step 7: Remove Your Old Installation
Removing your old Babylon node installation is a important step to start fresh or update to the bbn-test-3 chain, especially if you’re transitioning from an earlier version. Whether you’re updating an existing installation or setting up for the first time, executing these commands will ensure a clean state without affecting your system negatively.:
sudo systemctl disable babylon
sudo rm /etc/systemd/system/babylon.service
sudo systemctl daemon-reload
rm -rf $HOME/.babylond
rm -rf babylon
sudo rm -rf $(which babylond)
Step 8: Download And Build Binaries
To get the latest version of the Babylon project and prepare it for installation, you’ll need to clone the project’s repository from GitHub and build the source code.
# Clone project repository
cd $HOME
git clone https://github.com/babylonchain/babylon.git
cd babylon
git checkout v0.8.3

# Build binaries
make build
Step 9: Preparing The Directories And Install Cosmovisor
Preparing the directories and setting up your Babylon node with Cosmovisor ensures smooth upgrades and management. Here’s how to set up the directories and move your BabylonD file correctly:
# Prepare directories
mkdir -p ~/.babylond
mkdir -p ~/.babylond/cosmovisor
mkdir -p ~/.babylond/cosmovisor/genesis
mkdir -p ~/.babylond/cosmovisor/genesis/bin
mkdir -p ~/.babylond/cosmovisor/upgrades

# Install Cosmovisor
go install cosmossdk.io/tools/cosmovisor/cmd/cosmovisor@latest

# Move BabylonD file to Cosmovisor directory
mv build/babylond $HOME/.babylond/cosmovisor/genesis/bin/
rm -rf build

# Create application symlinks
sudo ln -s $HOME/.babylond/cosmovisor/genesis $HOME/.babylond/cosmovisor/current -f
sudo ln -s $HOME/.babylond/cosmovisor/current/bin/babylond /usr/local/bin/babylond -f
Stp 10: Initialize The Node
Initializing your Babylon node involves several important steps to make sure it’s correctly configured to join the network. Here’s a step-by-step guide to properly initialize your node, obtain the necessary genesis file, configure network settings, and set up network peers and seeds. Please execute these commands one at a time in your terminal to avoid any issues:
# Initialize the node:
babylond init $MONIKER --chain-id bbn-test-3

# Get genesis file:
wget https://github.com/babylonchain/networks/raw/main/bbn-test-3/genesis.tar.bz2
tar -xjf genesis.tar.bz2 && rm genesis.tar.bz2
mv genesis.json ~/.babylond/config/genesis.json

# Add seeds
sed -i -e 's|^seeds *=.*|seeds = "49b4685f16670e784a0fe78f37cd37d56c7aff0e@3.14.89.82:26656,9cb1974618ddd541c9a4f4562b842b96ffaf1446@3.16.63.237:26656"|' $HOME/.babylond/config/config.toml

# Change network to signet:
sed -i -e "s|^\(network = \).*|\1\"signet\"|" $HOME/.babylond/config/app.toml

# Set minimum gas price:
sed -i -e "s|^minimum-gas-prices *=.*|minimum-gas-prices = \"0.00001ubbn\"|" $HOME/.babylond/config/app.toml

# Set peers:
PEERS="3774fb9996de16c2f2280cb2d938db7af88d50be@162.62.52.147:26656,b82b321380d1d949d1eed6da03696b1b2ef987ba@148.251.176.236:3000,3fb6251a235480e81c8f964ff25304b2b4e7a071@43.128.69.178:26501,c0ee3e7f140b2de189ce853cfccb9fb2d922eb66@95.217.203.226:26656,e46f38454d4fb889f5bae202350930410a23b986@65.21.205.113:26656,25abb614b96fa606fb5514fcf711635e8e861d8f@217.72.207.107:26656,670d3cc0b1b4d008db95110557190b1d51c3cc87@43.156.24.202:26501,8e4e408a2e157e7ed3fce000525ff8ba22e8f6a8@135.181.58.31:26656,c3e82156a0e2f3d5373d5c35f7879678f29eaaad@144.76.28.163:46656,82191d0763999d30e3ddf96cc366b78694d8cee1@162.19.169.211:26656,26acaa8356468376abcfbbafb92e45fcb9fb14c7@65.109.64.179:26656,bb60df4fc43fd4915e16a779611e919fda4a57cb@95.216.187.89:26656,73d0b886307757aa7e0778ca272851c1d24c2e7d@135.181.246.250:3400,35abd10cba77f9d2b9b575dfa0c7c8c329bf4da3@104.196.182.128:26656,26cb133489436035829b6920e89105046eccc841@178.63.95.125:26656,2b9433ec17f98c902ce6bf0031342f20fb6e9cf8@80.64.208.1:26656,9d840ebd61005b1b1b1794c0cf11ef253faf9a84@43.157.95.203:26656,59b484e1370f211ba74f5b8e1316a0752a55d090@65.108.75.197:26656,fd837edb83d1ad175041b9a72ae6b0f5874d1df7@3.136.250.177:26656,564af85d70a1f7227146b1840f467015f8e9af5a@141.95.110.70:26656,a1a0ec58bf2be5ba114a648f84e53e776f5e4902@3.139.218.231:26656,868730197ee267db3c772414ec1cd2085cc036d4@148.251.235.130:17656,ce1caddb401d530cc2039b219de07994fc333dcf@162.19.97.200:26656,79973384380cb9135411bd6d79c7159f51373b18@133.242.221.45:26656,94039e66a22103ce28c85852c594cacabc6decd1@37.27.54.184:27656,e2a105f8da7a3653fe8149471d84ca1e39d51e53@161.97.131.159:20656,163ba24f7ef8f1a4393d7a12f11f62da4370f494@89.117.57.201:10656,ac65cb7c09f9b0f8aaf2605a9cf9d5684cda87d9@3.129.218.47:26656,2cc3d19c8126a3cecdb95401a525d6a2832a76b8@121.78.247.252:33656,11a40047f142b07119b29262da9f7800640b0699@88.217.142.242:16456,4d992a77957f6937a275a7966ad906f9c3e2f0be@114.203.200.187:26656,09ecb5c2c5c039b35e87be56b43263d1b1552208@109.199.114.30:26656,3bd2dbed00eab2bdf777ecb012ceff403659f8ef@18.171.248.222:26656,be1ff98cfdad3b765d3ef0ebd44ead182a020d23@95.217.35.179:26656,1bdc05708ad36cd25b3696e67ac455b00d480656@37.60.243.219:26656,26240e4061426d22d5594f91f2754a28a80494bc@109.199.96.75:26656,7720914dd724043a1cd5950fad726f67e155fb15@88.198.54.190:43656,ddd6f401792e0e35f5a04789d4db7dc386efc499@135.181.182.162:26656,5afce223a3b96954d0fbbac00c22318600c7b6b9@173.249.44.69:26656,798836777efb5555cfb940129e2073b44f9117e5@141.94.143.203:55706,21d9dd05fa924cbcdaf501b92b74bf106af29c95@89.58.32.218:25000,8566da036cb96a50b011f7a04eb796748f71a71e@51.89.40.26:26656,90eac330252ff51bf461602e7b8df054ce8583ae@65.109.64.57:26656,d43f2ed7961c199dc304e3e34d03247f0aa0615e@51.158.77.69:26656,424325d33fcc86c1cfc085cf412b105348ac2fcd@65.109.85.221:2050,86e9a68f0fd82d6d711aa20cc2083c836fb8c083@222.106.187.14:56000,5b197ab8f05c0140d622b258f0734a3bb7c4128d@88.198.8.79:2050,326fee158e9e24a208e53f6703c076e1465e739d@193.34.212.39:26659,259e9bdb6aabf01f42cdd5367f69aab5996afea4@37.27.59.71:20656,5463943178cdb57a02d6d20964e4061dfcf0afb4@142.132.154.53:20656,b9aaacb74ff31b304c294bdfc7d59c616e8b811a@213.202.212.75:26656,179a498904d880587cc37d07ebd1e01ff81a02fe@3.139.215.161:26656,a25c37941e272b5ed0ea40e8f39e95c0d9c55083@178.63.105.185:26656,05ec92459362ea3969a8980ec87e64df49cf8826@65.108.236.43:21156,e3b214c693b386d118ea4fd9d56ea0600739d910@65.108.195.152:26656,f7c9542e9d9af79f37d1698839787a86f7f8aef0@37.60.234.51:26656,59df4b3832446cd0f9c369da01f2aa5fe9647248@65.109.97.139:26656,5e02bb2c9a644afae6109bf2c264d356fad27618@15.165.166.210:26656,49b15e202497c231ebe7b2a56bb46cfc60eff78c@135.181.134.151:46656,6990fd085c9e2e8c9256f144799d18df51f74022@141.94.195.144:26656,118d4b1b0f58d9c038fafc18085808a593539e7a@78.46.71.227:26656,6359d70612b9abf7d4d458dc1938ec06f2a21652@129.226.152.250:26501,b4215706647068b234d8b72da1736b0e460e5cf1@65.21.228.25:26656,e27df9014fd0d37d917fb33f2d9de7500a8fab70@35.91.9.184:26656,5145171795b9929c41374ce02feef8d11228c33b@160.202.128.199:55706,1eb7b2585cf32255abc0371cd07624cba0706e29@103.35.191.186:26656,2abdfe743b995a8d86fa32f8a38127f1e36a628d@207.180.204.34:26656,4e893ae5671ac29b90229ec69528f731b5e359bb@36.153.240.230:26656,197d15d24b7f83bff06ef6e8ecc6120c5a14a556@37.60.227.81:26656,5b124ed79f5f0c02ffca4bfb8a73469265f46de1@3.132.112.231:26656,f887f4a18019563bcf3fc23079eb68b86931a766@37.60.226.84:16456,f0043c64dff1f95d356107b9f31ace39b4154990@38.242.253.112:26656,bcc5bd089b30bc8c96095a5cd4a8cd45e8c197a0@112.213.190.1:26656,bdd106eaa1b0ecb5ea13e03344147f34d1f457a1@65.108.43.51:26656,89a4dbf6593caa6d337cf02b049cab245ceb6ede@128.140.73.180:26656,7138083f9a513a33d3fd4d477d28436ff368367a@84.247.133.117:26656,0c9f976c92bcffeab19944b83b056d06ea44e124@5.78.110.19:26656,8f618f4f40d1c27e27b760ca10246b8b113e94be@18.222.121.72:26656,10b483d706782dd53834eca77562e081e52b16dd@3.137.160.91:26656,b1783b0d95ffeeac6c81be47ff8552bbc27bc054@18.191.27.217:26656,6460741d8b2701f6d733e0c5a9a52a9d5a924c9f@217.76.63.213:26656,94a6b8d058bc3db464ab8ec0b824cd40c09a2385@3.131.193.119:26656,9f7fd2aebea04d099eb9a60c8483a5b88a5b1db6@161.97.123.142:26656,d9b3f259aa6271351485e75c1adfc949a6c8919d@38.242.253.115:26656,73c9f1a0eba78497adadfd3a23b6391219eae29d@43.128.123.8:26501,d06147e71166c7e5fdf97378aa32ba5ef2a2be2f@43.134.176.53:26501,dbceef939143cdbf7131d9a185314c4849c81a98@202.61.199.52:26656,395af7ddf487e3adb1600adfdf276e9410d2bc39@36.189.234.219:26656,fad3a0485745a49a6f95a9d61cda0615dcc6beff@89.58.62.213:26501,f90d6a73190698aaec5554839229cad20693e04a@37.27.14.222:26656,9e36d595b69c75f94771d9dee791f822578e14da@173.212.244.215:26656,be95de5f28496fe8b7e93ce5ccbeec9db271520b@162.19.95.240:14656,e8f550ed3fea54eda7fa3f8ed3d6b17cb222fedf@95.111.239.100:26656,36123e2b3e3612c6a4abf6c81b71546168f7688d@109.199.114.26:26656,6c14e076d92f715b0a1f7b03b09af8c28f0d9469@65.108.153.90:26656,a31b620c076899133e44d195eae0d6308283230d@57.128.19.189:26656,4dbf5157b735de59fb84be26f2bd40a16cee056c@54.238.212.246:26656,1ecc4a9d703ad52d16bf30a592597c948c115176@165.154.244.14:26656,6e96d1fa4ff9cc573b3c41c3f722aa9b373d886e@154.91.1.78:26656,b5bbe6054b46055242aa72e71614c5b14527dce3@150.109.95.158:26501,37d27ecded8181952f99648628ff2c8d85286432@62.195.206.235:26656,ac0b5e230dfdc573f74642c48898e1398a1e5050@65.108.78.101:26656,0ccb869ba63cf7730017c357189d01b20e4eb277@185.84.224.125:20656,86eecc48c181a2e508852f6f3a170b99a09cae87@74.208.197.25:26656,e9913c53da2a7a1432ee65e17f8b90b072ff3ee6@109.199.113.189:26656,1a0b3386617587ad7e678e0ea522c79f1fe4113a@65.109.88.254:38656,07d1b69e4dc56d46dabe8f5eb277fcde0c6c9d1e@23.88.5.169:17656,fb5ea45358d13679518f43d995f42442a79b161f@185.246.87.105:56656,b80b2fb6002557b468add907074d0bf2ef4f911e@158.220.84.179:29656,ef83feb0f03af81e65a9fa511f7a99401308a99a@43.156.182.164:26501,3deaff1478542cf7f28123ad33be50d4bc08b728@2.56.97.152:26656,40662747f0e01678dbdf1e50879f40a68139d7aa@35.163.58.204:26656,b08f08b8f10103ce97f3b5cbd274795687ce4866@164.68.96.90:26656,68de398f1d36546c002086b91f6018ed5c6105f2@5.189.136.136:26656,34807baef8c02bc202fb14035f7d375a6a5ff30e@95.217.193.182:21656,69c1b7e1eb114703733c3000baa6c008ebc70073@65.109.113.233:20656"
sed -i 's|^persistent_peers *=.*|persistent_peers = "'$PEERS'"|' $HOME/.babylond/config/config.toml
Big thanks to Polkachu for providing a list with 115 peers!
Part 11: Create The Corresponding Service
Creating a systemd service for your Babylon node ensures it can run as a background service, automatically start on boot, and restart in case of failure. Here’s how to set up the service correctly:
sudo tee /etc/systemd/system/babylond.service > /dev/null <<EOF
[Unit]
Description=Babylon daemon
After=network-online.target

[Service]
User=$USER
ExecStart=$(which cosmovisor) run start --x-crisis-skip-assert-invariants
Restart=always
RestartSec=3
LimitNOFILE=infinity

Environment="DAEMON_NAME=babylond"
Environment="DAEMON_HOME=${HOME}/.babylond"
Environment="DAEMON_RESTART_AFTER_UPGRADE=true"
Environment="DAEMON_ALLOW_DOWNLOAD_BINARIES=false"

[Install]
WantedBy=multi-user.target
EOF
To finalize the setup and ensure your Babylon node service is active and set to start automatically on your system’s boot, follow these steps:
sudo -S systemctl daemon-reload
sudo -S systemctl enable babylond
sudo -S systemctl start babylond
Part 12: Check The Logs
Check the Service Status: Use this command to see if the service is active and running without errors. This will provide information about the service’s status, including whether it’s active, loaded, and running.babylond
systemctl status babylond
View the Logs: To monitor the service's logs in real-time and check for any errors or important messages, run:babylond
sudo journalctl -u babylond.service -f --no-hostname -o cat
If you encounter errors like “ERR Stopping peer for error err=EOF,” it’s generally safe to ignore them initially. Over time, your node’s address book will adjust, connecting only to reliable peers.
Check the Sync Status: To verify if your node has completed syncing with the blockchain, use:
babylond status | jq
When is , your node is fully synced and ready for the next steps. This indicates that your Babylon node is up-to-date with the latest blockchain state and can participate in the network. The output will look like this:catching_upfalse To verify your Babylon node’s synchronization with the network, check its and compare this value to the latest block height listed on the Babylonscan website. A close or matching block height indicates your node is fully synced and up-to-date with the network.
latest_block_height
Part 13: Create Or Import Your Wallet
If you’ve previously participated in bbn-test-2, you can import the mnemonic phrase to link the staker’s wallet account. Use the command with the option to import your wallet using the mnemonic phrase. Replace with your old wallet name, which is probably named “wallet”:babylond keys add--recover<your_old_Wallet_name>
babylond keys add "<your_old_wallet_name" --recover
The output will look like this. Also, make sure to enter a keyring passphrase of your choice: If this is your first time running any testnets, you’ll need to create a new wallet by executing:
babylond keys add wallet
Make sure to securely save your seed phrase provided during the wallet creation process, as it’s important for recovering your wallet in the future.
Part 14: Obtain Funds from the Babylon Testnet Faucet
To receive funds, visit the #faucet channel on the official Babylon Discord server. Here, you can request funds by sharing the address you previously created. Please note, in order to access the #faucet channel, you first need to visit the “get-a-role” channel and react with the “Computer” emoji. This action will grant you the necessary permissions to view the #faucet channel. Once in the channel, submit your request by typing followed by your address. For instance, you would type this to request funds for that specific address:!faucet!faucet bbn16yzx3zfucs6fxu4hw3ack6ht4hgsp9wqrly2c9
You can check your wallet balance using this command:
babylond q bank balances $(babylond keys show wallet -a)
Ensure that you have successfully received 1,100,000 ubbn. Please be aware that you can only claim 1 BBN from the faucet every 24 hours.
Part 15: Generate a BLS Key Pair
As a validator, you are required to provide a BLS signature at the conclusion of each epoch. For this purpose, it’s essential to possess a BLS key pair, which will be used for signing information. This should be done using the address that was established in the preceding step.
babylond create-bls-key $(babylond keys show wallet -a)
Executing this command will generate a BLS key, which will then be stored in the file. This file also contains the private key used by the validator for block signing. It's crucial to secure this file adequately to maintain the integrity and security of your validator operations. After creating a BLS key, you need to restart your node to load this key into memory. Restart your BabylonD service after this step:$HOME/.babylond/config/priv_validator_key.json
sudo systemctl stop babylond
sudo systemctl start babylond
Part 16: Create the Validator
For the bbn-test-3 phase, creating a file with your validator details is a new requirement. Here's how to create and populate this file, and then use it to set up your validator. Make sure to replace placeholders with your actual information. Execute the following command. This will create a file in your home directory with your validator details:validator.jsonvalidator.json
sudo tee ~/validator.json > /dev/null <<EOF
{
  "pubkey": $(babylond tendermint show-validator),
  "amount": "1000000ubbn",
  "moniker": "your_moniker",
  "website": "https://yourwebsite.com",
  "security": "contact@gmail.com",
  "details": "description of your validator",
  "commission-rate": "0.10",
  "commission-max-rate": "0.20",
  "commission-max-change-rate": "0.01",
  "min-self-delegation": "1"
}
EOF
Ensure you replace , , , and with your actual moniker, website, email address, and validator description. With the file ready, use the following command to create your validator on the blockchain. This command references the JSON file for validator details and executes the transaction to register your validator on the bbn-test-3 network:your_monikerhttps://yourwebsite.comcontact@gmail.com"description of your validator"validator.json
babylond tx checkpointing create-validator ~/validator.json \
    --chain-id="bbn-test-3" \
    --gas="auto" \
    --gas-adjustment="1.5" \
    --gas-prices="0.025ubbn" \
    --from=wallet
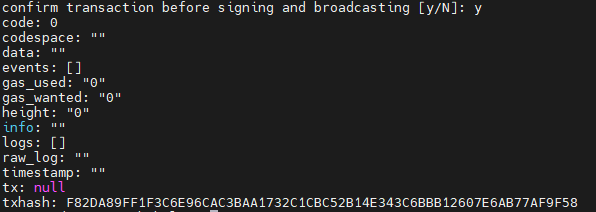
After executing the command to create your validator, the terminal will display a transaction. Make sure there are no error messages. On the Babylon chain, becoming a validator is tied to the epoch cycle, with each epoch up to 1–2 hours on the testnet. To view your validator’s address, use:
babylond keys show wallet -a --bech val
To query your validator’s status information, run:
babylond query staking validator wallet
If your validator has been successfully created, the output from these commands will confirm its active status and provide relevant details such as your validator’s address and status information. Ayrıca, doğrulayıcınızın Babylonscan blok zinciri gezginindeki varlığını ve durumunu, web sitelerine giderek ve takma adınızı arayarak doğrulayabilir ve görüntüleyebilirsiniz:
 Belirteçleri düğümünüze devretmek için aşağıdaki komutu kullanın:
babylond tx epoching delegate $(babylond keys show wallet --bech val -a) 1000000ubbn


![[ℕ𝕖𝕧𝕖𝕣] 𝕊𝕖𝕝𝕝 𝕐𝕠𝕦𝕣 𝔹𝕚𝕥𝕔𝕠𝕚𝕟 - Did This Poor Baby Make A Profit On The BTC He Sold?](https://cdn.bulbapp.io/frontend/images/255151e6-9e83-4151-9644-80af06e53b74/1)


